Have you ever wanted to change your shower faucet but didn’t know how? Many people feel stuck when it comes to home repairs. But installing a shower faucet can be easier than you think!
Imagine stepping into your shower and enjoying the perfect water flow. Sounds great, right? A new faucet can make your shower feel fresh and new. Plus, it’s a fun weekend project!
In this article, we will show you how to install a shower faucet step by step. Even if you have never done this before, you can follow along with ease. You’ll be surprised at how quickly you can learn. So grab your tools, and let’s dive into this DIY adventure!
How To Install A Shower Faucet: Step-By-Step Guide

How to Install a Shower Faucet
Installing a shower faucet might seem tough, but it can be done easily with the right steps. First, gather your tools and shut off the water supply. Next, remove the old faucet and make sure to clean the area well. Then, follow the instructions to attach the new faucet securely. Don’t forget to check for leaks after installation. Did you know many people save money by doing this themselves? Getting hands-on can be quite rewarding!Tools and Materials Needed
List of essential tools (wrench, screwdriver, plumber’s tape, etc.). Details on materials (type of faucet, mounting hardware, etc.).Before diving into your shower faucet journey, gather these tools. You’ll need a wrench to loosen the stubborn nuts, a screwdriver to drive screws to their happy place, and plumber’s tape to avoid leaks that could turn your bathroom into a water park.
| Essential Tools | Materials |
|---|---|
| Wrench | Faucet |
| Screwdriver | Mounting hardware |
| Plumber’s tape | Washers and seals |
Make sure you also pick a faucet that fits your shower like a glove. Trust me, a mismatched faucet is like wearing socks with sandals—nobody wants that!
Preparing the Installation Area
How to shut off the water supply. Steps to remove the existing faucet or cover.Before you start, make sure to shut off the water supply. Look for the valve in your bathroom or basement. Turn it clockwise until it’s tight. This stops the water flow. Next, it’s time to remove the old faucet. Use a wrench to loosen the nuts beneath it. Pull the faucet off carefully. If there is a cover plate, remove that too. Clean the area to make everything ready for the new faucet.
How do I shut off the water supply?
To shut off the water supply, turn the valve clockwise until it stops. This will stop water from flowing while you work.
Steps to remove the existing faucet:
- Loosen nuts under the faucet with a wrench.
- Carefully pull the faucet off.
- If needed, remove the cover plate.
- Clean the area for the new faucet.
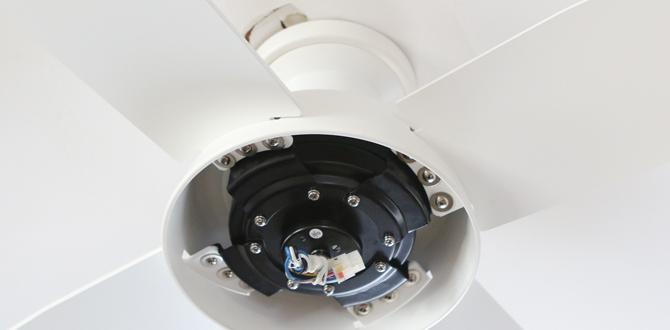
Understanding Shower Faucet Components
Description of the main parts of a shower faucet. Explanation of different types of shower faucets (single handle, dual handle, thermostatic).Shower faucets are simple yet clever devices. They have a few main parts: the handle, the spout, and the cartridge. The handle lets you control the water flow and temperature. The spout directs water where you want it, while the cartridge is the heart of the faucet, mixing hot and cold water. There are three popular types:
| Type | Description |
|---|---|
| Single Handle | One handle controls both temperature and flow. Easy peasy! |
| Dual Handle | Two handles, one for hot and one for cold. It’s like handling a hot potato! |
| Thermostatic | Automatically keeps water at the perfect temperature. No more surprise cold showers! |
Understanding these parts helps make installation a breeze (well, mostly!). Knowing what you’re working with can save you from a splashy mess!
Installing the New Shower Faucet
Stepbystep instructions for installing the faucet. Tips for aligning the faucet properly.Changing a shower faucet can be fun! First, turn off the water to avoid a splash party. Remove the old faucet by unscrewing it. Next, clean the area and check for leaks. When installing the new faucet, make sure it lines up straight. You can use a level or your trusty eye. Don’t forget to tighten the screws, but not too tight—no one likes a stubborn faucet! Your shower will be ready for action in no time!
| Steps | Tips |
|---|---|
| Turn off the water | Use a towel to cover the drain. |
| Remove old faucet | Check for any hidden screws. |
| Clean the area | Look for leaks before putting in the new one. |
| Install new faucet | Use a level to ensure it’s straight. |
| Test for leaks | Don’t over-tighten! |
Connecting the Water Supply
Guidelines for attaching water supply lines. Importance of checking for leaks after connections.Once you’ve set up your shower faucet, it’s time to connect the water supply. First, attach the water supply lines to the faucet. Make sure they are snug but not too tight. Always use plumber’s tape to prevent leaks. After connecting, it’s crucial to check for leaks. Run the water and look for any dripping. If you see any, tighten the connections slightly. A small leak can lead to big problems later!
What should I check for after connecting the water supply?
Check for leaks. Look at your connections and ensure water isn’t dripping. It helps prevent future issues.
Tips on connecting water supply lines:
- Use plumber’s tape.
- Tighten gently.
- Check connections after running water.
Testing the Installation
Steps to turn the water supply back on. How to test for proper function and identify any issues.Once you finish your shower faucet installation, it’s time to turn the water back on. Start by finding the main water valve. Slowly open it to avoid splashes. Next, check for leaks by running the faucet. If water drips from the connections, you may need to tighten them. Listen for strange sounds. If you hear anything unusual, it might indicate a problem.
- Turn the water valve counterclockwise.
- Open the faucet fully.
- Look for water pooling around joints.
How do you know if your shower faucet is working properly?
To ensure perfect function, check for smooth water flow. Adjust the temperature to see if it responds well. If it doesn’t, you might need to make adjustments.
Maintenance Tips for Shower Faucets
Recommendations for regular cleaning and upkeep. Common issues and troubleshooting advice.Keeping your shower faucet in top shape is simpler than you think! Regular cleaning is key; use a soft cloth and mild soap to keep it shiny. Did you know? A little vinegar can tackle pesky water spots. Watch out for common issues, like leaks or strange noises. If your faucet starts to drip, it could be an o-ring or washer issue. Don’t panic; grab a wrench and get to work!
| Issue | Solution |
|---|---|
| Dripping faucet | Check o-rings and washers |
| Low water pressure | Clean aerator or check valves |
| Noisy faucet | Tighten connections |
Conclusion
To install a shower faucet, first gather your tools and shut off the water. Remove the old faucet and connect the new one. Use plumber’s tape for a tight seal. Turn the water back on to check for leaks. You did it! For more help, read installation guides or watch videos. Happy plumbing!FAQs
What Tools Are Needed To Install A Shower Faucet?To install a shower faucet, you need a few simple tools. First, get a screwdriver to loosen and tighten screws. You’ll need an adjustable wrench to grip and turn the pipes. A tape measure helps you measure the parts. Finally, having a towel handy can help you clean up any water spills.
How Do I Remove The Old Shower Faucet Before Installing A New One?To remove the old shower faucet, first turn off the water. Use a screwdriver to take off the handle. After that, you may need a wrench to unscrew the faucet from the wall. Make sure to take off any old parts carefully. Finally, clean the area before adding the new faucet.
What Steps Should I Follow To Properly Connect The Plumbing For A New Shower Faucet?To connect the plumbing for a new shower faucet, first turn off the water supply. Next, remove the old faucet if there is one. Then, attach the new faucet to the wall. Hook up the hot and cold water pipes to the faucet. Finally, turn the water back on and check for any leaks.
Are There Any Specific Installation Instructions For Different Types Of Shower Faucets (E.G., Single Handle Vs. Dual Handle)?Yes, there are different steps for single handle and dual handle shower faucets. For a single handle, you usually connect one pipe for hot water and one for cold. With dual handles, you connect two pipes, one for hot and one for cold. Make sure you follow the instructions that come with your faucet for the best results. Always turn off the water before you start!
How Can I Test For Leaks After Installing The Shower Faucet?To test for leaks after you install the shower faucet, first, turn on the water. Check all the pipes and joints for drops of water. If you see any water, that means there’s a leak. You can also feel with your hands for wet spots. Make sure everything is tight and secure to fix any leaks.