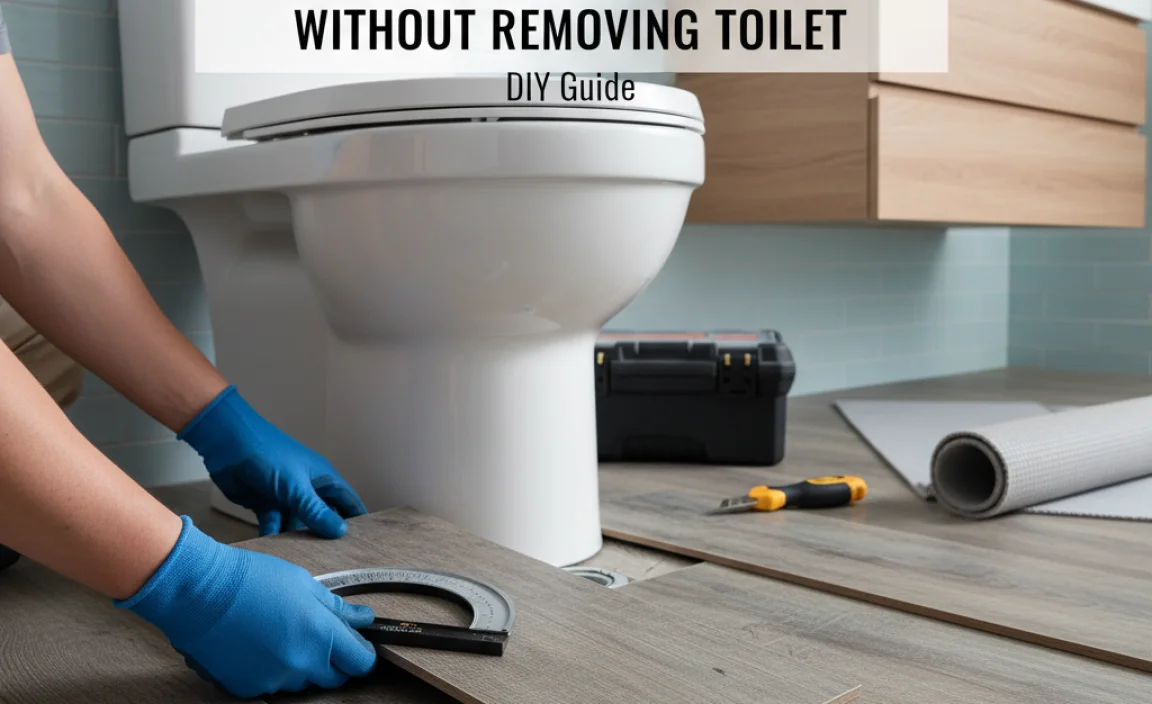
Have you ever thought about how to update your bathroom without a big mess? Installing vinyl flooring can breathe new life into your space. But what if you want to do it without removing the toilet? Sounds tricky, right? Well, it isn’t impossible!
Imagine stepping into a bathroom that looks fresh and new. You don’t have to worry about losing your weekend with a complicated project. With the right steps, you can install vinyl flooring even around your toilet.
Did you know that vinyl flooring comes in many fun styles? Whether you prefer classic tiles or a wood-like look, there’s something for everyone. Plus, it’s mostly easy to clean and maintain. With just a few tools and tips, you can create a beautiful bathroom floor.
This article will guide you through the process. You’ll learn how to install vinyl flooring in your bathroom without removing the toilet. Ready to get started on your project? Let’s dive in!
How To Install Vinyl Flooring In Bathroom Without Removing Toilet
Installing Vinyl Flooring In A Bathroom Can Be A Stylish And Practical Choice, But The Thought Of Having To Remove The Toilet Is Daunting For Many Homeowners. Fortunately, It Is Possible To Install Vinyl Flooring Without Dismantling Your Toilet, Saving You Time And Effort. This Article Will Guide You Through A Step-By-Step Process To Achieve A Successful Installation.
Materials Needed
– Vinyl Flooring Tiles Or Sheets
– Utility Knife
– Measuring Tape
– Adhesive (If Required For Your Flooring Type)
– Straight Edge Or Ruler
– Caulk (For Sealing)
– Floor Roller (Optional But Recommended)
Step 1: Measure The Bathroom Area
Start By Measuring The Dimensions Of Your Bathroom. This Step Is Crucial For Ensuring You Purchase The Right Amount Of Vinyl Flooring. Consider All Areas Around The Toilet, Including The Space Between The Toilet And The Wall.
Step 2: Prepare The Surface
Before Laying Down Your New Vinyl Flooring, Ensure The Existing Floor Is Clean, Dry, And Flat. Remove Any Debris And Clean The Entire Area Thoroughly. If There Are Any Holes Or Uneven Patches, Patch Them Up To Create A Smooth Surface.
Step 3: Plan Your Layout
It’S Important To Lay Out Your Vinyl Flooring Before Actual Installation. Start By Marking The Center Of The Bathroom And Use This As A Reference Point. Arrange The Vinyl Pieces Around The Toilet To Visualize How They Will Fit. This Will Help You Plan Any Necessary Cuts.
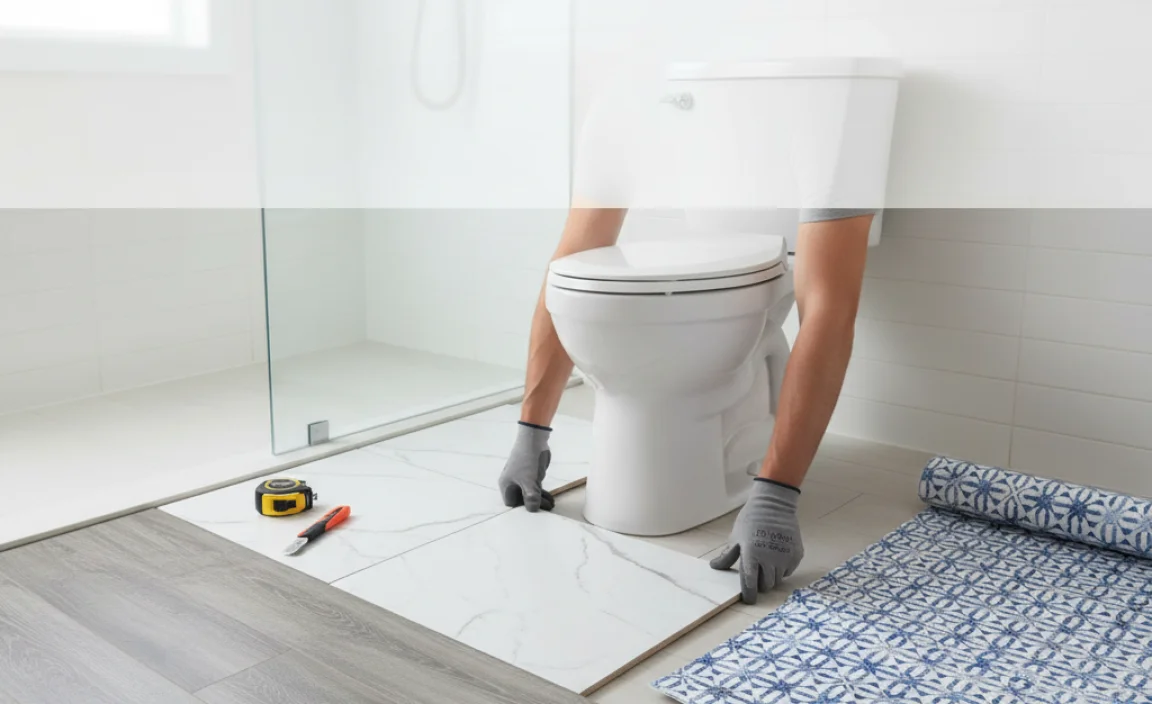
Step 4: Cut The Vinyl Flooring
Carefully Measure And Cut The Vinyl Flooring Around The Base Of The Toilet. You Can Do This By Placing A Piece Of Cardboard Or Paper Around The Toilet Base To Create A Template, Then Transfer This Measurement Onto The Vinyl And Cut It Out.
Step 5: Install The Flooring
Once All Pieces Are Cut To Fit, You Can Begin The Installation. If Your Vinyl Requires Adhesive, Apply It According To The Manufacturer’S Instructions. Start Placing Your Vinyl Pieces From The Center Of The Room And Work Your Way Outwards.
Step 6: Secure Flooring In Place
If Adhesive Is Used, Ensure You Press The Vinyl Down Firmly To Eliminate Air Bubbles. You May Want To Use A Floor Roller To Ensure A Solid Bond Between The Flooring And The Surface Below.
Step 7: Seal The Edges
After Placing The Vinyl, Take Some Caulk To Seal The Edges, Especially Around The Toilet. This Prevents Water From Getting Underneath The Vinyl, Protecting It From Potential Damage.
Conclusion
Installing Vinyl Flooring In A Bathroom Without Removing The Toilet Is A Manageable Diy Project With The Right Tools And Preparation. By Following The Steps Outlined Above, You Can Successfully Revamp Your Bathroom’S Look While Saving Yourself The Hassle Of Toilet Removal. Enjoy Your Newly Installed Flooring!
How to Install Vinyl Flooring in Bathroom Without Removing Toilet
Installing vinyl flooring in your bathroom doesn’t have to be a hassle, even with a toilet in the way. Start by measuring the area around the toilet carefully. Use a utility knife for precise cuts around the toilet’s base. Seamlessly fit the vinyl into place, ensuring it adheres well. Surprise yourself with the transformation—your bathroom can look brand new without major work! This simple method saves time and effort, making your renovation dreams a reality.
Understanding Vinyl Flooring Options
Types of vinyl flooring suitable for bathrooms. Pros and cons of each type.
Many homeowners love vinyl flooring for bathrooms. There are three main types to consider: sheet vinyl, vinyl planks, and vinyl tiles. Sheet vinyl is one big, solid piece. It’s great for water resistance but can be tricky to install around the toilet. Vinyl planks look like wood and are easy to fit. They are durable and add flair, but they can be more expensive. Lastly, vinyl tiles are colorful and versatile, but they might not always be as waterproof as sheet vinyl.
| Type | Pros | Cons |
|---|---|---|
| Sheet Vinyl | Waterproof, easy to clean | Hard to fit around objects |
| Vinyl Planks | Stylish, simple to install | Can be pricey |
| Vinyl Tiles | Lots of designs, easy to replace | May not be as waterproof |
Choosing wisely can turn your bathroom floor into a splash of joy—without the splash!
Preparation Before Installation

Tools and materials needed. Measuring the bathroom area accurately.
Before you start putting down vinyl flooring, gather your tools and materials. You will need:
- Vinyl flooring sheets or tiles
- Utility knife
- Measuring tape
- Floor roller
- Adhesive (if required)
Make sure to measure your bathroom area accurately. Use your measuring tape to find the length and width of the space. Multiply these numbers to get the total area. This will help you buy the right amount of vinyl. Remember, measure twice to be safe!
What tools do I need to install vinyl flooring?
You’ll need a utility knife, measuring tape, adhesive, and a floor roller for installation.
Cleaning and Preparing the Subfloor
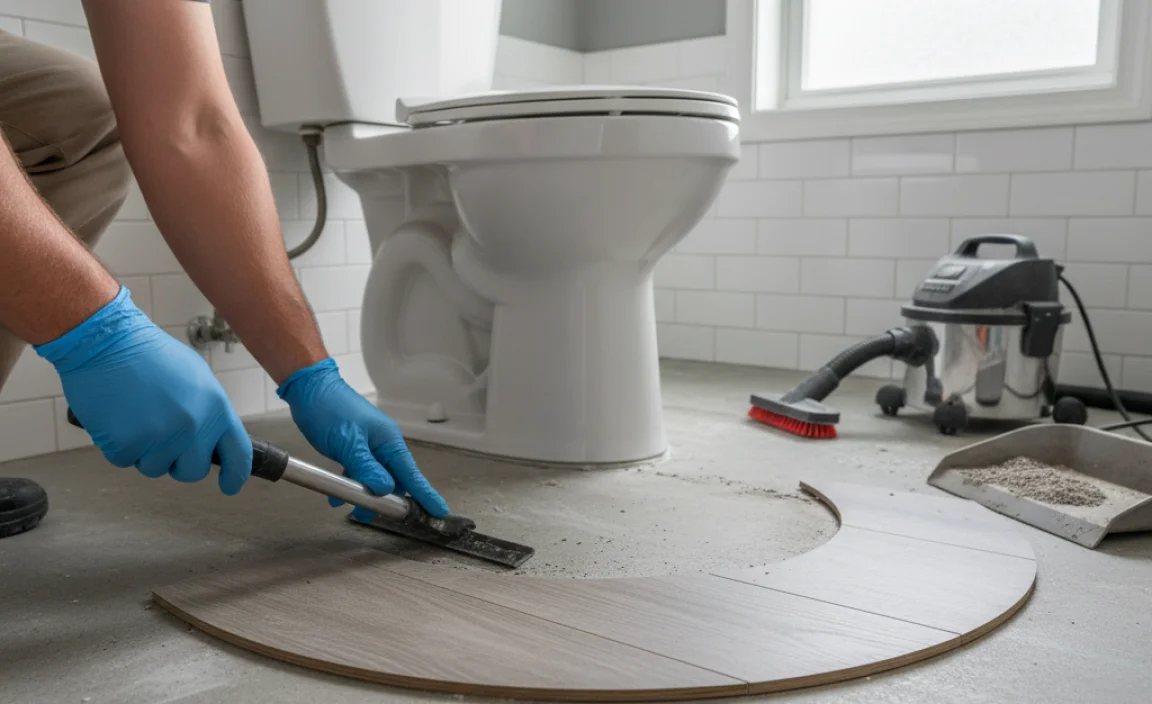
Steps to clean the existing floor. Inspecting for damage and making necessary repairs.
First, let’s get that floor sparkling! Start by sweeping away dirt and dust. Then, grab a mop and use warm, soapy water to clean it well. Think of it as giving your floor a nice bath! Next, check for any damage, like cracks or loose tiles. If you spot anything, fix it up. Remember, a happy subfloor makes a happy vinyl floor. You wouldn’t want to install a new outfit on a dirty foundation!
| Step | Action |
|---|---|
| 1 | Sweep away dirt |
| 2 | Mop with soapy water |
| 3 | Inspect for damage |
| 4 | Make necessary repairs |
Having a clean and sturdy subfloor is key for new vinyl. It’s like laying a strong foundation for a house. Pay attention to every little crack. After all, nobody wants their flooring to have a “crack-a-lack!” So, make it snazzy before you start putting down those vinyl tiles!
Measuring and Cutting Vinyl Flooring
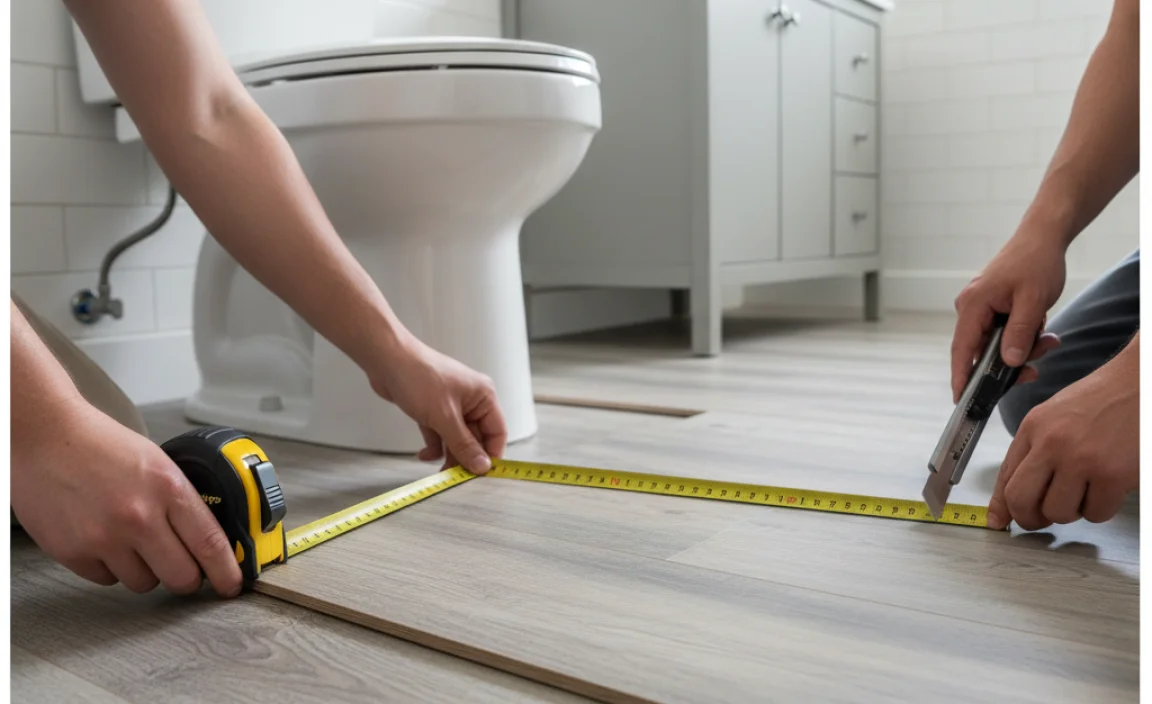
Techniques for accurate measurement around fixtures. How to cut vinyl flooring to fit around the toilet.
Before you cut your vinyl, you need to measure like a pro! First, grab your tape measure. Measure the distance from the wall to the edge of the toilet. Don’t forget to jot these down! Now comes the fun part—cutting. Use a utility knife to trim the vinyl. For a perfect fit around the toilet, trace the outline of the base on the flooring piece. Cut it out carefully. Remember, the goal is to make it look seamless, not like a puzzle gone wrong!
| Step | Description |
|---|---|
| 1 | Measure distance from wall to toilet. |
| 2 | Write down the measurements. |
| 3 | Trace the toilet base on vinyl. |
| 4 | Cut carefully with a utility knife. |
Installing the Vinyl Flooring Around the Toilet
Stepbystep process for laying the flooring. Tips for ensuring a tight fit against the toilet base.
First, gather your tools! You’ll need a measuring tape, a vinyl cutter, and some strong glue. Start by carefully measuring the area around the toilet. Cut your vinyl flooring to match these measurements. When laying the vinyl, gently tuck it around the toilet’s base. Use a small roller to ensure everything sticks well. Remember, a tight fit helps keep the floor looking neat and clean! If you notice gaps, patch them up. Who wants a sneaky leak, right?
| Step | Description |
|---|---|
| 1 | Measure the space around the toilet. |
| 2 | Cut vinyl flooring to size. |
| 3 | Lay the vinyl carefully around the toilet. |
| 4 | Use a roller for a strong bond. |
| 5 | Patch any gaps to prevent leaks. |
Don’t worry if it doesn’t fit perfectly at first! You can always adjust. And remember, a well-installed vinyl floor can make your bathroom shine like a star on a clear night!
Finishing Touches
Applying adhesive if necessary. Trim and molding installation.
To complete your vinyl flooring project, add some finishing touches. If your flooring requires adhesive, apply it following the manufacturer’s instructions. Once that’s done, cut and attach trim and molding around the edges. This helps keep everything neat and smooth.
- Use a level to ensure trim is straight.
- Fill any gaps with caulk for a polished look.
These steps not only enhance appearance but also add durability. Enjoy your refreshed bathroom!
Do I need adhesive for vinyl flooring?
Not always. Some vinyl flooring has self-adhesive backing. If yours doesn’t, using adhesive will help it stay in place securely.
How do I install trim and molding?
Measure and cut the trim to fit. Use finishing nails or glue to attach it. Make sure it covers the edges of the vinyl nicely!
Maintaining Your Vinyl Flooring
Tips for cleaning and upkeep. Signs of wear and when to consider replacement.
To keep your vinyl flooring looking great, regular cleaning is key. Use a soft broom or vacuum for dirt and crumbs. For deeper cleaning, a damp mop with gentle soap works well. Avoid harsh chemicals that can damage the surface.
Over time, you might notice signs of wear like scratches or fading. If these become prominent, it may be time to consider replacement.
- Cleaning Tips: Sweep or vacuum often.
- Deep Clean: Mop with mild soap and water.
- Replacement Signs: Look for scratches and fading.
How do I clean vinyl flooring?
Use a broom or vacuum for daily cleaning. Mop with warm water and mild soap weekly.
How often should I replace vinyl flooring?
Generally, consider replacement every 10-20 years, depending on wear and tear.
Conclusion
In conclusion, installing vinyl flooring in your bathroom without removing the toilet is doable. You need to measure carefully, cut the vinyl properly, and secure it well. This method saves time and effort. We encourage you to gather your tools and try it out for yourself. For more tips and tricks, check out our other guides on DIY projects!
FAQs
What Tools And Materials Are Needed To Install Vinyl Flooring In A Bathroom Without Removing The Toilet?
To install vinyl flooring in a bathroom without removing the toilet, you need some tools and materials. First, get a measuring tape to check sizes. You also need a pair of scissors or a utility knife to cut the vinyl. Don’t forget adhesive to stick the vinyl down. A straightedge will help you make clean cuts. Finally, have a roller to press the vinyl down flat.
How Do You Properly Measure And Cut Vinyl Flooring Around A Toilet?
To measure for vinyl flooring around a toilet, start by measuring the space around the toilet. Use a tape measure to find where the toilet edges are. Then, mark these spots on the vinyl with a pencil. Next, carefully cut the vinyl with scissors, following your marks. Finally, fit the vinyl around the toilet to make sure it fits nicely!
What Are The Steps To Ensure A Watertight Seal Around The Toilet When Installing Vinyl Flooring?
To make sure the seal around your toilet is watertight, start by cutting the vinyl flooring carefully. Leave a little gap around the toilet base. Next, use silicone caulk to fill that gap. This helps to keep water from getting underneath. Finally, let the caulk dry completely before using the toilet.
Are There Any Specific Types Of Vinyl Flooring That Work Better For Bathroom Installations Around Toilets?
Yes, some types of vinyl flooring are better for bathrooms. Look for vinyl that is waterproof and durable. This helps prevent water damage around toilets. You can choose luxury vinyl tiles or sheets. They are easy to clean and strong.
How Can You Prevent The Vinyl Flooring From Lifting Or Curling Around The Toilet Over Time?
To prevent vinyl flooring from lifting or curling near the toilet, make sure the area is clean and dry before you install it. Use a strong adhesive that sticks well to hold the edges down. You can also put trim or a molding around the toilet to keep the vinyl in place. Lastly, avoid letting water spill around the toilet area to keep the floor safe.