Have you ever wanted to add some style to your room? Floating shelves can do just that! They seem to float on the wall, giving any space a clean look. Many people think making them is hard, but it’s easier than you think.
Imagine displaying your favorite books or plants on shelves that look like they’re magically hanging. Using plywood for these shelves is a great choice. Plywood is strong yet lightweight, making it perfect for this project.
In this article, we will show you how to make floating shelves with plywood step by step. Don’t worry if you’ve never made anything before. With a few tools and some simple steps, you can create beautiful shelves in no time!
How To Make Floating Shelves With Plywood: A Diy Guide

How to Make Floating Shelves with Plywood
Creating floating shelves with plywood can be a fun project! First, gather your materials like plywood, brackets, and paint. Cut the plywood to your desired size. Did you know that floating shelves not only save space but also add a stylish touch to your room? After cutting, securely attach the brackets to the wall and slide on the shelves. With a little effort, you can display books or plants, making your space more inviting!Materials Needed
List of essential materials including plywood types, brackets, and screws. Tools required for cutting and assembling.Before you start making those cool floating shelves, you need a few essentials. First, grab some sturdy plywood. A thin sheet might buckle under pressure, so go for at least ¾ inch thickness. You’ll also need some strong brackets to hold everything up and a bunch of screws to keep them in place. Don’t forget your tools! A good saw, a drill, and a measuring tape are your best pals here.
| Material | Purpose |
|---|---|
| Plywood | Main shelf surface |
| Brackets | Support the shelf |
| Screws | Hold brackets and shelves |
| Saw | Cut the plywood |
| Drill | Make holes for screws |
| Measuring tape | Ensure proper sizes |
With these materials and tools, you’ll be on your way to impressing your friends with stylish new shelves. Just remember, a shelf can be a statement piece or a great spot to display your favorite cat figurines!
Choosing the Right Plywood
Discuss types of plywood suitable for floating shelves. Factors to consider such as thickness, finish, and durability.Choosing the right plywood is key for strong and stylish floating shelves. There are different types of plywood to consider. The thickness should be at least 3/4 inch for sturdiness. A smooth finish helps shelves look neat. Look for durable plywood, like birch or maple, which resist wear. Toothpicks hold up well when glued together. Lightweight options are also popular, but make sure they can hold your items safely.
What type of plywood is best for floating shelves?
Birch and maple are great options. They are strong and have a nice finish. They hold up well over time, making them perfect for floating shelves.
Factors to Consider:
- Thickness: At least 3/4 inch
- Finish: Smooth and nice looking
- Durability: Resistant to wear
Measuring and Planning
Steps for accurate measurements of shelf dimensions and wall space. Tips for creating a layout plan for multiple shelves.Before diving into making those fancy floating shelves, let’s start with some good old measuring and planning. Grab a trusty tape measure and check the wall space where your shelves will go. Keep it simple: measure the width and height, and write it down. It’s like a treasure map, but instead of gold, you get shelves! For more than one shelf, sketch a layout plan. Think of it as arranging a game of Tetris, but with boards and no stress! This helps you see how they will fit together and look on the wall.
| Measurement | Notes |
|---|---|
| Width | Measure the space horizontally. |
| Height | Ensure shelves are at a comfortable level. |
| Depth | Consider what will go on the shelves. |
Cutting the Plywood
Detailed instructions on cutting techniques and tools to use. Safety precautions to follow while handling plywood.Cutting plywood for floating shelves can be fun and easy! Use a circular saw or a jigsaw for straight cuts. Don’t forget your measuring tape—it’s your best buddy here. Always wear safety goggles and ear protection! Plywood can be a bit slippery, so keep your fingers clear of the blade, or you might need a band-aid—or worse, a good reason to tell your mom why you’re home late!
| Tools | Safety Gear |
|---|---|
| Circular saw | Safety goggles |
| Jigsaw | Earmuffs or earplugs |
| Measuring tape | Work gloves |
With the right tools and safety gear, you’ll be a plywood-cutting pro in no time!
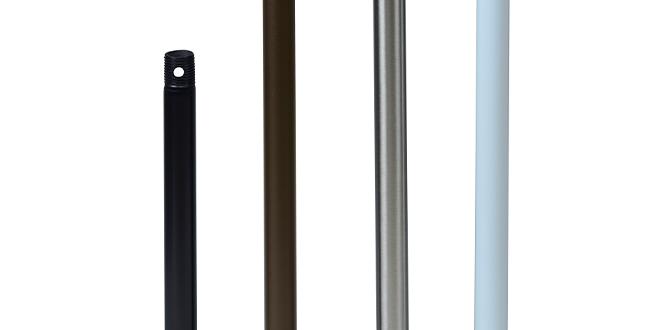
Building Brackets for Support
Explanation of different bracket types and their installation processes. Tips for ensuring brackets are strong and secure.To build strong floating shelves, you need sturdy brackets. There are different types of brackets: L-brackets, floating brackets, and heavy-duty brackets. Each type has its own way of installation. For example, L-brackets attach to the wall with screws. Floating brackets go inside the shelf, making them invisible. Here are some tips for strength:
- Use strong materials like steel.
- Ensure screws are tight.
- Check the weight limit of your brackets.
By following these steps, your shelves will be safe and stylish!
What types of brackets are best for floating shelves?
Best types for floating shelves include L-brackets, floating brackets, and heavy-duty brackets. Each offers different support and style for your project.
Assembling the Floating Shelves
Stepbystep instructions for attaching the shelves to brackets. Importance of achieving level shelves for aesthetic appeal.Begin by locating the brackets for your floating shelves. Use a level to ensure they are straight. Here are steps to follow:
- Hold the bracket against the wall where you want the shelf.
- Mark the spots where you will drill.
- Drill holes in those spots, then insert anchors.
- Attach the brackets tightly.
- Place the shelf on the brackets.
Making sure your shelves are level is important for a neat look. Level shelves not only look better but also prevent items from sliding off. Your creativity will shine with well-assembled shelves!
How do you make sure shelves are level?
Use a level tool to check both sides of the shelf. Adjust as needed before securing it in place.
Finishing Touches
Options for staining or painting the plywood. Suggestions for sealing and protecting the shelves.To wrap up your floating shelves, it’s time to add some flair! Decide on a stain or paint that matches your style. Do you want a sleek look or a pop of color? Either way, choosing the right finish makes a big difference. Remember to seal your shelves with a protective coat. This keeps them safe from spills and scratches. After all, nobody wants surprise watermarks! Here’s a quick guide for your options:
| Finish Type | Effect |
|---|---|
| Stain | Adds color while showing wood grain. |
| Paint | Gives a bold, colorful look. |
| Clear Sealant | Protects your shelves from damage. |
Installing Floating Shelves
Guidelines for wall mounting, including stud finding and drill techniques. Tips for ensuring stability and weight distribution.First, find your wall studs. You don’t want your shelves falling like a bad dessert! Use a stud finder or knock on the wall until you hear a solid sound. Once found, mark those spots. Next, drill pilot holes. This helps your screws go in easier. Remember, even floating shelves need support! For stability, spread out the weight evenly. Place heavier items on the bottom. This will keep your shelves upright and your snacks conveniently close.
| Step | Tip |
|---|---|
| Find studs | Use a stud finder! |
| Drill pilot holes | Easy does it, folks! |
| Distribute weight | Heavy items go low! |
Decorating with Floating Shelves
Ideas for items to display on floating shelves. Styling tips for enhancing interior decor with shelves.Floating shelves can change a room’s feel. They are perfect for showing off favorite items. Here are some fun ideas for what to display:
- Books: Stack your favorite reads neatly.
- Plants: Add greenery with small potted plants.
- Pictures: Frame special moments with family and friends.
- Decorative items: Use unique finds or crafts you love.
To style your shelves, remember these tips:
- Mix items of different heights for balance.
- Use colors that match your room’s theme.
- Keep it simple to avoid clutter.
Floating shelves add charm and interest to your space. They help organize while looking great!
What items are great for floating shelves?
Some popular options include books, plants, and decorative pieces. They create a lovely display.
What are some styling tips for floating shelves?
- Mix different heights for visual interest.
- Coordinate colors with your room.
- Simplify your design to avoid clutter.
Common Mistakes to Avoid
List of pitfalls when making and installing floating shelves. Solutions for troubleshooting common issues.Building floating shelves sounds fun, right? But many people trip over a few common mistakes. For instance, forgetting to measure space can lead to shelves that are too big or too small. Another pitfall is using weak brackets, which can lead to sad, sagging shelves. Always ensure your wall can handle the weight. Check the type of wood, too! Plywood is a winner, but you need the right thickness. If you miss these points, your beautiful shelves will be more ‘float’ and less ‘shelf’. Here’s a handy table to avoid pitfalls:
| Mistake | Solution |
|---|---|
| No measurements | Always measure twice! |
| Weak brackets | Use sturdy ones. |
| Wrong wood type | Choose the right plywood. |
Maintenance Tips for Longevity
Care and upkeep advice to retain shelf quality over time. Recommended cleaning supplies and methods.To keep your shelves looking great, care is essential. Regularly dust them with a soft cloth. Avoid harsh chemicals as they can damage the wood. Instead, use mild soap and water for cleaning. Remember, too much water can warp the wood.
- Use a soft cloth for dusting.
- Clean with mild soap and water.
- Avoid harsh chemicals.
Taking these simple steps can help your floating shelves last longer. Caring for them means they will stay beautiful and useful for years.
How do I clean my floating shelves?
Simply dust them regularly with a soft cloth and use mild soap combined with water for deeper cleaning.
Conclusion
In conclusion, making floating shelves with plywood is fun and rewarding. First, gather the right materials and tools. Next, cut the plywood to your desired sizes. Then, secure brackets for support and finish the shelves nicely. Try this project to add style to your space. For more tips, check out DIY guides online or ask for help!FAQs
What Tools And Materials Do I Need To Build Floating Shelves With Plywood?To build floating shelves with plywood, you’ll need a few tools and materials. First, get some plywood to make the shelves. You’ll also need a saw to cut the wood. A drill will help you make holes and attach the shelves to the wall. Don’t forget screws and wall brackets to support the shelves. Finally, have sandpaper ready to smooth the edges.
How Do I Determine The Right Dimensions And Thickness Of Plywood For My Floating Shelves?To choose the right size of plywood for your floating shelves, first, measure the space where you want to put them. Think about how much weight you will store on the shelves. For small items, ¾ inch thick plywood works well. For heavier things, use 1 inch thick plywood for extra strength. Finally, make sure the shelves are wide enough to hold everything safely.
What Is The Best Way To Install Floating Shelves Securely To Ensure They Can Hold Weight?To install floating shelves securely, start by finding the studs in the wall. You can use a stud finder for this. Then, use strong brackets that fit inside the shelf. Make sure to screw the brackets into the studs. Finally, check that the shelf is level before putting things on it.
How Can I Finish Or Stain Plywood To Enhance The Appearance Of My Floating Shelves?To finish or stain plywood for your floating shelves, start by sanding the surface to make it smooth. Next, choose a wood stain in a color you like and apply it using a brush or cloth. Let the stain dry completely. Finally, add a clear finish like polyurethane to protect the wood and make it shine. Enjoy your beautiful shelves!
Are There Any Specific Design Ideas Or Styles For Floating Shelves That Work Well With Plywood?Yes, there are great design ideas for floating shelves with plywood! You can use simple shapes like rectangles. Staining the wood can show off its grain and colors. You can also make shelves with fun edges, like rounded or zigzag shapes. Finally, try adding bright brackets to hold them up for some style!