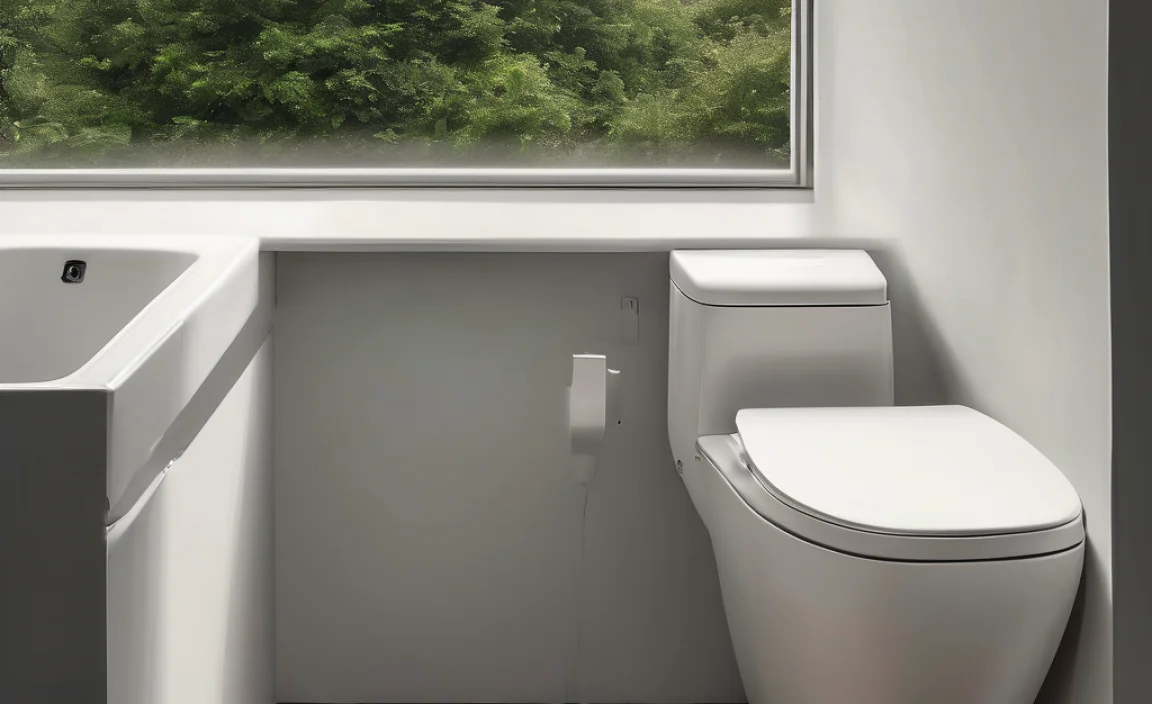
Have you ever flushed a toilet and heard it running? Maybe the flapper is broken. The flapper is a small, rubber piece. It stops water from flowing. It sits at the bottom of the tank. Sometimes, you need to know how to remove a toilet flapper.
Knowing how to remove a toilet flapper can save water. It can also save you money. You do not always need a plumber. You can often do it yourself! It is usually a simple fix. Let’s learn how to do it.
Key Takeaways
- Knowing how to remove a toilet flapper helps fix running toilets easily.
- Turn off the water supply before starting any toilet repairs.
- Unhook the chain and gently detach the old flapper from its mounting pins.
- Install the new flapper by attaching it to the pins and the chain.
- Test the toilet after replacement to ensure proper flushing and sealing.
How to Remove a Toilet Flapper: Getting Started
To start, you need to understand what a toilet flapper does. It’s a small but important part. It seals the opening between the tank and the bowl. When you flush, the chain lifts the flapper. Water rushes into the bowl. The flapper then drops back down. It stops the water when the tank is empty. Over time, flappers can wear out. They might get old and cracked. Sometimes, they do not seal well anymore. This is when you need to know how to remove a toilet flapper. A leaky flapper wastes water. It can make your water bill higher. Replacing it is easy and cheap. You can often do it in a few minutes. You only need a few simple tools. This saves you from calling a plumber.
- Turn off the water supply to the toilet.
- Flush the toilet to empty the tank.
- Detach the chain from the flapper.
- Remove the old flapper from its hinges.
- Clean the area around the flapper seat.
Before you begin, make sure you have a new flapper. You can buy one at a hardware store. Take the old flapper with you. This helps you find the right size. Look for one that matches. Some flappers are universal. They fit most toilets. Others are made for specific toilet brands. Check the package to be sure. You might also need a pair of pliers. These can help you detach the chain. A sponge or cloth is good to have. You can use it to clean the area. Now you are ready to learn how to remove a toilet flapper and fix your toilet!
Why Is My Toilet Always Running?
Have you ever wondered why your toilet keeps running? It’s often because of a bad flapper. The flapper is supposed to seal the tank. If it does not, water leaks out. This makes the tank refill constantly. The constant refilling is why you hear the running water. A worn-out flapper can be stiff or cracked. It may not sit right on the valve seat. Dirt or mineral buildup can also cause problems. These things stop the flapper from sealing. Sometimes, the chain is too short. This keeps the flapper from closing fully. Other times, the chain is too long. It can get stuck under the flapper. Checking and fixing these things can stop the running.
What Tools Do I Need?
You do not need many tools to replace a toilet flapper. Most of the time, you can do it with just your hands. However, a few tools can make the job easier. A pair of pliers can help you detach the chain. This is useful if the chain is rusty or stuck. A sponge or cloth is good for cleaning. You can wipe down the area around the flapper seat. This helps the new flapper seal better. A small bucket can be helpful too. Use it to catch any extra water. Some people like to wear gloves. This keeps their hands clean. But gloves are not always needed. Remember, safety first. Turn off the water before you start.
How Do I Choose the Right Flapper?
Choosing the right flapper is very important. A wrong flapper can cause leaks. It can also make your toilet not flush well. The best way to choose is to take your old flapper with you. Compare it to the new ones at the store. Make sure the size and shape are the same. Some flappers are universal. They are made to fit most toilets. But others are specific to certain brands. Check the package to see what it says. Look at the mounting style too. Some flappers have posts that clip on. Others have rings that slide over pegs. Make sure the new flapper matches your toilet’s style. If you are not sure, ask a store employee for help. They can guide you to the right one.
Fun Fact or Stat: Did you know a leaky toilet can waste up to 200 gallons of water per day? That is like flushing your toilet 50 times without even using it!
Step-by-Step Guide: Toilet Flapper Removal
Now, let’s get into the actual steps of how to remove a toilet flapper. First, turn off the water. You will find a valve behind the toilet. Turn it clockwise until it stops. Next, flush the toilet. This empties the tank. Some water might stay in the tank. That is okay. Now, look at the chain. It connects the flapper to the flush handle. Unhook the chain from the flapper. You might need to use pliers. Be gentle so you do not break anything. Next, find where the flapper attaches to the tank. Most flappers have two little pegs or clips. These hold it in place. Gently pull the flapper off these pegs. It should come off easily. If it is stuck, wiggle it a little. Now you have removed the old flapper!
- Locate the water shut-off valve behind the toilet.
- Turn the valve clockwise to stop the water flow.
- Flush the toilet to remove most of the water.
- Disconnect the chain from the old flapper.
- Detach the flapper from its mounting points.
- Clean the flapper seat to remove debris.
Take a look at the area where the flapper was. You might see some dirt or buildup. Use a sponge or cloth to clean it. This helps the new flapper seal better. Make sure the surface is smooth. If there is a lot of buildup, you can use a mild cleaner. But be careful not to scratch the surface. Rinse the area with a little water. Now you are ready to install the new flapper. Remember to handle the new flapper with care. Do not bend or twist it too much. This can damage it. Following these steps makes how to remove a toilet flapper simple.
What If the Water Won’t Turn Off?
Sometimes, the water shut-off valve is stuck. It might be old or rusty. If you cannot turn it off, do not force it. You could break it. Try turning it gently back and forth. Sometimes this loosens it up. If that does not work, you have a few choices. You can try turning off the main water supply. This is usually in your basement or outside. But this turns off water to the whole house. Another option is to call a plumber. They can fix the valve for you. It is better to be safe than sorry. Working with water can be tricky. If you are not sure, get help.
How Do I Detach the Chain Easily?
The chain connects the flapper to the flush handle. It is important to detach it carefully. If the chain is new, it should come off easily. But sometimes, it can be rusty or stuck. Try using pliers to open the link. Grip the link gently and twist. Be careful not to break the chain. If the chain is really stuck, you can cut it. Use wire cutters or strong scissors. Just make sure you have a new chain to replace it. When you reattach the chain, make sure it is not too long. If it is, the chain can get stuck under the flapper. This stops the flapper from sealing. A little slack is good, but not too much.
What If the Flapper Is Hard to Remove?
Sometimes, the flapper is hard to remove. It might be old and stuck to the pegs. Do not pull too hard. You could break the pegs or the flapper. Try wiggling the flapper gently. Move it back and forth. This can help loosen it. You can also try using a flathead screwdriver. Put the screwdriver under the edge of the flapper. Gently pry it up. Be careful not to scratch the tank. If the flapper is really stuck, you can try using a lubricant. Spray a little WD-40 on the pegs. This can help loosen the flapper. Wait a few minutes and then try again. With a little patience, you should be able to remove it.
Fun Fact or Stat: A new toilet flapper costs only a few dollars. Replacing it yourself can save you over $100 in plumber fees!
Installing the New Toilet Flapper Correctly
After removing the old flapper, it’s time to install the new one. First, make sure you have the right flapper. It should match the old one in size and shape. Now, attach the new flapper to the pegs. These are the little posts on the bottom of the tank. Line up the holes on the flapper with the pegs. Gently push the flapper onto the pegs. Make sure it is secure. Next, reattach the chain. Hook it onto the flapper. Adjust the length of the chain. It should have a little slack. But not too much. The flapper should close completely when you flush. Now, turn the water back on. Watch the tank fill. Flush the toilet to test it. Make sure the flapper seals properly.
- Align the new flapper’s holes with the mounting pins.
- Gently push the flapper onto the pins.
- Attach the chain to the flapper arm.
- Adjust the chain length for proper closure.
- Turn the water supply back on slowly.
- Observe the tank filling and the flapper sealing.
If the flapper does not seal, adjust the chain. If the chain is too long, shorten it. If the chain is too short, lengthen it. You can also try moving the chain to a different hole on the flush lever. Sometimes, the flapper needs a little time to settle. Wait a few minutes and flush again. If it still leaks, check the flapper seat. This is the area where the flapper sits. Make sure it is clean and smooth. If it is rough, you can try sanding it lightly. Be careful not to damage it. With a little patience, you can get the new flapper to seal perfectly. Knowing how to remove a toilet flapper and install a new one is a great skill.
How Tight Should the Chain Be?
The chain should not be too tight or too loose. If it is too tight, the flapper might not close all the way. This causes the toilet to run. If it is too loose, the chain might get stuck under the flapper. This also causes the toilet to run. The best way to adjust the chain is to experiment. Start with a little slack. Flush the toilet and see what happens. If the flapper does not seal, shorten the chain. Keep adjusting until the flapper seals properly. A good rule of thumb is to have about half an inch of slack. This gives the flapper enough room to move freely.
What If the Flapper Keeps Leaking?
If the flapper keeps leaking, there could be a few reasons. First, check the flapper seat. Make sure it is clean and smooth. Any dirt or buildup can prevent the flapper from sealing. You can try cleaning it with a sponge or cloth. If that does not work, you can try sanding it lightly. Use fine-grit sandpaper. Be careful not to scratch the surface. Another reason could be the water level. If the water level is too high, it can push the flapper open. Adjust the float in the tank to lower the water level. Finally, make sure the flapper is the right size. If it is too small, it will not seal properly.
Can I Use a Universal Flapper?
Yes, you can often use a universal flapper. These flappers are made to fit most toilets. They usually have adjustable features. This lets you customize them to your toilet. However, not all universal flappers are created equal. Some are better quality than others. Read reviews before you buy one. Make sure it is made of durable material. Also, check the size. Some universal flappers are too big or too small for certain toilets. If you are not sure, it is best to buy a flapper that is specifically made for your toilet brand. This ensures a perfect fit.
Fun Fact or Stat: The average toilet is flushed about five times a day. That’s almost 2,000 times a year!
Troubleshooting Common Toilet Flapper Problems
Sometimes, even after replacing the flapper, problems can still happen. One common issue is the toilet running constantly. This usually means the flapper is not sealing right. Check the chain. Make sure it is not too tight or too loose. Also, check the flapper seat. It might be dirty or rough. Clean it or sand it down. Another problem is a weak flush. This can happen if the chain is too long. Shorten the chain so the flapper lifts higher. Sometimes, the new flapper is just defective. If you have tried everything else, try replacing it again. Make sure you buy a good quality flapper.
- Toilet runs constantly after flapper replacement.
- Weak flush even with a new flapper.
- Flapper closes too quickly, causing a short flush.
- Water level in the tank is too low or too high.
- Chain gets tangled or caught under the flapper.
Another thing to check is the fill valve. This valve fills the tank with water. If it is not working right, it can cause problems. The fill valve might be clogged or broken. Clean it or replace it. Also, make sure the float is adjusted correctly. The float tells the fill valve when to stop filling. If the float is too high, the water will overflow. If it is too low, the toilet will not flush well. Troubleshooting these problems can be tricky. But with a little patience, you can usually fix them. Knowing how to remove a toilet flapper and solve these issues saves money.
Why Does My Toilet Run After Flushing?
A toilet that runs after flushing is a common problem. It usually means the flapper is not sealing properly. The water is leaking out of the tank. This makes the tank refill constantly. Check the chain first. Make sure it is not too long. If it is, it can get stuck under the flapper. Also, check the flapper seat. It might be dirty or rough. Clean it with a sponge or cloth. If that does not work, you can try sanding it lightly. Use fine-grit sandpaper. Be careful not to scratch the surface. If the problem continues, the flapper itself might be bad. Replace it with a new one.
How Do I Adjust the Water Level?
Adjusting the water level is important for a good flush. If the water level is too low, the flush will be weak. If the water level is too high, the water will overflow. Most toilets have a float that controls the water level. The float is usually a plastic ball or cylinder. It is connected to the fill valve. To adjust the water level, find the adjustment screw on the fill valve. Turn the screw clockwise to lower the water level. Turn it counterclockwise to raise the water level. Flush the toilet after each adjustment. This lets you see if the water level is right.
What If the Chain Keeps Getting Tangled?
A tangled chain can prevent the flapper from sealing. It can also make it hard to flush the toilet. The chain might be too long. If it is, it can get caught under the flapper. Shorten the chain by removing some links. Also, make sure the chain is hanging straight. If it is twisted, it can get tangled more easily. You can also try using a different type of chain. Some chains are designed to be less likely to tangle. Finally, make sure the flush lever is working smoothly. If it is stiff, it can cause the chain to tangle.
Fun Fact or Stat: Toilets use about 27% of the water in your home. Fixing a leaky flapper can save a lot of water!
Choosing the Right Type of Flapper Material
Flappers come in different materials. The material affects how long the flapper lasts. Rubber flappers are common. They are cheap and easy to find. But they can wear out quickly. Silicone flappers are more durable. They resist chemicals and last longer. Some flappers have adjustable floats. These let you fine-tune the flush. Others have antimicrobial coatings. These prevent bacteria from growing. Consider your water quality. Hard water can damage rubber flappers faster. A silicone flapper might be better. Think about how often you flush. A busy bathroom needs a durable flapper. Price is also a factor. Rubber flappers are cheaper. But silicone flappers can save money in the long run.
- Rubber flappers are affordable but less durable.
- Silicone flappers resist chemicals and last longer.
- Adjustable flappers allow fine-tuning of the flush.
- Antimicrobial coatings prevent bacterial growth.
- Hard water can degrade rubber flappers quickly.
- Consider usage frequency for flapper durability.
Here is a table comparing the different types of flapper materials:
| Material | Cost | Durability | Pros | Cons |
|---|---|---|---|---|
| Rubber | Low | Low | Affordable, easy to find | Wears out quickly, affected by hard water |
| Silicone | Medium | High | Long-lasting, resists chemicals | More expensive than rubber |
| Vinyl | Low-Medium | Medium | Better than rubber, resists hard water | Can still wear out with time |
| Hybrid (Rubber/Plastic) | Medium | Medium-High | Good balance of cost and durability | May not last as long as silicone |
Choosing the right material is part of knowing how to remove a toilet flapper and replace it well. Think about your needs and budget. A good flapper saves water. It also prevents annoying leaks. Do some research before you buy. Read reviews and compare prices. This helps you make the best choice. Replacing a flapper is easy. But choosing the right one makes a difference.
What Is the Best Material for Hard Water?
Hard water contains minerals like calcium and magnesium. These minerals can damage rubber flappers. They can make them stiff and brittle. Silicone flappers are a better choice for hard water. They resist the minerals. They do not break down as easily. Vinyl flappers are also a good option. They are more resistant to hard water than rubber. If you have hard water, avoid cheap rubber flappers. They will not last long. Invest in a silicone or vinyl flapper. This saves you money in the long run. You will not have to replace it as often.
Do Adjustable Flappers Work Well?
Adjustable flappers have a small float. You can move the float up or down. This changes how long the flapper stays open. This lets you control the amount of water used in each flush. Adjustable flappers can be useful. They can help you save water. But they can also be tricky to adjust. It takes some experimenting to get it right. If you are not careful, you can waste water. Or you can have a weak flush. Read the instructions carefully. Start with the float in the middle. Then adjust it as needed. Some people find adjustable flappers helpful. Others prefer standard flappers.
Are Antimicrobial Flappers Worth It?
Antimicrobial flappers have a coating. This coating kills bacteria. This can help keep your toilet cleaner. But are they worth the extra cost? It depends on your priorities. If you are concerned about germs, an antimicrobial flapper might be a good choice. They can help prevent odors. They can also reduce the spread of bacteria. However, they are not essential. Regular cleaning can also keep your toilet clean. If you clean your toilet often, you might not need an antimicrobial flapper. It is a personal choice. Consider your needs and budget.
Fun Fact or Stat: A toilet flapper is usually made of rubber or silicone. These materials are flexible and water-resistant!
Maintaining Your Toilet Flapper for Longevity
Taking care of your toilet flapper can make it last longer. Clean the flapper regularly. Use a soft brush or sponge. This removes buildup. Avoid harsh chemicals. These can damage the flapper. Check the chain often. Make sure it is not tangled. Adjust it if needed. Flush the toilet gently. Do not yank the handle. This can strain the flapper. Consider using a toilet bowl cleaner. Choose one that is safe for rubber or silicone. Inspect the flapper seat. Clean it if it is dirty. Replace the flapper when it shows wear. Cracks or stiffness mean it is time for a new one. Small steps help the flapper work well.
- Clean the flapper regularly with a soft brush.
- Avoid using harsh chemicals that can damage it.
- Check the chain for tangles and adjust as needed.
- Flush gently to prevent strain on the flapper.
- Use toilet bowl cleaners safe for rubber/silicone.
- Inspect and clean the flapper seat regularly.
Preventing problems is part of how to remove a toilet flapper and keep your toilet in good shape. A well-maintained flapper saves water. It also prevents costly repairs. Make it a habit to check your flapper. A few minutes of care can make a big difference. If you notice any issues, address them quickly. Do not wait until the flapper fails completely. Regular maintenance keeps your toilet running smoothly. It also saves you money in the long run.
How Often Should I Clean My Flapper?
You should clean your flapper every few months. This prevents buildup. Buildup can cause leaks. Cleaning is easy. Turn off the water. Flush the toilet. Use a soft brush to scrub the flapper. Rinse it with clean water. You can also use a mild cleaner. But make sure it is safe for rubber or silicone. Avoid bleach. Bleach can damage the flapper. Regular cleaning keeps the flapper working well. It also extends its lifespan. A clean flapper seals better. This saves water and money.
Can Toilet Bowl Cleaners Damage the Flapper?
Yes, some toilet bowl cleaners can damage the flapper. Cleaners with harsh chemicals are especially bad. These chemicals can break down the rubber or silicone. This makes the flapper brittle and leaky. Choose a toilet bowl cleaner carefully. Look for one that is safe for rubber or silicone. Read the label. Avoid cleaners with bleach or strong acids. You can also use natural cleaners. Vinegar and baking soda are good options. These are gentler on the flapper. They are also better for the environment. A safe cleaner protects your flapper.
How Long Should a Toilet Flapper Last?
A toilet flapper should last for several years. But the lifespan depends on several factors. The material of the flapper is important. Silicone flappers last longer than rubber flappers. Water quality also matters. Hard water can shorten the lifespan of a flapper. How often you flush the toilet is another factor. A toilet that is used frequently will wear out faster. Regular maintenance can also extend the lifespan. Cleaning the flapper and checking the chain helps. In general, expect a flapper to last 3-5 years. If it starts to leak, replace it.
Fun Fact or Stat: Replacing a worn-out flapper is one of the easiest and cheapest ways to save water in your home!
Summary
In short, knowing how to remove a toilet flapper is very useful. It helps you fix a common problem: a running toilet. A leaky flapper wastes water. It also increases your water bill. But replacing the flapper is easy. You can do it yourself in a few minutes. First, turn off the water. Then, remove the old flapper. Clean the area. Install the new flapper. Adjust the chain. Test the toilet. With a few simple steps, you can save water and money. Choosing the right flapper material is also important. Silicone flappers last longer. Maintaining your flapper extends its life. Clean it regularly and check the chain.
Conclusion
Learning how to remove a toilet flapper is a great skill. It empowers you to fix your own toilet. You save money and water. The steps are simple and easy to follow. Replacing a flapper prevents leaks. It keeps your toilet running smoothly. Now you can tackle this common household task. You do not need to call a plumber. You can do it yourself. So next time your toilet runs, remember what you have learned. You can fix it quickly and easily. You are now a toilet repair expert!
Frequently Asked Questions
Question No 1: Why is my toilet running constantly?
Answer: A constantly running toilet usually means the flapper is not sealing properly. This allows water to leak from the tank into the bowl. Common causes include a worn-out flapper, a chain that is too short or too long, or debris on the flapper seat. To fix this, first, check the chain to make sure it has the right amount of slack. Then, inspect the flapper for any signs of wear or damage. Clean the flapper seat to remove any dirt or buildup. If the problem persists, you may need to replace the flapper.
Question No 2: How do I know if my toilet flapper needs replacing?
Answer: There are several signs that indicate your toilet flapper needs replacing. The most obvious sign is a toilet that runs constantly. Other signs include a toilet that refills frequently, a weak flush, or water leaking from the tank into the bowl. You can also visually inspect the flapper. Look for cracks, stiffness, or discoloration. If the flapper looks worn out, it is probably time to replace it. Replacing a flapper is easy and inexpensive. It can save you a lot of water and money.
Question No 3: Can I use any toilet flapper for my toilet?
Answer: While some flappers are universal, it is best to choose a flapper that is designed for your specific toilet model. Using the wrong flapper can cause leaks or a weak flush. To find the right flapper, take your old one to the hardware store. Compare it to the new ones. Look for a flapper that matches in size and shape. You can also check your toilet’s manual. It might list the correct flapper model. If you are unsure, ask a store employee for help. They can guide you to the right flapper for your toilet.
Question No 4: How do I adjust the chain on my toilet flapper?
Answer: The chain on your toilet flapper should have a little slack. But it should not be too long. If the chain is too short, the flapper will not seal properly. This will cause the toilet to run. If the chain is too long, it can get stuck under the flapper. This will also cause the toilet to run. To adjust the chain, simply move the hook to a different link. Shorten the chain if it is too long. Lengthen the chain if it is too short. Test the toilet after each adjustment. Make sure the flapper seals properly and the flush is strong.
Question No 5: What tools do I need to replace a toilet flapper?
Answer: You do not need many tools to replace a toilet flapper. In most cases, you can do it with just your hands. However, a few tools can make the job easier. You might need pliers to detach the chain. A sponge or cloth is useful for cleaning the flapper seat. A small bucket can catch any extra water. Some people like to wear gloves. This keeps their hands clean. But gloves are not always needed. The most important thing is to turn off the water before you start. Then, follow the steps for how to remove a toilet flapper.
Question No 6: How can I prevent my toilet flapper from leaking in the future?
Answer: There are several things you can do to prevent your toilet flapper from leaking in the future. First, choose a high-quality flapper made of durable material. Silicone flappers tend to last longer than rubber flappers. Second, clean the flapper and flapper seat regularly. This removes any dirt or buildup that can prevent a good seal. Third, adjust the chain properly. Make sure it has the right amount of slack. Fourth, avoid using harsh chemicals in your toilet. These chemicals can damage the flapper. Finally, replace the flapper every few years, even if it is not leaking. This ensures your toilet stays efficient.