Have you ever turned on your outdoor faucet, only to find it leaking? It can be really frustrating, right? Replacing an outdoor faucet might sound hard, but it’s easier than you think. Imagine enjoying a sunny day while watering your garden with a new faucet that works perfectly.
In this article, we will show you how to replace an outdoor faucet step by step. You don’t need to be a plumber to fix this! Many people have done it on their own. Plus, knowing how to replace an outdoor faucet can save you money and secure your home from water damage. Isn’t that a fun fact?
You might wonder if you can handle it. If you’ve changed a lightbulb or used a screwdriver, you can learn this skill too! Let’s dive into the process and help you turn that pesky leak into a smooth-running faucet.
How To Replace An Outdoor Faucet: A Simple Step-By-Step Guide
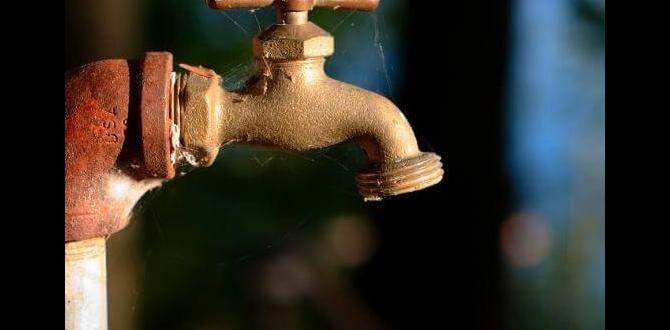
How to Replace an Outdoor Faucet
Replacing an outdoor faucet is simpler than you might think. Start by turning off the water supply to prevent any mess. Next, remove the old faucet by unscrewing it carefully. It’s important to check for any leaks once the new faucet is installed. Did you know changing your faucet can save water? A worn-out faucet could waste gallons! With basic tools and a bit of effort, you can restore your outdoor water flow efficiently.Understanding Outdoor Faucets
Types of outdoor faucets and their uses. Signs that indicate a faucet needs replacement.Outdoor faucets come in several types, each serving a unique purpose. Common ones include the hose bib, which is perfect for watering plants. There’s also the frost-free faucet, great for cold climates. Keep an eye out for signs that tell you it’s time for a change. If your faucet drips like a leaky faucet symphony or has cracks, it’s waving a red flag. This means it’s time for an upgrade!
| Type of Faucet | Use |
|---|---|
| Hose Bib | Perfect for garden hoses. |
| Frost-Free Faucet | Best for winter climates. |
| Wall-Mounted Faucet | Good for tight spaces. |
So, if your faucet is looking sad and leaky, it might just be time for a replacement! Remember, a working faucet can keep your garden happy and flowing.
Tools and Materials Needed
List of essential tools for the replacement process. Recommended materials for a successful installation.Replacing an outdoor faucet is easier with the right tools and materials. Make sure you have these essentials ready:
- Pliers – Useful for gripping and turning.
- Wrench – Helps to loosen or tighten fittings.
- Screwdriver – Needed for removing screws.
- Teflon tape – Seals the connections to prevent leaks.
- New faucet – Choose one that fits your needs.
Gather these items before you start. Having everything handy makes the job much smoother and quicker.
What tools do I need to replace an outdoor faucet?
You need pliers, a wrench, a screwdriver, Teflon tape, and a new faucet.Preparing for Faucet Replacement
Steps to turn off the water supply. Draining the existing faucet to avoid water spillage.First, find the shut-off valve. This is usually near the house, hiding like a shy turtle. Turn it clockwise to stop the water flow. Next, you’ll want to drain the existing faucet to avoid an unexpected splash zone. Just open the faucet and watch the water flow out. If you’re lucky, you might hear it gurgle like it’s having a good laugh! A quick check for leaks can also save you from a slippery surprise later.
| Step | Description |
|---|---|
| 1. Turn Off Water Supply | Find the valve and turn it clockwise. |
| 2. Drain Faucet | Open the faucet for any remaining water to flow out. |
Removing the Old Faucet
Stepbystep instructions for detaching the old faucet. Tips for dealing with rusted or stuck parts.First, turn off the water supply. This will stop any leaks. Next, remove any decorative covers. Use a wrench to loosen the nut that holds the faucet in place. If parts are stuck, try these tips:
- Apply penetrating oil to rusted areas. Wait a few minutes.
- Use pliers for extra grip, but be careful not to damage pipes.
- Tap gently with a hammer to loosen stuck parts.
Once loose, carefully detach the faucet. Keep track of any washers or parts, as you may need them for the new faucet.
What should I do if the faucet is stuck?
If the faucet is stuck, apply oil to rusty areas, wait a bit, and try again. Using pliers or a gentle tap can help too!
Installing the New Faucet
Stepbystep installation guide for the new faucet. Importance of proper sealing and watertight connections.First, gather your tools: a wrench, Teflon tape, and a screwdriver. Turn off the water and remove the old faucet. Next, fit the new faucet to the pipe and use the wrench to tighten the connections. Remember, proper sealing is key. A watertight connection means no leaks later! Wrap Teflon tape around the threads—this is like giving your faucet a cozy blanket. Finally, turn the water back on and check for leaks. If water is tapping on your doorbell, you’ve got a problem!
| Step | Action |
|---|---|
| 1 | Gather your tools |
| 2 | Turn off the water |
| 3 | Remove the old faucet |
| 4 | Install the new faucet |
| 5 | Seal with Teflon tape |
| 6 | Turn the water back on |
Testing the New Faucet
Procedures for checking for leaks after installation. Adjustments to ensure optimal performance.After you’ve installed the new faucet, it’s time for the big test! First, turn on the water and check for any sneaky leaks. A drip can quickly turn into a puddle party, and nobody wants that! If you notice any leaks, simply tighten the connections until they are snug.
Next, let’s make sure your faucet works like a charm. Adjust the handle if needed. A little twist can make a big difference in performance. Remember, no one wants a faucet that acts like it’s auditioning for a comedy show!
| Steps | What to Check |
|---|---|
| 1 | Turn on the water |
| 2 | Look for leaks |
| 3 | Tighten connections |
| 4 | Adjust handle |
Now you’re all set! Enjoy your new faucet without any waterworks drama!
Maintenance Tips for Outdoor Faucets
Routine checks and preventive measures to prolong faucet life. Seasonal tips to protect against weather damage.Keeping your outdoor faucet in good shape is not hard. Regular checks can help catch small problems early. Look for leaks or rust. Clean the faucet to prevent dirt buildup. These steps can help your faucet last longer.
Weather can harm your faucet too. Here are some simple tips to protect it:
- Drain the faucet before winter.
- Use insulation sleeves on cold nights.
- Check for cracks after storms.
Taking care of your faucet can save money on repairs and replacements. Isn’t it nice to have a faucet that works well?
How can I keep my outdoor faucet safe in winter?
To keep your outdoor faucet safe in winter, drain it and cover with insulation.
Conclusion
In conclusion, replacing an outdoor faucet is simple. First, gather your tools and shut off the water. Next, remove the old faucet carefully. Then, install the new one, following instructions closely. Finally, turn the water back on and check for leaks. You can do this! For more tips, consider reading further or watching online tutorials. Happy DIY!FAQs
Sure! Here Are Five Related Questions On The Topic Of Replacing An Outdoor Faucet:When replacing an outdoor faucet, you first need to turn off the water. Look for the valve that controls the water. Next, use a wrench to unscrew the old faucet. After that, put the new faucet in and tighten it. Finally, turn the water back on and check for leaks.
Sure! Please provide the question you want me to answer.
What Tools Do I Need To Replace An Outdoor Faucet?To replace an outdoor faucet, you need a few tools. First, grab a wrench to loosen and tighten the pipes. You also need a screwdriver for screws. A bucket helps catch any water that spills. Finally, some plumber’s tape can help stop leaks.
How Do I Turn Off The Water Supply Before Replacing An Outdoor Faucet?To turn off the water supply, first find the main water valve. This is usually near your house where the water comes in. Turn the valve handle to the right until it stops. Next, go outside and open the faucet. This lets out extra water and helps you when you replace it.
What Are The Steps To Remove The Old Outdoor Faucet?To remove the old outdoor faucet, first, turn off the water supply. Then, use a wrench to loosen the nuts that hold the faucet in place. After that, gently pull the faucet out of the wall. Finally, check the area for any leftover parts or leaks. You’re done!
How Do I Install The New Outdoor Faucet Properly?First, turn off the water supply to your old faucet. Next, use a wrench to take off the old faucet. Then, clean the area where the new faucet will go. After that, fit the new faucet in place and tighten it. Finally, turn the water back on and check for leaks.
Are There Any Tips For Preventing Leaks After Replacing An Outdoor Faucet?To prevent leaks after you replace your outdoor faucet, make sure to check the connections. Tighten the nuts and screws with a wrench, but don’t over-tighten. Use plumber’s tape on the threads to help seal them. Finally, turn the water on slowly to catch any leaks early. If you see water, turn it off and check the parts again!


