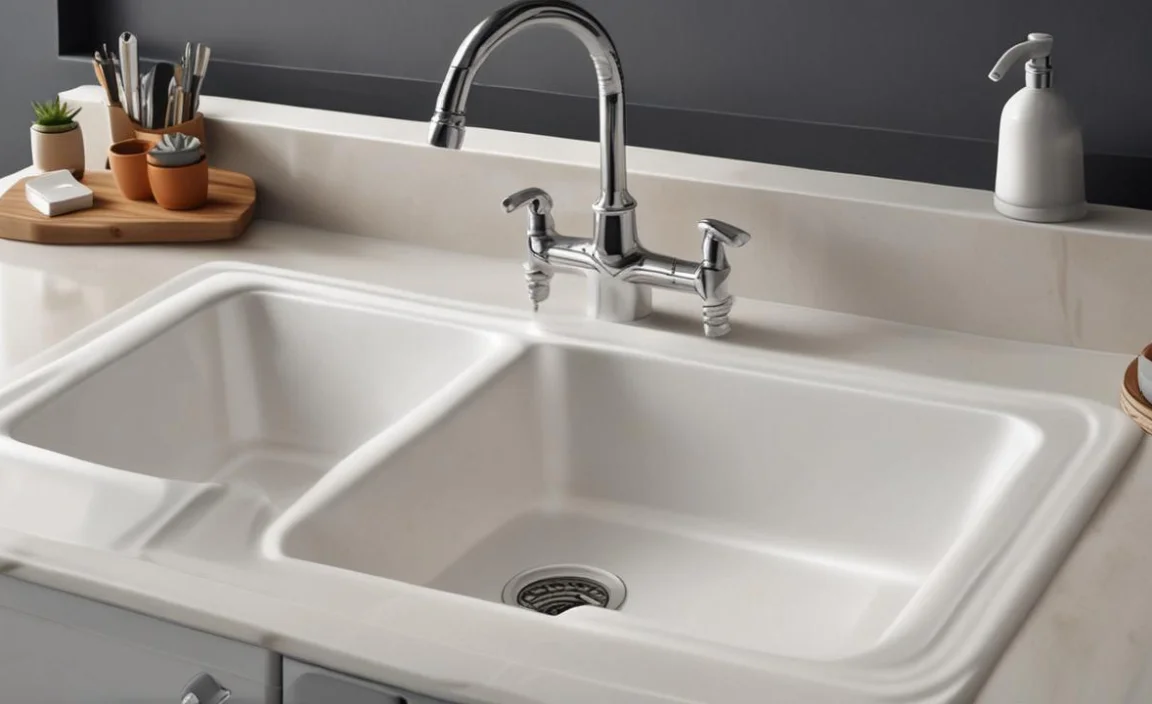
Have you ever seen water leaking from your sink? It can make a big mess. It can also damage your cabinets. Resealing a sink can stop those leaks. It is like giving your sink a new waterproof shield. Learning how to reseal a sink is important for every homeowner.
Why is your sink leaking? The old seal might be cracked. Maybe it has simply worn away over time. Don’t worry, it is easy to fix. We will show you how to reseal a sink. You will save money and keep your kitchen dry.
Key Takeaways
- Resealing a sink prevents water damage and costly repairs.
- Gather tools like a scraper, sealant, and cleaning supplies before you start.
- Clean the area around the sink thoroughly to ensure good sealant adhesion.
- Apply a smooth, even bead of sealant around the sink’s edge for a watertight seal.
- Allow the sealant to fully cure per the manufacturer’s instructions for best results.
How to Prepare to Reseal Your Sink
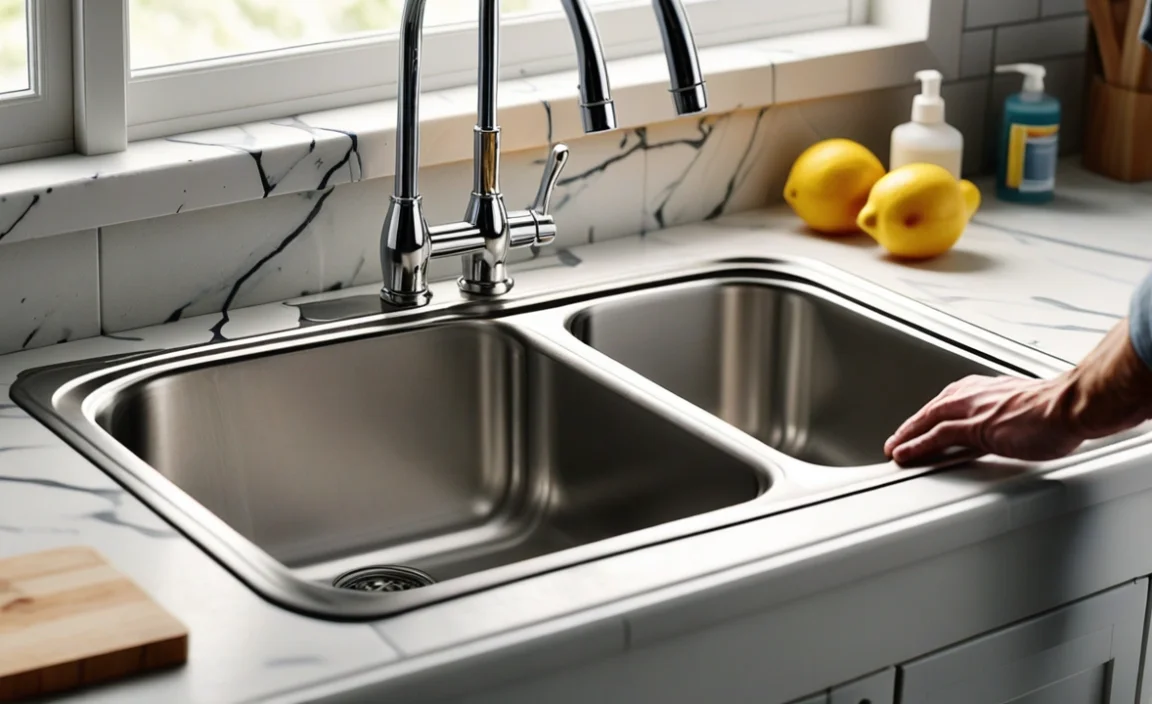
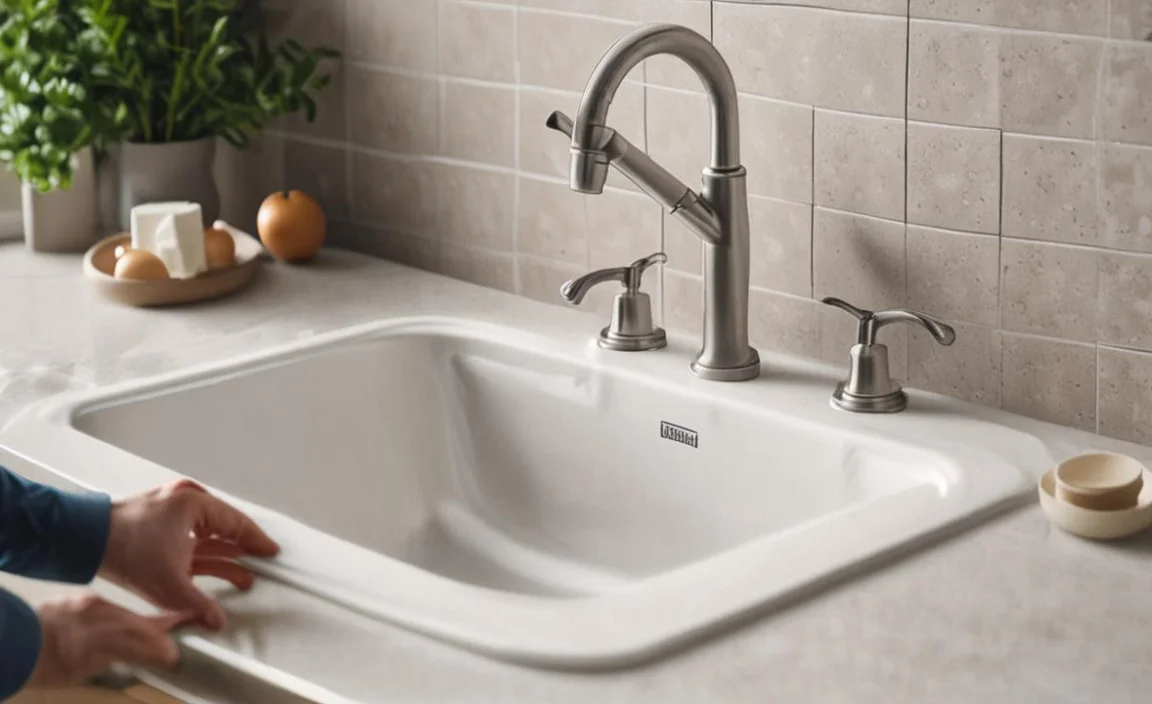
Before you learn how to reseal a sink, you need to prep. This means gathering your tools. You will also need to clean the area. Make sure you have everything ready. This will make the job easier. You will need a scraper to remove old sealant. Get a good quality sealant that is made for kitchens. You should have cleaning supplies ready. A clean surface is important. It helps the new sealant stick better. Do not forget safety gloves and eye protection. These will protect you from chemicals. Preparing well is the first step to a good seal. Now, let’s get everything in order and ready to go!
- Gather a scraper to remove old sealant.
- Get a kitchen-grade sealant.
- Find cleaning supplies.
- Wear safety gloves.
- Protect your eyes.
Cleaning the area is very important. First, dry the area around the sink. Use your scraper to take off old sealant. Be careful not to scratch the sink or countertop. Next, clean the area with a cleaner. This will remove any dirt or grease. Rinse the area well and let it dry. A clean, dry surface is the key. It helps the new sealant stick. Resealing a sink starts with careful prep work. This is a step you do not want to skip. Taking your time here will pay off with a long-lasting seal. Now you are ready to apply the new sealant.
Why is Preparation Important?
Imagine you are painting a wall. Would you paint over dirt and dust? No, you would clean it first. The same is true when resealing a sink. Old sealant, dirt, and grease can stop the new sealant from sticking. A clean surface helps the new sealant bond better. This makes the seal stronger and last longer. Good preparation will prevent leaks. It will also make your new seal look much better. Taking the time to prep well is worth it. You will have a much better result if you do.
Choosing the Right Sealant
Choosing the right sealant is very important. There are many types of sealants. Some are better for kitchens than others. Look for a sealant that is made for wet areas. It should say “kitchen and bath” on the label. Make sure it is also mildew-resistant. This will stop mold from growing. Read the label carefully before you buy. A good sealant will last for many years. Picking the right one is worth the time and effort. It will protect your sink from leaks and damage.
Tools You’ll Need
Having the right tools makes the job easier. You will need a scraper to remove the old sealant. A utility knife can help with this too. You will also need a caulking gun to apply the new sealant. Make sure you have a smooth rag to wipe away extra sealant. Do not forget safety gloves and eye protection. These tools will help you do the job right. They will also keep you safe. Gather all your tools before you start. This will make the job go faster.
Fun Fact or Stat: Did you know that a leaky sink can waste up to 3,000 gallons of water per year? That is like filling a small swimming pool!
Removing the Old Sealant from Your Sink
The next step in how to reseal a sink is removing the old sealant. This can be a bit tricky. Take your time and be careful. You do not want to damage the sink or countertop. Use a scraper or utility knife to loosen the old sealant. Gently work the tool under the edge of the sealant. Then, slowly peel it away. If the sealant is hard, you can use a heat gun to soften it. Be careful not to overheat the area. Once you have removed the old sealant, clean the area again. Make sure there is no residue left. A clean surface is important for the new sealant to stick.
- Use a scraper to loosen old sealant.
- Gently peel away the old sealant.
- Use a heat gun to soften hard sealant.
- Clean the area after removing sealant.
- Remove all residue.
Removing old sealant can be messy. Have a trash can nearby to throw away the old sealant. Work in small sections. This will make it easier to control. If you are having trouble removing the sealant, try using a sealant remover. You can find this at most hardware stores. Follow the instructions on the bottle. Be patient and take your time. Rushing can cause damage. Resealing a sink requires patience. With a little effort, you will have a clean surface ready for new sealant. A clean surface is key to a successful seal.
Techniques for Stubborn Sealant
Sometimes, old sealant can be very stubborn. It might not want to come off easily. If this happens, try using a plastic scraper instead of a metal one. Plastic is less likely to scratch the sink or countertop. You can also try using a special sealant remover. These products are designed to dissolve the sealant. Follow the directions on the bottle carefully. Apply the remover and let it sit for a few minutes. Then, try scraping the sealant again. This should make it easier to remove. Remember to be patient and persistent.
Safety First When Removing Sealant
Safety is very important when removing old sealant. Always wear safety glasses to protect your eyes. Small pieces of sealant can fly off and hurt your eyes. Wear gloves to protect your hands from chemicals and sharp tools. If you are using a heat gun, be careful not to burn yourself. Keep the heat gun moving and do not hold it in one spot for too long. Work in a well-ventilated area. This will help prevent you from breathing in fumes. Following these safety tips will keep you safe while resealing a sink.
What to Do After Removing the Sealant
After you remove the old sealant, you need to clean the area very well. Use a cleaner to remove any leftover residue. You can also use rubbing alcohol to clean the surface. This will help remove any grease or oil. Make sure the area is completely dry before you apply new sealant. Use a clean cloth to wipe the area dry. You can also use a hairdryer to speed up the drying process. A dry, clean surface is essential for a good seal. This step is very important for how to reseal a sink correctly.
Fun Fact or Stat: Professional plumbers often use specialized tools, like oscillating multi-tools, to remove sealant quickly and cleanly.
Applying New Sealant to the Sink

Now that you have removed the old sealant and cleaned the area, it’s time to apply new sealant. This is a very important step in how to reseal a sink. Load your caulking gun with the new sealant cartridge. Cut the tip of the cartridge at a 45-degree angle. This will help you apply a smooth, even bead. Start at one corner of the sink and slowly squeeze the trigger of the caulking gun. Move the gun along the edge of the sink in a smooth, steady motion. Try to apply a consistent bead of sealant. Do not apply too much or too little. You want a nice, even line of sealant around the entire sink.
- Load sealant into a caulking gun.
- Cut the tip at a 45-degree angle.
- Apply a smooth, even bead.
- Move the gun in a steady motion.
- Do not apply too much sealant.
After you apply the sealant, use your finger to smooth it out. Dip your finger in soapy water to prevent the sealant from sticking to your finger. Run your finger along the bead of sealant to create a smooth, clean finish. Wipe away any excess sealant with a damp cloth. Check for any gaps or holes in the sealant. If you see any, apply more sealant to fill them in. Resealing a sink requires a careful eye. A smooth, even bead of sealant will protect your sink from leaks. Take your time and do it right.
The Right Angle for Sealant Application
The angle at which you hold the caulking gun is very important. Hold the gun at a 45-degree angle to the surface. This will help you apply a smooth, even bead of sealant. Keep the gun moving at a consistent speed. Do not stop and start. This can create bumps and unevenness in the sealant. Practice on a piece of cardboard before you start on the sink. This will help you get a feel for the gun and the sealant. The right angle and technique will make a big difference.
Smoothing the Sealant for a Professional Look
Smoothing the sealant is an important step. It gives the seal a professional look. It also helps to ensure a watertight seal. Dip your finger in soapy water before you smooth the sealant. This will prevent the sealant from sticking to your finger. Use light pressure and move your finger along the bead of sealant. Wipe away any excess sealant with a damp cloth. You can also use a special sealant smoothing tool. These tools are designed to create a smooth, even finish. A little effort here will make your sink look great.
What to Do If You Mess Up
Everyone makes mistakes. If you mess up while applying sealant, do not worry. You can fix it. If you apply too much sealant, wipe it away with a damp cloth. If you create a bump or unevenness, smooth it out with your finger. If you leave a gap or hole, apply more sealant to fill it in. If the sealant is not sticking, make sure the surface is clean and dry. You can also try using a different type of sealant. Do not be afraid to start over if you need to. Learning how to reseal a sink takes practice.
Fun Fact or Stat: Some professional sealants can last up to 20 years with proper application and care!
Allowing the Sealant to Cure Properly
After you have applied and smoothed the sealant, you need to let it cure. This is a very important step in how to reseal a sink. Curing means letting the sealant dry and harden. The curing time will depend on the type of sealant you used. Read the instructions on the sealant cartridge. It will tell you how long to let the sealant cure. Usually, it takes about 24 to 48 hours for the sealant to fully cure. During this time, do not use the sink. Keep it dry and undisturbed. This will allow the sealant to form a strong, watertight seal. Patience is key!
- Read the sealant instructions.
- Find the curing time.
- Wait 24 to 48 hours.
- Do not use the sink.
- Keep the area dry.
While the sealant is curing, you can check it periodically. Look for any cracks or gaps that may have formed. If you see any, apply a small amount of sealant to fill them in. Make sure to smooth it out. Keep the area clean and free from dust. Dust can interfere with the curing process. After the sealant has fully cured, you can use the sink. Test the seal by running water around the edges of the sink. Look for any leaks. If you see any leaks, you may need to apply more sealant. Resealing a sink properly ensures a long-lasting seal.
Why Curing Time Matters
Curing time is very important. It allows the sealant to fully harden and bond to the surfaces. If you use the sink before the sealant is fully cured, you can damage the seal. This can lead to leaks and water damage. The curing process is like letting cement dry. It needs time to become strong. Do not rush the curing process. It is worth the wait. A fully cured seal will protect your sink for many years.
Checking the Sealant During Curing
While the sealant is curing, check it regularly. Look for any cracks or gaps. If you find any, fix them right away. This will prevent leaks from forming. You can also check the sealant by pressing on it gently. If it feels soft or sticky, it is not fully cured yet. Keep waiting until it feels firm and dry. Checking the sealant during curing will help you ensure a strong, watertight seal. Resealing a sink requires attention to detail.
What Happens If You Use the Sink Too Soon?
If you use the sink before the sealant is fully cured, bad things can happen. The sealant can crack or peel away. This will create gaps and leaks. Water can seep under the sink and damage your cabinets. You may have to remove the sealant and start over. It is best to be patient and wait for the sealant to fully cure. This will save you time and money in the long run. Following the curing instructions is very important.
Fun Fact or Stat: Some sealants continue to harden and strengthen for up to a week after the initial curing period!
Maintaining Your Sink’s New Seal
Now that you have successfully resealed your sink, it is important to maintain the new seal. This will help it last longer and prevent leaks. Clean the sealant regularly with a mild soap and water. Avoid using harsh chemicals or abrasive cleaners. These can damage the sealant. Check the sealant periodically for any cracks or gaps. If you see any, repair them right away. You can use a small amount of sealant to fill in the cracks. Smooth it out with your finger. Resealing a sink is a task you want to avoid repeating often. Proper maintenance will extend the life of your new seal.
- Clean sealant with mild soap and water.
- Avoid harsh chemicals.
- Check for cracks and gaps.
- Repair cracks with sealant.
- Smooth out any repairs.
Be careful not to bump or scratch the sealant. Sharp objects can damage the seal. If you notice the sealant is starting to peel away, replace it as soon as possible. Do not wait until the leak gets worse. Resealing a sink is easier if you catch problems early. A little maintenance will go a long way. It will keep your sink looking great and prevent water damage. Taking care of your new seal is worth the effort.
Cleaning Tips for Long-Lasting Seals
When cleaning your sink, use a soft cloth or sponge. Avoid using abrasive scrub brushes. These can scratch the sealant and make it wear out faster. Use a mild dish soap and warm water. Rinse the area thoroughly after cleaning. Dry the sealant with a clean cloth. Avoid using harsh chemicals like bleach or ammonia. These can damage the sealant. Regular cleaning will help your seal last longer and look better. Cleanliness is key to a long-lasting seal.
How to Spot Early Signs of Seal Failure
It is important to watch for signs that your seal is failing. Look for small cracks or gaps in the sealant. These can let water seep through. Check for discoloration or mildew growth on the sealant. This can indicate that the sealant is not working properly. Feel the sealant for softness or stickiness. This can mean that the sealant is breaking down. If you see any of these signs, it is time to repair or replace the sealant. Catching problems early will prevent bigger issues. Be vigilant and protect your sink.
Extending the Life of Your Sink Seal
To extend the life of your sink seal, avoid putting too much weight on the edge of the sink. This can put stress on the sealant and cause it to crack. Do not pour boiling water directly onto the sealant. This can soften the sealant and make it wear out faster. Keep the area around the sink dry. Excess moisture can damage the sealant. Following these tips will help your seal last longer. Protecting your sink is easy with a little care.
Fun Fact or Stat: The type of water you use can affect your sealant. Hard water with high mineral content can degrade sealant faster than soft water.
Troubleshooting Common Sink Seal Problems
Sometimes, even with the best efforts, problems can arise after you reseal a sink. Knowing how to troubleshoot these issues can save you time and money. One common problem is leaks. If you see water leaking around the sink, check the sealant for cracks or gaps. Apply more sealant to fill in any openings. Another issue is mold or mildew growth. Clean the area with a mildew cleaner. Make sure to dry the area thoroughly. If the problem persists, you may need to replace the sealant. Addressing problems quickly will prevent further damage.
| Problem | Possible Cause | Solution |
|---|---|---|
| Leaks | Cracks or gaps in sealant | Apply more sealant |
| Mold/Mildew | Excess moisture | Clean with mildew cleaner |
| Sealant peeling | Poor adhesion | Reapply sealant after cleaning |
| Discoloration | Harsh chemicals | Use mild soap and water |
If the sealant is peeling away from the sink, it may be due to poor adhesion. Make sure you cleaned the area thoroughly before applying the sealant. You may need to remove the old sealant and reapply new sealant. If you are still having problems, consult a professional plumber. They can help you diagnose and fix the issue. Resealing a sink can be tricky. Do not be afraid to ask for help if you need it. Learning from mistakes will improve your skills.
Dealing with Persistent Leaks
If you have persistent leaks after resealing a sink, double-check your work. Make sure you applied a thick enough bead of sealant. Check for any hidden cracks or gaps. Sometimes, leaks can come from other sources, like the drainpipe. Inspect the drainpipe for leaks and tighten any loose connections. If the leaks continue, it may be a sign of a more serious problem. Call a plumber to inspect your sink and plumbing.
Preventing Mold and Mildew Growth
Mold and mildew can grow in damp areas around your sink. To prevent this, keep the area clean and dry. Wipe up any spills or splashes right away. Use a mildew-resistant sealant. This will help prevent mold from growing. Ventilate the area by opening a window or using a fan. If you see mold or mildew, clean it with a mildew cleaner. Follow the instructions on the bottle carefully. Keeping your sink area clean and dry will stop mold.
When to Call a Professional
Sometimes, resealing a sink is best left to the professionals. If you are not comfortable doing the job yourself, call a plumber. If you have tried resealing the sink and it is still leaking, call a plumber. If you notice any signs of serious water damage, such as mold or rotting wood, call a plumber. A professional plumber can diagnose and fix the problem quickly and efficiently. They have the tools and expertise to get the job done right. Do not hesitate to ask for help when you need it.
Fun Fact or Stat: Some professional plumbers use infrared cameras to detect hidden leaks behind walls before they cause major damage.
Summary
Resealing a sink is a simple way to prevent water damage. Start by gathering your tools. You will need a scraper, sealant, and cleaning supplies. Remove the old sealant carefully. Clean the area thoroughly. Apply a smooth, even bead of new sealant. Let it cure for 24 to 48 hours. Do not use the sink during this time. Maintain the new seal by cleaning it regularly. Check for any cracks or gaps. Repair them as needed. This will keep your sink looking great and prevent leaks. Taking these steps can extend the life of your sink.
Conclusion
Learning how to reseal a sink is a useful skill. It can save you money on plumbing repairs. It also prevents water damage. Remember to prepare the area well. Remove the old sealant carefully. Apply the new sealant smoothly. Let it cure properly. Maintain the seal regularly. By following these steps, you can keep your sink leak-free. You will also keep your kitchen dry. A little effort goes a long way.
Frequently Asked Questions
Question No 1: How often should I reseal my sink?
Answer: You should reseal your sink every few years. The exact time depends on the sealant you use. Check the sealant regularly for cracks. If you see any cracks, it is time to reseal. Also, if you notice any leaks around the sink, check the seal. Sometimes, you might need to reseal more often if you use harsh cleaners. Regular checks will help you know when how to reseal a sink.
Question No 2: What kind of sealant should I use?
Answer: Use a sealant made for kitchens and bathrooms. Look for a sealant that is mildew-resistant. This will help prevent mold from growing. Silicone sealant is a good choice. It is waterproof and flexible. Read the label carefully before you buy. Make sure it is compatible with your sink and countertop. You can ask for help at the hardware store to choose the right sealant for how to reseal a sink. Choosing the right one will make your seal last longer.
Question No 3: Can I use caulk instead of sealant?
Answer: Caulk is not the same as sealant. Caulk is less flexible. It is also not as waterproof. Sealant is better for areas that get wet, like around a sink. Caulk can crack and dry out over time. Sealant will stay flexible and waterproof. So, use sealant for how to reseal a sink. It will protect your sink better and last longer.
Question No 4: How do I clean the sealant after applying it?
Answer: After you apply the sealant, smooth it out with your finger. Dip your finger in soapy water to prevent sticking. Wipe away any excess sealant with a damp cloth. You can also use a special sealant smoothing tool. These tools help create a smooth, even finish. Clean the area around the sink to remove any sealant residue. A clean finish will make your sink look great after how to reseal a sink.
Question No 5: What if I get sealant on my skin?
Answer: If you get sealant on your skin, wash it off right away. Use soap and water. If the sealant is hard to remove, try using a solvent. Follow the instructions on the solvent bottle. Wear gloves when working with sealant. This will protect your skin. If you have any skin irritation, see a doctor. Safety is important when how to reseal a sink.
Question No 6: How long does it take for sealant to dry?
Answer: Sealant usually takes 24 to 48 hours to dry. The exact drying time depends on the type of sealant. Read the instructions on the sealant tube. It will tell you how long to wait. Do not use the sink while the sealant is drying. This will allow it to form a strong seal. Patience is important. After it is dry, check for leaks. Then, you can use your sink again after how to reseal a sink.
