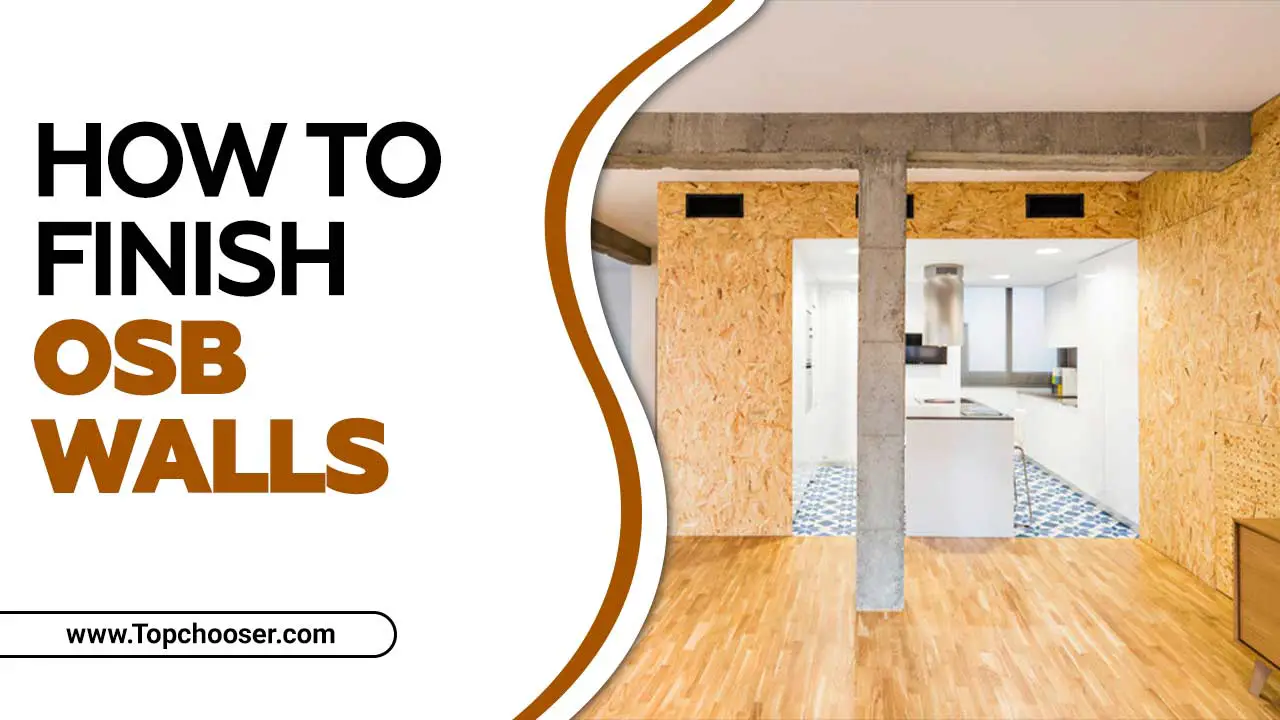
Installing OSB (Oriented Strand Board) on interior walls is common in the construction industry due to its affordability and versatility. Whether a DIY enthusiast or a professional contractor, knowing how to install OSB properly can save you time and money in your next building project. OSB is a type of engineered wood that is made from compressed strands of wood and adhesive.
Here, we will take you through the step-by-step process of installing OSB on interior walls. Starting with what OSB is and why it’s beneficial to use on interior walls, we will go through all the tools and materials needed and the steps required for a successful installation. Read on to learn more about how to install OSB on interior walls.
About OSB and its Role in Interior Walls
OSB, or oriented strand board, is a versatile and cost-effective engineered wood used widely in construction. It provides strength, insulation, and soundproofing when installed on interior walls. Proper preparation and installation techniques, such as measuring and cutting the boards, attaching them to wall studs, and finishing the edges, are crucial for a successful OSB installation. OSB on interior walls offers a clean and modern look while enhancing the overall insulation and soundproofing of the space.
Tools and materials needed for installing OSB on interior walls
Installing OSB (oriented strand board) on interior walls can be a cost-effective way to add structural support and create a smooth, primed finish surface. Before you begin the installation process, gathering all the necessary tools and materials is important. Here’s a list of what you’ll need:
- OSB panels
- Circular or table saw
- Screws or nails
- Screwdriver or nail gun
- Level
9 Steps To Install OSB On Interior Walls
Installing OSB (oriented strand board) on interior walls is relatively straightforward. Always follow the manufacturer’s instructions and local building codes when installing OSB on interior walls. It’s also recommended to wear appropriate safety gear, such as gloves and eye protection, during installation. Installing OSB (oriented strand board) on interior walls can be a cost-effective and durable option for many homeowners. OSB is made from pressed wood strands and adhesive, creating a strong and sturdy material that can be used for various applications, including wall sheathing. Here are the steps to follow to install OSB on interior walls.
Step 1: Gather the Required Materials
Before starting your OSB installation project, it’s crucial to ensure that you have all the necessary materials on hand. This will help you avoid any last-minute trips to the store and make the process smoother. Make a checklist of the materials needed, including tools and supplies, and double-check everything to ensure you’re fully prepared. Gathering the required materials is essential for a successful OSB installation.
Step 2: Prepare the Interior Walls
Preparing the interior walls before installing OSB ensures a smooth and effective installation. It is vital to start by thoroughly cleaning and inspecting the walls for any obstructions or damages that could hinder the installation process. Additionally, checking for any moisture or humidity on the walls and addressing the issue before proceeding with the installation is crucial.
Before installing OSB, experts recommend filling any cracks or holes in the walls and priming them for better adhesion. This will help create a stronger bond between the wall and the OSB, making it less likely for the panels to shift or move over time. Properly preparing your interior walls is key to a successful OSB installation, so take your time and ensure everything is in order before starting the project.
Step 3: Measure and Cut the OSB Sheets
Measuring and cutting OSB sheets with precision is essential to achieve a professional and seamless installation. To minimize wastage, it is critical to use proper measuring techniques and double-check measurements before making any cuts. This will ensure the sheets fit seamlessly, resulting in a visually appealing finish. It is important to cut the sheets accurately to create a smooth surface that can be easily caulked if required. Appropriate tools like a circular saw or jigsaw can help achieve clean cuts and precise edges. Lastly, wearing protective gear like goggles and gloves is advisable while cutting, as the process can generate dust and debris.
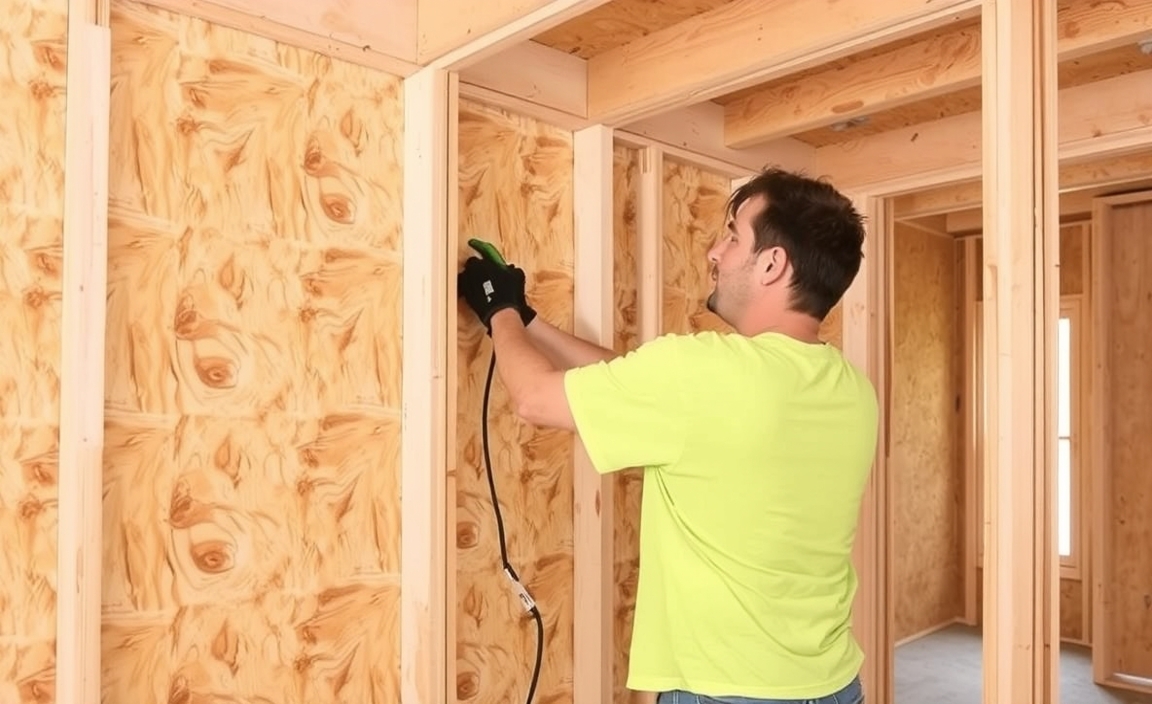
Step 4: Install the First OSB Sheet
Proper installation of OSB sheets is crucial for ensuring a sturdy and durable structure. The first step in the installation process is to install the first sheet securely by aligning it correctly for a level installation. This involves using a level tool to ensure the sheet is straight and even.
Once the first sheet is aligned, it should be attached to the interior entire garage walls using appropriate techniques, such as screws or nails. Ensure you properly space and install them at the right angle to prevent future issues.
After securing the sheet, it’s essential to double-check your work to ensure that there are no gaps or uneven areas. This will help ensure a flawless first installation and establish a strong and reliable structure. Overall, taking proper care during OSB installation can go a long way in ensuring the longevity and safety of your construction project.
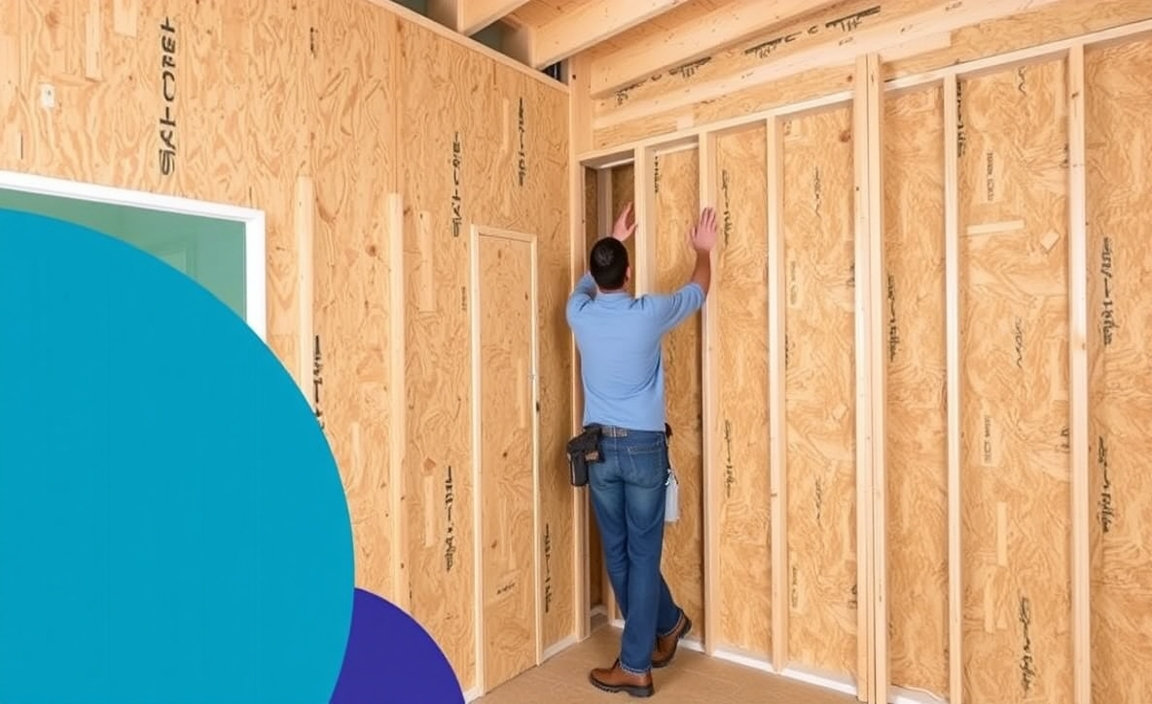
Step 5: Install the Remaining OSB Sheets
To complete the OSB installation, continue adding the remaining sheets while keeping consistent spacing for a polished finish. Make sure to attach each sheet to guarantee a sturdy installation securely. Take your time to align and fit each sheet properly, as this can make all the difference in achieving a smooth finish. Double-check your work to install all sheets correctly and securely fasten them. This will not only ensure the longevity of your installation but also provide a neat and professional look. It’s also important to note that using appropriate tools, such as a circular saw or jigsaw, will help you make precise cuts, resulting in an accurate fit. Finally, clean up any debris or dust left from cutting and installing the boards before moving on to the next stage of your project.
Step 6: Secure the OSB Sheets to the Interior Walls
Properly securing OSB (oriented strand board) sheets to interior walls is critical for ensuring a durable installation. To achieve this, you should use the recommended fasteners and tightly secure each sheet to prevent movement. By following proper installation techniques, you can achieve long-lasting results. Take your time to securely fasten each sheet, as rushing through this step can compromise the integrity of the installation.
When installing OSB sheets, it is important to ensure that they are flush with the wall studs and that there are no gaps between them. You can achieve this by using a level and taking measurements before securing each sheet.
Step 7: Fill in any Gaps or Holes
When installing OSB on interior walls, filling in gaps or holes is crucial for a seamless finish. This can be achieved by using the appropriate filler material to address imperfections and ensuring that uneven areas are smoothed out for a professional appearance. Taking time to properly fill in these gaps or holes is essential to ensure a flawless final result. It’s also important to double-check your work and make any necessary adjustments before moving on to the next step of the installation process. Properly filling in gaps and holes improves the finished product’s aesthetics and ensures the installation is structurally sound and long-lasting.
Step 8: Sand and Smooth the OSB Surface
Achieving a polished finish on an OSB surface requires sanding and smoothing. Using appropriate sanding tools and techniques is important to achieve optimal results. Removing rough edges and imperfections is necessary to attain a professional look. Taking enough time to sand and smooth the entire wall surface thoroughly is crucial for a smooth and even finish. Verifying your work is advisable to ensure the desired result has been achieved. Additionally, it would be best to protect yourself by wearing protective gear such as gloves, goggles, or a face mask while sanding.
Step 9: Apply Primer and Paint (Optional)
To improve the overall look of your OSB walls, it is recommended to apply primer and paint. Begin by selecting a primer appropriate for OSB surfaces and applying a smooth and even coat to improve the adhesion of the paint. For a professional finish, follow proper painting techniques, such as using a high-quality brush or roller and allowing sufficient drying time between coats. Once you’ve completed the painting process, double-check your work for imperfections to achieve a flawless paint finish. You should note that while white paint can add aesthetic value to your walls, you should undertake regular maintenance to avoid any damage caused by moisture or other environmental factors.
Benefits of Installing OSB on Interior Walls
There are several benefits to installing OSB (oriented strand board) on interior walls. OSB is a cost-effective alternative to traditional plywood and offers similar strength and durability. It is also more moisture-resistant, making it a great choice for areas prone to high humidity or water exposure, such as bathrooms or basements. Additionally, you can easily work with OSB and cut, drill, and fasten it using standard tools and techniques. Its smooth surface makes it ideal for painting or applying finishes, allowing you to customize the look of your interior walls. Whether you are renovating your home or building from scratch, installing OSB on your interior walls can provide numerous benefits in terms of cost, durability, and versatility.
Tips and tricks for a successful OSB installation on interior walls
Installing OSB (oriented strand board) on interior walls can be a cost-effective and durable option for many homeowners. By following these tips, you can achieve a successful OSB installation on your interior walls, creating a sturdy and visually appealing result that will stand the test of time. Here are some tips and tricks to ensure a successful OSB installation:
- Measure and cut accurately: Take precise measurements of your interior walls and cut the OSB panels accordingly. Use a straight edge and circular saw to make clean, straight cuts.
- Secure the panels properly: Use construction adhesive or nails to secure the OSB panels to the wall studs. It’s important to distribute fasteners along the edges evenly and in the field of each panel to ensure proper stability.
- Leave expansion gaps: Allow for expansion and contraction by leaving small gaps between panels. This will help prevent buckling or warping over time.
- Reinforce corners and edges: Install corner braces or metal plates at the corners to provide extra strength and stability. Additionally, consider adding trim or moldings along the edges of the OSB panels for a finished look.
- Seal and prime: Seal any visible horizontal seams or gaps with caulk or wood filler before painting or finishing the OSB. Apply a primer suitable for OSB to create a smooth paint or finish surface.
Frequently Asked Questions
How do you attach OSB to a wall?
To attach OSB (oriented strand board) to a wall, measure and cut the panels to fit the wall. Use construction adhesive on the back of the OSB panels and then nail or screw them into the wall studs at regular intervals.
Can OSB be handy for interior walls?
OSB (oriented strand board) can be handy for interior internal walls as a cost-effective alternative to traditional drywall compounds. It offers good structural support, can be painted or finished, and provides a rustic look when exposed.
How do you finish OSB interior walls?
To finish OSB interior walls, start by sanding rough areas and filling in gaps with wood filler. Apply a primer to the walls, followed by two coats of paint. Alternatively, you can cover the OSB with ceiling drywall or paneling for a smoother finish.
What thickness of OSB is used for walls?
The most commonly used thickness of oriented strand board (OSB) for walls is 7/16 inch. This thickness provides a good balance of strength and cost-effectiveness for wall sheathing applications.
Is OSB or plywood better for walls?
OSB (oriented strand board) is typically better for walls due to its strength, cost-effectiveness, and moisture resistance. Pressed wood strands come from it, and engineers design it for structural stability, making it a preferred choice for wall sheathing in construction.
Conclusion
Installing OSB on interior walls is a practical and cost-effective way to enhance the strength and durability of your walls. Whether you’re renovating your home or building from scratch, OSB provides a solid foundation for your interior walls. By following the step-by-step guide here, you can confidently install OSB and achieve professional-looking results. With its versatility and affordability, OSB is an excellent choice for homeowners and contractors alike. Ready to get started? Refer back to this blog whenever you need guidance during the installation process. Transform your interior walls with OSB and enjoy the benefits of a sturdy and long-lasting finish.
Resource:
Understanding Wood-Based Panels: https://www.engineeredwood.org/wood-based-panels
Interior Wall Moisture Management Tips: https://www.energy.gov/energysaver/moisture-control-basements
Safe Sawing Techniques for DIY Projects: https://www.familyhandyman.com/project/circular-saw-safety-tips/
Choosing the Right Primer for Wood Surfaces: https://www.bobvila.com/articles/best-primer-for-wood/

I am passionate about home engineering. I specialize in designing, installing, and maintaining heating, ventilation, and air conditioning systems. My goal is to help people stay comfortable in their homes all year long.