Ever feel a little guilty about tossing those banana peels and coffee grounds into the trash? You’re not alone! It’s a common kitchen dilemma, but there’s a simple, eco-friendly solution: composting. Don’t worry if it sounds complicated; this guide is designed to make kitchen composting super easy, right from the start. We’ll walk you through every step, so you can turn your food scraps into garden gold. Get ready to discover how simple and rewarding it can be!
Why Start Kitchen Composting?
Composting might seem like a big undertaking, but it’s really just nature’s way of recycling. When you compost, you’re taking organic waste that would otherwise end up in a landfill and turning it into nutrient-rich soil. This “black gold” is amazing for your garden, helping plants grow stronger and healthier. Plus, it’s a fantastic way to reduce your household waste and do your part for the planet.
Benefits at a Glance
- Reduces Landfill Waste: Food scraps can make up a significant portion of household trash.
- Creates Nutrient-Rich Soil: Your garden will thank you for the boost!
- Improves Soil Health: Compost helps soil retain moisture and air.
- Saves Money: You’ll buy less fertilizer and soil amendments.
- Eco-Friendly: Reduces methane gas emissions from landfills.
What Can You Compost (and What to Avoid)?
This is where many people get a little confused. It’s pretty straightforward once you know the basics. Think of compostable items as “greens” (nitrogen-rich) and “browns” (carbon-rich). You need a good balance of both for successful composting.
The “Go” List: What to Compost
- Fruits and Vegetables: Peels, cores, rinds, scraps.
- Coffee Grounds and Filters: A great source of nitrogen.
- Tea Bags: Remove any staples or plastic tags.
- Eggshells: Rinse and crush them first.
- Yard Waste: Grass clippings, leaves, small twigs (especially for outdoor bins).
- Paper Products: Uncoated shredded newspaper, paper towels, cardboard (tear into small pieces).
- Grains and Bread: Cooked grains like rice or pasta, stale bread.
The “No-Go” List: What to Avoid
- Meat, Fish, and Bones: These attract pests and can create foul odors.
- Dairy Products: Milk, cheese, yogurt – also attract pests and smell bad.
- Oily Foods: Salad dressings, cooking oils, greasy residues.
- Diseased Plants: To avoid spreading plant diseases.
- Weeds with Seeds: Unless you have a very hot compost pile, seeds can survive.
- Pet Waste: Cat and dog feces can contain harmful pathogens.
- Treated Wood or Sawdust: Chemicals can harm your compost and garden.
- Glossy or Coated Paper: Like magazines or junk mail with shiny coatings.
Choosing Your Kitchen Composting Method
The best method for you depends on your space, how much food waste you generate, and your personal preference. Here are a few popular options for beginners:
1. Countertop Compost Bin
This is a small, often stylish bin that sits on your kitchen counter. It’s perfect for collecting scraps throughout the day before you take them to your main compost area (or to your curb for collection, if available).
- Pros: Convenient for daily use, reduces trips to the outdoor bin, can be odor-controlled with filters.
- Cons: Small capacity, needs to be emptied regularly.
2. Indoor Worm Composting (Vermicomposting)
This method uses special composting worms (red wigglers) to break down food scraps in a contained bin, typically kept indoors or in a sheltered outdoor spot. It’s very effective and produces nutrient-rich worm castings.
- Pros: Great for smaller spaces like apartments, very efficient, produces high-quality fertilizer (worm castings).
- Cons: Requires specific worms, can be intimidating for some, needs careful temperature control if outdoors. Learn more about the amazing process of vermicomposting from the EPA.
3. Outdoor Compost Bin or Pile
This is the most traditional method. You can buy a ready-made bin, build your own, or simply create a pile in a corner of your yard.
- Pros: Can handle larger volumes of waste, less odor concern as it’s outside.
- Cons: Requires yard space, takes longer to break down materials than some indoor methods.
4. Bokashi Composting
This is a unique pre-composting method that ferments food waste using a special bran inoculated with microbes. It can handle meat and dairy, and the fermented material is then buried in soil or added to a traditional compost pile to finish breaking down.
- Pros: Can compost all food scraps (including meat/dairy), fast initial processing, no bad odors during fermentation.
- Cons: Requires special Bokashi bran and airtight bins, the fermented material needs further decomposition.
Step-by-Step: Setting Up Your Kitchen Compost System
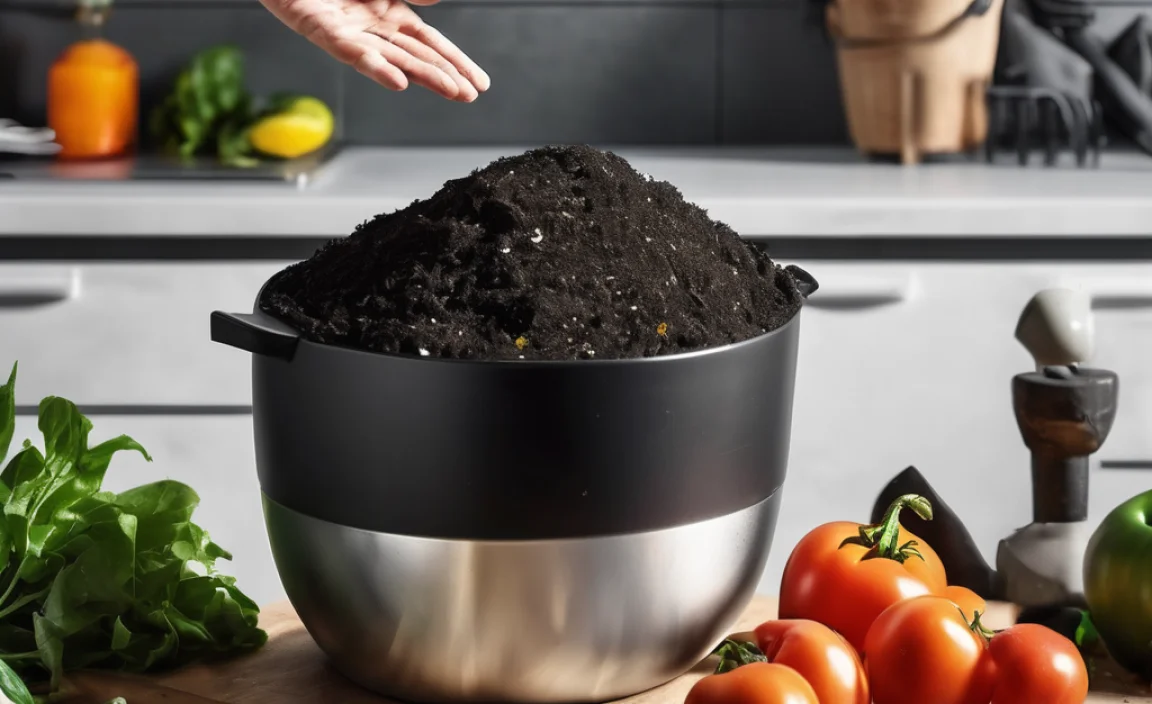
Let’s get practical! Here’s how to start, focusing on the most common beginner setup: a countertop bin for collecting and an outdoor bin for the main composting process.
Step 1: Gather Your Supplies
You don’t need much to get started. Here’s a basic shopping list:
- Kitchen Countertop Compost Bin: Look for one with a charcoal filter to control odors.
- Larger Outdoor Compost Bin or Materials to Build One: This could be a purchased tumbler, a multi-chamber bin, or even just chicken wire to create a simple enclosure. Or, if you have the space and a sunny spot, a simple pile works too!
- Compost Aeration Tool (Optional but Recommended): A pitchfork or a specialized compost aerator helps turn and mix the pile.
- Kitchen Gloves: For handling scraps and your compost.
- A Small Trowel or Shovel: For burying scraps in your outdoor bin.
Step 2: Set Up Your Collection System
Place your countertop bin in a convenient spot, like next to your sink or on your prep counter. Line it with a compostable bag if you prefer, or just empty it directly as needed.
Step 3: Choose Your Outdoor Location
If you’re using an outdoor bin or pile, pick a spot that’s:
- Accessible: Easy to get to with your kitchen scraps.
- Well-drained: You don’t want your compost sitting in a puddle.
- Partially Shaded: Direct, intense sun can dry out the pile too quickly, while full shade might keep it too wet.
- Away from Your House (if concerned about pests/odors): Although proper composting minimizes these issues.
Step 4: Start Adding to Your Outdoor Bin
This is where the magic happens. You’ll be layering your “greens” (food scraps from your kitchen bin, grass clippings) and “browns” (dry leaves, shredded newspaper, cardboard). A good general rule of thumb is to aim for a ratio of about two to three parts “browns” to one part “greens” by volume.
How to Layer:
- Start with Browns: Lay down a base layer of dry leaves, straw, or shredded cardboard in your bin. This helps with aeration and drainage.
- Add Your Kitchen Scraps (Greens): Empty your countertop bin directly onto the brown layer.
- Cover with Browns: Crucially, always cover your fresh kitchen scraps with a layer of brown material. This is key to preventing odors and deterring pests.
- Repeat: Continue layering greens and browns as you add waste.
Step 5: Maintain Your Compost Pile
Composting isn’t a set-it-and-forget-it task, but it doesn’t require constant attention either. Here’s what you need to do:
- Moisture: Your compost pile should be as damp as a wrung-out sponge. If it’s too dry, things won’t break down. If it’s too wet, it can get slimy and smelly. Add water if dry, or more browns if too wet.
- Aeration (Turning): This is one of the most important steps for faster composting and preventing smells. Turning the pile mixes everything, introduces oxygen, and helps the microorganisms work their magic. Aim to turn it every 1-2 weeks. You can use a pitchfork to move material from the outside to the inside and vice-versa. If you have a compost tumbler, just give it a good spin!
- Temperature: A healthy compost pile will heat up in the center as the microbes do their work. This heat is good – it helps kill weed seeds and pathogens.
The “Greens” and “Browns” Ratio Explained
Getting the balance right between nitrogen-rich “greens” and carbon-rich “browns” is the secret to a happy compost pile. Think of them as the fuel (greens) and the structure/air (browns) for your compost ecosystem.
Here’s a table to help you visualize:
| “Greens” (Nitrogen-Rich) | “Browns” (Carbon-Rich) |
|---|---|
| Fruit & Vegetable Scraps | Dry Leaves |
| Coffee Grounds & Tea Bags | Shredded Newspaper & Cardboard |
| Grass Clippings | Straw or Hay |
| Plant Trimmings (Soft) | Wood Chips or Sawdust (untreated) |
| Manure (herbivore) | Egg Cartons (torn up) |
Why the Ratio Matters:
- Too many greens: The pile can become too wet, dense, and smelly (like ammonia).
- Too many browns: The pile will be too dry and break down very slowly.
The 2:1 to 3:1 ratio of browns to greens (by volume) is a great starting point. Don’t stress about being perfectly precise; you’ll learn to eyeball it as you go. If it smells yeasty or ammoniated, add more browns. If it’s slow or dry, add more greens or moisture.
Troubleshooting Common Kitchen Composting Issues
Even with the best intentions, you might run into a few bumps. Here’s how to fix common composting problems:
Problem: The compost smells bad (like rotten eggs or ammonia).
- Cause: Too many greens, not enough air, or too wet.
- Solution: Add more brown materials (leaves, shredded paper). Turn the pile thoroughly to aerate it. If it’s very wet, try adding dry browns and turning.
Problem: The compost is attracting pests (flies, rodents).
- Cause: Exposed food scraps, meat/dairy in the compost, or pile is too wet.
- Solution: Always cover fresh kitchen scraps with a thick layer of brown material. Ensure you are not adding meat, dairy, or oily foods to an open-air pile. If using a bin, make sure it has a secure lid. Some pests might be attracted to the moisture, so ensure it’s not waterlogged.
Problem: The compost is not breaking down (slow or no activity).
- Cause: Too dry, not enough greens, or pile is too cold.
- Solution: Add water to moisten the pile. Add more “green” materials (food scraps, grass clippings). Turn the pile to mix and aerate. In cooler weather, a well-built pile will still compost, but more slowly. Insulating your bin with straw can help.
Problem: The compost is too wet and slimy.
- Cause: Too many “greens” or too much rain/water.
- Solution: Add a generous amount of dry brown materials (shredded cardboard, dry leaves, sawdust). Turn the pile well to incorporate the browns and improve drainage and aeration. If it’s in an open bin, consider covering it during heavy rain.
For more in-depth troubleshooting and best practices, resources like the Grounds for Change Composting Guide offer valuable insights.
When is Compost Ready?
Patience is a virtue when it comes to compost! Typically, compost can take anywhere from a few months to a year to be ready, depending on your method, the materials you use, and how often you turn it. You’ll know your compost is ready when:
- It resembles dark, crumbly soil or humus.
- It has a pleasant, earthy smell.
- The original materials are no longer recognizable.
- The temperature of the pile has cooled down.
Your finished compost is a fantastic soil amendment. You can use it to:
- Mix into garden beds before planting.
- Top-dress around existing plants.
- Use in potting mixes for containers.
Conclusion
See? Kitchen composting isn’t nearly as daunting as it might seem. By following these simple steps, choosing the right method for your home, and paying attention to the balance of your
FAQ: Your Kitchen Composting Questions Answered
We’ve compiled answers to some of the most common questions beginners have about kitchen composting.
Q1: Do I really need a special bin for kitchen scraps? Can’t I just put them straight into the main compost?
A: While you can put scraps straight into your main compost, a countertop bin makes it much more convenient. It holds a day or two’s worth of scraps, preventing you from having to go directly to your outdoor bin every time you peel a carrot. Many have filters to keep odors contained in your kitchen.
Q2: Will my kitchen compost smell up my house?
A: Not usually, if done correctly! Using a bin with a charcoal filter and making sure to cover fresh scraps with browns in your main compost pile are key. If you notice odors, it’s usually a sign your main pile is too wet or has too many nitrogen-rich materials.
Q3: How often do I need to turn my compost pile?
A: For faster composting, turning it every 1-2 weeks is great. If you’re less concerned about speed, turning it once a month or even less is still effective, just slower. Tumblers can be spun daily or weekly.
Q4: Can I compost citrus peels and onions?
A: Yes, you can! While they can sometimes slow down decomposition due to their acidic nature, in a well-balanced and actively managed compost pile, they will break down just fine. Just be sure to balance them with plenty of brown materials.
Q5: What if I live in an apartment and don’t have a yard?
A: No yard? No problem! Worm composting (vermicomposting) or Bokashi composting are excellent indoor options. You can also look for local community composting programs or municipal services that collect food scraps. Some farmers’ markets have drop-off points.
Q6: How do I know if my compost is “hot” or “cold”?
A: A “hot” compost pile heats up significantly in the center (130-160°F or 55-70°C) due to rapid microbial activity. This breaks down materials quickly and kills pathogens. A “cold” pile composts much more slowly and doesn’t get very warm. While hot composting is faster, cold composting still produces valuable compost over a longer period.
Q7: Can I just buy compost instead of making it?
A: Absolutely! If making your own compost feels like too much right now, you can certainly buy compost from garden centers or nurseries. However, making your own is a very rewarding way to reduce waste and create a customized, high-quality soil amendment for your plants.
.lwrp.link-whisper-related-posts{
margin-top: 40px;
margin-bottom: 30px;
}
.lwrp .lwrp-title{
}.lwrp .lwrp-description{
}
.lwrp .lwrp-list-container{
}
.lwrp .lwrp-list-multi-container{
display: flex;
}
.lwrp .lwrp-list-double{
width: 48%;
}
.lwrp .lwrp-list-triple{
width: 32%;
}
.lwrp .lwrp-list-row-container{
display: flex;
justify-content: space-between;
}
.lwrp .lwrp-list-row-container .lwrp-list-item{
width: calc(25% – 20px);
}
.lwrp .lwrp-list-item:not(.lwrp-no-posts-message-item){
max-width: 150px;
}
.lwrp .lwrp-list-item img{
max-width: 100%;
height: auto;
object-fit: cover;
aspect-ratio: 1 / 1;
}
.lwrp .lwrp-list-item.lwrp-empty-list-item{
background: initial !important;
}
.lwrp .lwrp-list-item .lwrp-list-link .lwrp-list-link-title-text,
.lwrp .lwrp-list-item .lwrp-list-no-posts-message{
}@media screen and (max-width: 480px) {
.lwrp.link-whisper-related-posts{
}
.lwrp .lwrp-title{
}.lwrp .lwrp-description{
}
.lwrp .lwrp-list-multi-container{
flex-direction: column;
}
.lwrp .lwrp-list-multi-container ul.lwrp-list{
margin-top: 0px;
margin-bottom: 0px;
padding-top: 0px;
padding-bottom: 0px;
}
.lwrp .lwrp-list-double,
.lwrp .lwrp-list-triple{
width: 100%;
}
.lwrp .lwrp-list-row-container{
justify-content: initial;
flex-direction: column;
}
.lwrp .lwrp-list-row-container .lwrp-list-item{
width: 100%;
}
.lwrp .lwrp-list-item:not(.lwrp-no-posts-message-item){
max-width: initial;
}
.lwrp .lwrp-list-item .lwrp-list-link .lwrp-list-link-title-text,
.lwrp .lwrp-list-item .lwrp-list-no-posts-message{
};
}

I am passionate about home engineering. I specialize in designing, installing, and maintaining heating, ventilation, and air conditioning systems. My goal is to help people stay comfortable in their homes all year long.

