Sheet composting, also known as sheet mulching or lasagna gardening, is a fantastic way to build healthy soil right in your garden. It’s like giving your garden a nutritious meal! However, sometimes things don’t go exactly as planned. If you’ve found yourself scratching your head over a sheet composting situation that’s not quite working, don’t worry! You’re not alone, and I’m here to help. We’ll walk through the common hiccups and figure out how to fix them, so you can get back to enjoying your garden.
Sheet Composting Problems: Essential Solutions
Hey there, fellow backyard enthusiasts! Troy D Harn here, your go-to friend for all things home, garden, and DIY. Today, we’re diving into a topic that can sometimes leave us a bit stumped: sheet composting problems. If you’ve tried sheet composting, you know how rewarding it can be – creating rich, dark compost right where you want it, no turning required! But sometimes, our DIY efforts hit a snag. Maybe your layers aren’t breaking down, or perhaps you’re seeing some unwelcome visitors. It’s totally normal, and thankfully, these issues usually have simple, practical solutions. Let’s troubleshoot together and get your sheet compost pile working for you!
What is Sheet Composting Anyway?
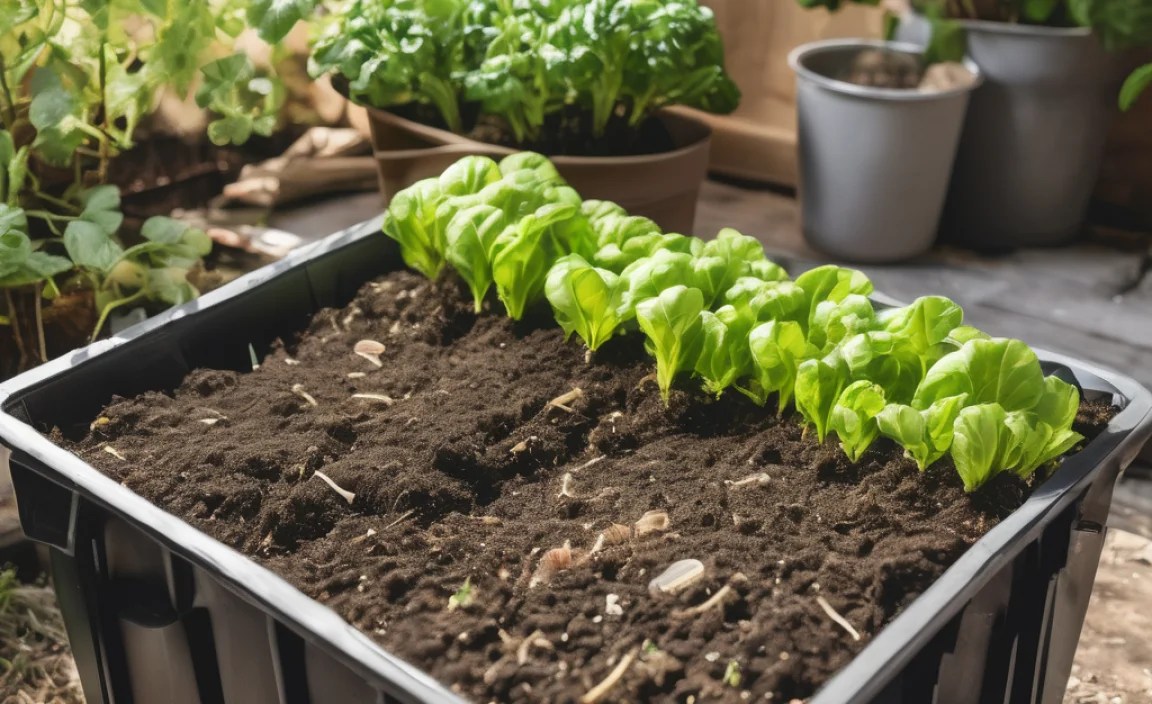
Before we tackle the problems, let’s do a quick refresher. Sheet composting is a no-dig method that layers organic materials directly onto the ground. Think of it like building a lasagna for your soil! You start with a base layer, then alternate “green” (nitrogen-rich) and “brown” (carbon-rich) materials, perhaps adding a cardboard or newspaper layer in between. Over time, these layers break down, enriching the soil beneath and creating a beautiful, fertile garden bed. It improves soil structure, conserves moisture, and suppresses weeds. It’s a fantastic, low-effort way to build healthy soil.
Common Sheet Composting Problems and How to Solve Them
Even the best gardeners encounter issues. Don’t let a problem discourage you! Most sheet compost challenges are easily fixed with a little know-how. Let’s break down what might be going wrong and how to set it right.
Problem 1: My Sheet Compost Isn’t Breaking Down
This is probably the most common issue. You’ve carefully layered your materials, and you’re expecting magic, but things are just… sitting there. What happened?
Why it happens:
- Lack of Moisture: Microbes, the tiny workers in your compost, need water to do their job. If your pile is too dry, they slow down or stop working.
- Too Many Brown Materials (Carbon): Compost piles need a good balance of “green” (nitrogen-rich) and “brown” (carbon-rich) materials. If you have way too many browns (like dry leaves or cardboard), the decomposition process can stall because there isn’t enough nitrogen to fuel the microbial activity.
- Materials Are Too Large: If your layers are huge chunks of material, it takes much longer for them to break down.
- Cold Weather: Decomposition slows down significantly in cold temperatures.
Essential Solutions:
- Add Water: The easiest fix! Give your sheet compost pile a good, thorough soaking. You want it to be damp like a wrung-out sponge, not soggy. You can use a hose with a sprinkler attachment or even a watering can.
- Add More Green Materials: If you suspect a carbon-heavy pile, add some nitrogen-rich materials. Great options include fresh grass clippings, kitchen scraps (vegetable and fruit peels, coffee grounds, tea bags), or even a light sprinkling of aged manure. Chop larger green materials.
- Chop Materials: If you notice large, intact pieces, break them down. Smaller pieces have more surface area for microbes to work on, speeding up decomposition. You can chop up large leaves, twigs, or even run over dry leaves with a mower before adding them.
- Be Patient (and Warm it Up): If it’s cold, decomposition will naturally be slower. Once temperatures warm up, things should pick up. You can also add “activators” like finished compost or a bit of manure to introduce a rich population of microbes. Covering the pile with a dark tarp can also help trap heat.
Problem 2: My Sheet Compost Smells Bad (Rotten Eggs or Ammonia)
A healthy compost pile should smell earthy and pleasant. If yours smells like a sewer or ammonia, something’s out of balance.
Why it happens:
- Too Much Green Material (Nitrogen): An excess of nitrogen-rich materials without enough carbon can lead to anaerobic conditions (lack of oxygen) and the production of ammonia gas, causing that strong smell.
- Pile is Too Wet and Compacted: When the pile becomes too saturated and tightly packed, air can’t get in. This creates anaerobic conditions, similar to having too much green material, leading to foul odors as organic matter decomposes without sufficient oxygen.
- Airtight Layers: Sometimes, thick, impermeable layers (like a solid sheet of plastic, though hopefully you’re not using that!) can trap gases and moisture, leading to unpleasant smells.
Essential Solutions:
- Add Brown Materials: To balance out excess nitrogen, add a generous layer of carbon-rich brown materials. Shredded newspaper, dry leaves, straw, or sawdust are excellent choices. Mix them in as best you can.
- Aerate Your Pile: This is crucial for preventing foul odors. If your pile is too wet and compacted, you need to introduce air. Gently fork or turn the top layers of the pile. You can also poke holes into the pile with a stick or a garden fork to allow air to circulate.
- Improve Drainage and Airflow: Ensure your starting layers are not too compacted. If you notice a particularly smushy, wet layer, add some coarser brown material like straw or wood chips to help with aeration and drainage.
- Check Kitchen Scraps: Avoid adding meat, dairy, or oily foods to your compost, as these break down poorly and can attract pests and cause odors.
Problem 3: I’m Seeing Pests (Rats, Mice, Flies)
No one wants unwanted guests in their garden beds! Pests are a common concern, but they can usually be managed with a few adjustments.
Why it happens:
- Exposed Food Scraps: If you have lots of kitchen scraps like fruit and vegetable peels visible on the top layer, they can be a buffet for rodents and insects.
- Certain Ingredients: Meat, dairy, and oily foods are highly attractive to pests.
- Aeration (or Lack Thereof): While aeration is good, a pile that’s too loose and airy might allow pests easier access. Conversely, a pile that’s too compact and anaerobic might still attract certain pests if food is exposed.
- Wrong Location: Placing your sheet compost pile too close to your house or other structures might make it more inviting for pests to explore.
Essential Solutions:
- Bury Kitchen Scraps: Always bury your fresh kitchen scraps deep within a layer of brown materials or under a layer of soil or finished compost. This hides the attractive smells and sights.
- Avoid Problematic Foods: Stick to plant-based kitchen scraps. If you must add meat or dairy, ensure your pile is hot and actively decomposing, or better yet, avoid them altogether in a sheet compost system that’s directly on the ground.
- Cover with Cardboard/Newspaper: A layer of cardboard or newspaper after adding materials can act as a barrier and helps break down too. Ensure it’s slightly damp so it doesn’t blow away but not so wet it seals the pile and prevents airflow.
- Maintain a Good “Brown-to-Green” Ratio: A balanced pile is less attractive to pests. Too much green can lead to smells, and very dry piles can also have issues. Aim for that damp-sponge consistency.
- Consider a “Hot” Compost Layer: If pest issues are severe, consider initiating a “hot” compost pile separately for a while, then using that finished compost to “seed” your sheet compost, ensuring it’s no longer attractive to pests.
- Location, Location, Location: Place your sheet compost pile away from tempting entry points like your house, shed, or compost bins that might be attracting pests.
- Use a Hardware Cloth Barrier: For persistent rodent issues, especially if your site is prone to them, you can lay down a layer of ½-inch hardware cloth (wire mesh) on the ground before you start your sheet composting layers. This is especially effective if you’re building on top of grass.
Problem 4: The Area is Too Wet or Waterlogged
If your sheet compost location is a natural pooling spot for water, it can drown your compost and create anaerobic conditions, leading to smells and slow breakdown.
Why it happens:
- Poor Drainage: The spot you chose naturally collects water.
- Over-watering: While unlikely for sheet compost itself, if you’re watering the surrounding area too much, it can seep into your pile.
- Compacted Soil Beneath: If the soil underneath is heavily compacted, water has nowhere to go.
Essential Solutions:
- Choose a Better Location: This is the most straightforward fix. If possible, move your sheet compost to a slightly elevated spot or an area with better natural drainage.
- Create a Raised Bed: You can build a simple frame (using wood, rocks, or even just mounding soil) to create a slightly raised area for your sheet compost. This helps water run away from the pile.
- Incorporate Coarser Materials: When building your layers, add more coarse brown materials like straw, wood chips, or twigs at the base. These act like a sponge and improve drainage and aeration within the pile.
- Top with Mulch: Once your sheet compost is established and you’re ready to plant, a thick layer of mulch on top (like straw or wood chips) will help regulate moisture and prevent excessive surface saturation.
Problem 5: Weeds Are Still Growing Through
The promise of sheet composting is weed suppression, so if weeds are still making an appearance, it’s frustrating!
Why it happens:
- Insufficient Weed Barrier: The layer meant to smother weeds wasn’t thick or effective enough.
- Weed Seeds on Top: You might have added materials that still contained viable weed seeds, or weed seeds blew onto the pile after it was built.
- Weeds Are Too Established: Very persistent perennial weeds might have the energy to push through thinner layers.
- Not Enough Time: Sometimes, you just need to give the process more time to smother everything.
Essential Solutions:
- Use a Thicker Weed Barrier: When starting your sheet compost, use a substantial layer of cardboard or several layers of newspaper. Ensure there are no gaps, and overlap edges generously. Wetting these layers down helps them stay in place and start smothering immediately.
- Layer Green Materials: A good layer of moist green materials on top of your cardboard or newspaper barrier helps feed the microbes that will break down the barrier and smother existing weeds.
- Add More Layers: If you see weeds, it might be time to add more layers. Adding more “green” materials encourages decomposition and can help bury persistent weeds.
- Top Mulch is Your Friend: Once your sheet compost is ready for planting, maintaining a thick layer of mulch (straw, wood chips, shredded bark) on top will significantly help suppress new weed growth.
- Hand-Weeding Small Sprouts: For any small weeds that do manage to sprout, a quick pull-them-out by hand while they are small is much easier than dealing with a full-blown infestation later.
- Wait it Out: If you’ve built your sheet compost correctly, patience is key. The layers are designed to smother and decompose. Give it adequate time, especially if you’re dealing with tough perennial weeds.
Problem 6: The Pile is Too Dry and Dusty
A dry sheet compost pile is a slow compost pile. Dust can also make it unpleasant to work with.
Why it happens:
- Lack of Water: The most obvious reason – it simply hasn’t been watered enough.
- Too Much Brown Material: A very high ratio of dry, carbon-rich materials will absorb any available moisture.
- Exposure to Sun and Wind: These elements can dry out a pile very quickly, especially if it’s not covered.
- Not Enough “Greens”: Green materials are generally wetter and help maintain moisture.
Essential Solutions:
- Water Thoroughly: This is the first step. Soak the pile. A hose with a good spray setting or a watering wand is perfect for this. Aim to get water deep into the layers.
- Add More Green Materials: Introduce more nitrogen-rich “green” materials like kitchen scraps, fresh grass clippings, or coffee grounds. These are typically moister and will help bring the moisture content up.
- Cover Your Pile: Use a tarp, a thick layer of straw, or even a thick layer of finished compost to help retain moisture.
- Turn the Outer Layers: If the outer layers are particularly dry and dusty, gently turn them into the moister interior of the pile.
- Check for Proper Balance: Ensure you haven’t gone too heavy on the dry brown materials without enough moisture or greens to balance them out.
Key Ingredients for Successful Sheet Composting
To avoid these problems from the start, it’s handy to know what makes a good sheet compost pile. Think of these as your essential toolkit:
The Brown Helpers (Carbon-Rich Materials)
- Shredded newspaper or plain cardboard (great for weed suppression too!)
- Dry leaves
- Straw or hay
- Sawdust or wood shavings (use sparingly as they can tie up nitrogen initially)
- Pine needles
- Twigs and small branches (chopped)
The Green Boosters (Nitrogen-Rich Materials)
- Kitchen scraps (fruit and vegetable peels, coffee grounds, tea bags, eggshells)
- Fresh grass clippings
- Plant trimmings (non-diseased)
- Manure (from herbivores like cows, horses, rabbits, chickens)
- Seaweed
The Foundation (Weed Barrier)
- Cardboard (corrugated is best, remove tape and labels)
- Several layers of newspaper
The Moisture Maintainer
- Water!
- Mulch (straw, wood chips, compost) for the top layer
A good rule of thumb for layering is to aim for roughly 2-3 parts brown to 1 part green. But don’t get too hung up on exact ratios, especially when starting. Observation is your best tool!
Sheet Composting in Action: A Quick Comparison
To help illustrate the benefits and how effective sheet composting can be when done right, let’s look at a comparison of a well-executed sheet compost bed versus one with common issues.
| Feature | Ideal Sheet Compost Bed | Sheet Compost Bed with Problems |
|---|---|---|
| Breakdown Speed | Steady and consistent, layers disappear within 6-12 months. | Slow to no breakdown, materials still recognizable after a year. |
| Odor | Pleasant, earthy smell. | Foul, rotten egg, or strong ammonia smell. |
| Pests | Minimal to none. | Visible signs of rodents, excessive flies, or other pests. |
| Weed Growth | Heavily suppressed, with only occasional small sprouts. | Persistent weeds growing through, especially perennial types. |
| Moisture Level | Consistently damp, like a wrung-out sponge. | Either too dry and dusty, or waterlogged and soggy. |
| Soil Appearance (after breakdown) | Dark, crumbly, rich soil, easy to work with. | Materials still chunky, clumpy, or overly wet/dry soil. |
Tips for Success: Proactive Prevention
The best way to deal with sheet composting problems is to avoid them in the first place! Here are a few tips from my own garden shed:

I am passionate about home engineering. I specialize in designing, installing, and maintaining heating, ventilation, and air conditioning systems. My goal is to help people stay comfortable in their homes all year long.