Maybe you recently changed the transmission of your cars or just changed the rear end. Or suppose your beloved car doesn’t have any driveshaft, and you have only got an oversized driveshaft to use.
Since the driveshaft rotates at such a high speed, even the tiniest imbalance will become apparent when driving. For that reason, you might have to shorten your driveshaft for a better driving experience.
But the ultimate question is, how to shorten a driveshaft? And then, do I require professional help, or should I just do it by myself? This guide will help you get your questions answered and show you the process of shortening a driveshaft. Just to let you know, if you don’t shorten the driveshaft properly, it could become useless. Now let’s get going.

What is Driveshaft?
Driveshaft is a Singapore-based technology company that specializes in the design, development, and distribution of software products and services for the transportation industry. They offer a variety of solutions that include fleet management, transportation management, and traffic management. The company was started as Driveshaft in February 2002.
They were a division of SITO Technologies, and grew to become an independent company during its second year of operations. While they are funded by the Central Provident Fund (CPF), they operate independently with no traditional shareholders or equity holders on board!
Led by CEO, Alvin Yeo and COO, Roy Chow respectively, Driveshaft is currently headquartered in Bedok North , Singapore with sales and support operations in over 10 countries.
Find Out The Right Driveshaft

The transmission or transfer case of your car to the fronts or rear differential is connected through a drive shaft which transmits power to the wheels. That’s why, before getting a driveshaft, be sure you know which one your car needs. Here are some basics for you to remember.
A rear-wheel-drive car is connected to the rear differential with a single driveshaft. But front-wheel-drive cars utilize CV axles instead of drive shafts. Longer vehicles have a two-piece driving shaft. 4WD and certain AWD cars may also have two drive shafts.
When choosing a driveshaft, there are several additional things to take into consideration. The kind of shaft material, diameter, thickness, and length, as well as suitably rated yokes and U-joints, are all aspects you should consider.
Shortening A Driveshaft – A Complete Guide
a) Driveshaft Cost
Front shafts are usually between 150 and 250 dollars; bigger rear shafts start at 250 dollars and can get as high as $400 or more, potentially higher than a two-piece. From 250$ to 2000$, driveshaft costs can be wildly disproportionate, depending on which car you have.
b) Tool Costs
Relying on the quality, you might need 300$ and more to get some decent tools for shortening a driveshaft. You can easily save costs while buying these.
c) Time Needed

If you are handy with auto parts and accustomed to using and fixing them, you won’t need more than an hour. Newbies could need more time whatsoever.
d) Tools
- MIG Welder
- Cutoff Saw
- Angle Iron
- Angle Grinder
- Air Hammer Attachment
- Scuff Pad and A Bevel
- U-joint Snap Ring Pliers
- Magnetic Ground Clamp Attachment
- Aluminum V Blocks
- Dial Indicator
- Optional: TIG Welder
e) Materials
You would need a cost-effective but extremely durable Driveshaft.
How To Shorten A Driveshaft – Steps To Follow
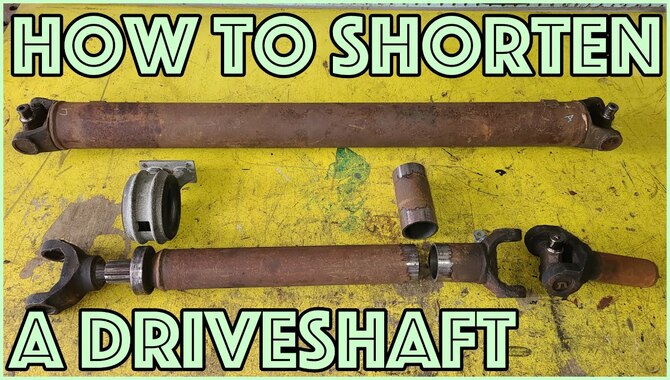
Shortening a driveshaft is a simple procedure, but it must be done with extreme caution. It’s quite delicate work. Any mistakes can create disaster. That’s why we recommend that you proceed with great caution. Now it’s time to get to work.
Step 1: Remove The U – joint Cap

To begin, use the U-joint Snap Ring Pliers to release the ring. Use an Air Hammer Attachment to push the u-joint cap down into the tool using the yoke. The Air Hammer Attachment’s impact will easily remove the u-joint. You may also utilize the hammer and socket method, which usually takes a long time.
Step 2: Mark The Length On The Driveshaft

In this step, make sure you don’t mess up the driveshaft’s balance. Keep an eye on the u-joint to see if it stays in phase. Markdown the driveshaft’s length. Also, mark the two inches you’ll be cutting off from the shaft. Keep the driveshaft in a flat position for measuring it perfectly.
Just to let you know, the suspension should bear the whole weight of the vehicle. To keep the driveshaft straight, use Angle Iron. Not to mention, use the marker to properly make a ring, which will obviously help you in a straight cut.
Now, smoothly install the yoke into the transmission. Make sure it’s in the right place. After that, measure from the center of the transmission to the center of the rear yoke. If you’ve used the yoke before, you’ll notice a ring that indicates where it typically rests. You can quickly measure how much you wish to get rid of using it.
Many people make the mistake of mismeasuring the shaft. As a result, they end up with the incorrect size. Sometimes the shaft could even get damaged.
Step 3: Cut The Driveshaft

You can start cutting after guaranteeing the tube is level and perpendicular to the saw blade. Now you might be wondering why the cat isn’t closer to the yoke. It’s because there are weights reattached. Plus, the bigger diameter portion you’re working on will strengthen the weld.
Step 4: Clean The Edges And Use The Bevel
In this step, start by cleaning the edges with the Angle Grinder to ensure that you can pierce smoothly with the Scuff Pad. The angle could be applied to the end of the tube. Continue to the final step after you feel it is smooth. You can also use Magnetic Ground Clamp Attachment for better penetration.
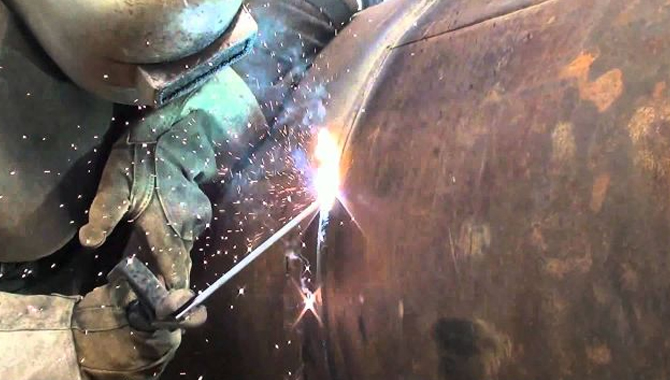
Step 5: MIG Welding

Now, carefully attach the two shaft pieces together. Then, using the MIG welder, begin welding. We highly recommend that you use at least a 185-amp MIG welder for the next stage.
Weld three or four sides of the joint around each other to ensure that it stays together. A couple of MIG tack welds will keep everything in place until you can measure for run out before the final welding.
Step 6: Final Welding
With the temporary driveshaft tack welded together, you must ensure the run-out is within a reasonable amount. To do that, you could use Aluminum V Blocks and the Dial Indicator. Mount the dial indicator on the rear end, and set it against the driveshaft tube to measure the runout.
Scrubbing off any surface rust and applying a little grease to where you have to spin your driveshaft will minimize any rolling resistance making it easier to turn and increasing the accuracy of the measurements. Go ahead and weld it all together. Remember to work on a little portion at a time. You can accomplish the same thing with a MiG welder, but TIG welders have superior heat control.
Also, keep in mind that the wall thickness of the tube is just approximately a sixteenth of an inch. Be careful while using it. When welding, make sure the u-joints are properly aligned. If you fail to do that, it could cause errors in the measurements.
Warnings
For a myriad of purposes, experts advise going to a shop to shorten the driveshaft. Before you begin, there are a few things you should be conscious of. That’s because if you don’t properly maintain them, you’ll most likely damage the driveshaft. The problems are as follows:
Length
The first is, obviously, about preserving the driveshaft’s length. The length is frequently not properly measured. And, there’s nothing to blame. It’s actually quite hard.
Balance
If the incorrect side is cut, the driveshaft’s balance could be lost. Experts say the secret to reducing the length of a drive shaft is to balance it in a proper way. If the rear transmission and rear end seals are not correctly balanced, they will certainly be harmed. You might have to redo the complete transmission and rear end if that happens.
Square
This step is entirely dependent on your expertise. While you’re cutting, do your utmost to make it flawless. If you complete it appropriately, the squareness might be alright.
Welding
The most challenging part is welding. If you’re not confident in your welding abilities, get it welded by someone who is. Also, don’t forget to put on your safety gear.
Finished Driveshaft
There are a few ways to shorten a driveshaft-finished driveshaft:
- Cut the driveshaft at the spline. Splines are the metal connectors that join the shafts together. They are usually cut at a 45-degree angle with a cutting torch, or with a special hammer and chisel. The angle of the cut will determine how short the shaft will be.
- Cut off one end of the driveshaft. This is done most often when it is necessary to shorten a driveshaft by more than 1 inch (2.54 cm). To do this, remove the nut that holds the end on and use a hacksaw to cut through the metal. Make sure to wear safety goggles and gloves, and use a cutting guard to protect your hands and eyes from sparks.
- Rip out the splines. This is done with a torch or an oxy-acetylene welding machine. The heat melts the metal around the splines, causing them to pull out of the shaft easily.
Conclusion
Congratulations! You’ve arrived at your last destination. You successfully completed the task of reducing the length of your driveshaft on your own. I hope you’ve figured out how to reduce the length of a driveshaft. Keep an eye out for whose warnings, and follow the how to shorten a driveshaft instruction carefully. Getting the correct-sized ideal driveshaft will make your travel safer, without a doubt.

Thank you for your sharing. I am worried that I lack creative ideas. It is your article that makes me full of hope. Thank you. But, I have a question, can you help me?