If you’re in the market for a new air compressor, it’s important to ensure you have the proper wiring to power it. A 220-volt air compressor requires a specific wiring diagram for 220 volt air compressor to ensure it runs safely and efficiently.
Whether you’re a DIY enthusiast or a professional mechanic, understanding the wiring diagram for your 220-volt air compressor is crucial to getting the most out of your investment. We’ll look at the wiring diagram for your 220-volt air compressor.
We’ll cover everything from electrical wiring basics to more advanced concepts like voltage drops and wire sizing. By the end of this post, you’ll have a thorough understanding of the electrical requirements for your air compressor and be able to wire it up confidently.
Safety Measures To Consider Before Wiring Diagram
Understanding the electrical requirements of your air compressor is crucial to ensure effective and safe wiring. It is recommended to consult a professional electrician who can guide you on complying with local electrical codes and safely wiring the system. Before attempting to wire a 220-volt air compressor, it is important to consider the following safety measures:
– Turn off the power: Before starting any electrical work, make sure to turn off the power supply to prevent any accidents or electrical shocks.
– Wear protective gear: It is essential to wear appropriate safety gear, such as gloves and safety glasses when working with electricity.
– Use proper wiring methods: Ensure that you are using the correct gauge of wire for your specific air compressor and follow the manufacturer’s instructions for wiring.
– Grounding: Proper grounding is crucial for electrical safety. Make sure to connect the ground wire according to local electrical codes.
– Check for damage: Before connecting any wires, inspect them for any signs of damage or fraying. If you notice any issues, replace the wires before proceeding.
– Seek professional help if needed: If you are unsure about how to properly wire a 220-volt air compressor, it is best to seek the assistance of a qualified electrician.
Following these safety measures can help prevent accidents and ensure that your wiring is done correctly and safely.
Tools And Materials Needed For The Wiring Process
– Wire cutter/stripper
– Screwdriver
– Electrical tape
– Wire nuts
– 220-volt electrical wire
– Circuit breaker
– Junction box or electrical enclosure
– Grounding wire (if required)
– Wiring diagram for the specific air compressor model (if available)
These tools and materials are necessary for safely wiring a 220-volt air compressor. It is important to follow proper safety procedures and consult the manufacturer’s instructions or a qualified electrician if you are unsure about any aspect of the wiring process.
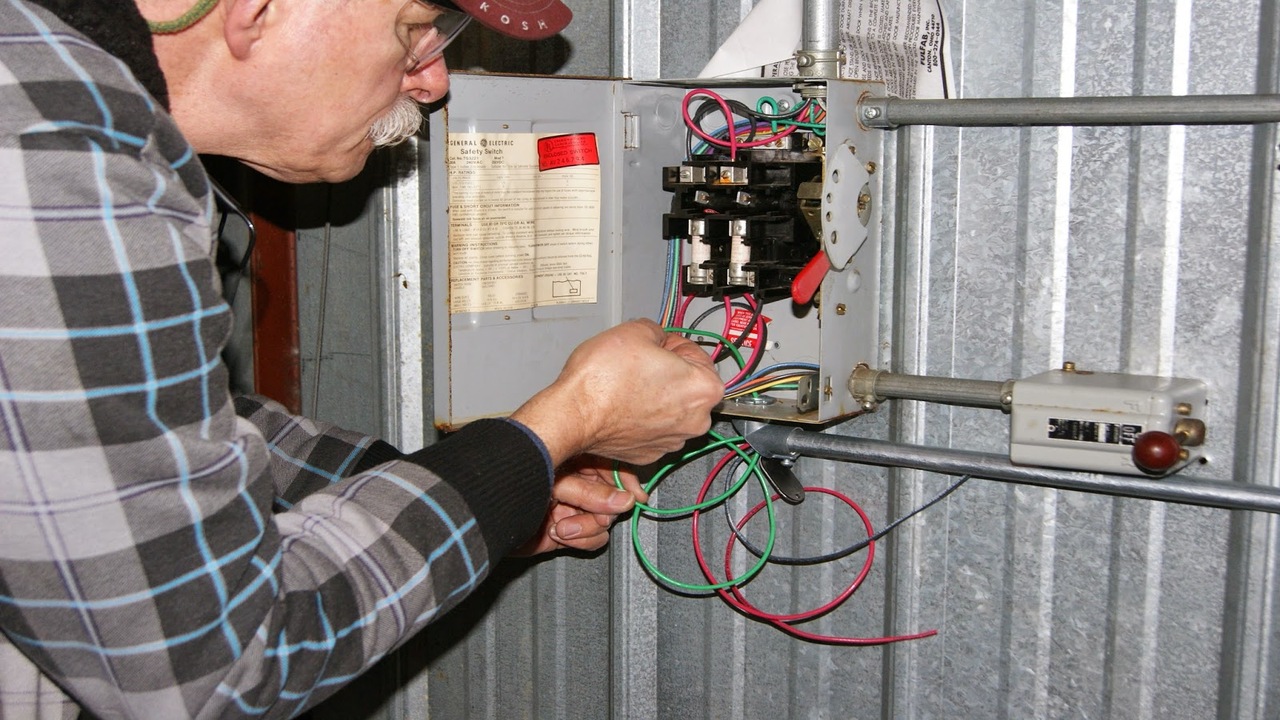
Detailed Steps To Wiring Diagram For 220 Volt Air Compressor
To successfully wire the diagram for 220-volt air compressor, start by understanding the electrical requirements of the compressor. Gather the necessary tools, including a wiring diagram and appropriate wires. Before beginning work, remember to shut off the power supply to the area.
Connect the power supply wires to the circuit breaker and the ground wire to the grounding system. Finally, connect the power supply wires to the pressure switch. By following these detailed steps, you can ensure a safe and effective wiring process for your 220 volt air compressor. Here are step-by-step processes to wiring diagram for 220 volt air compressor.
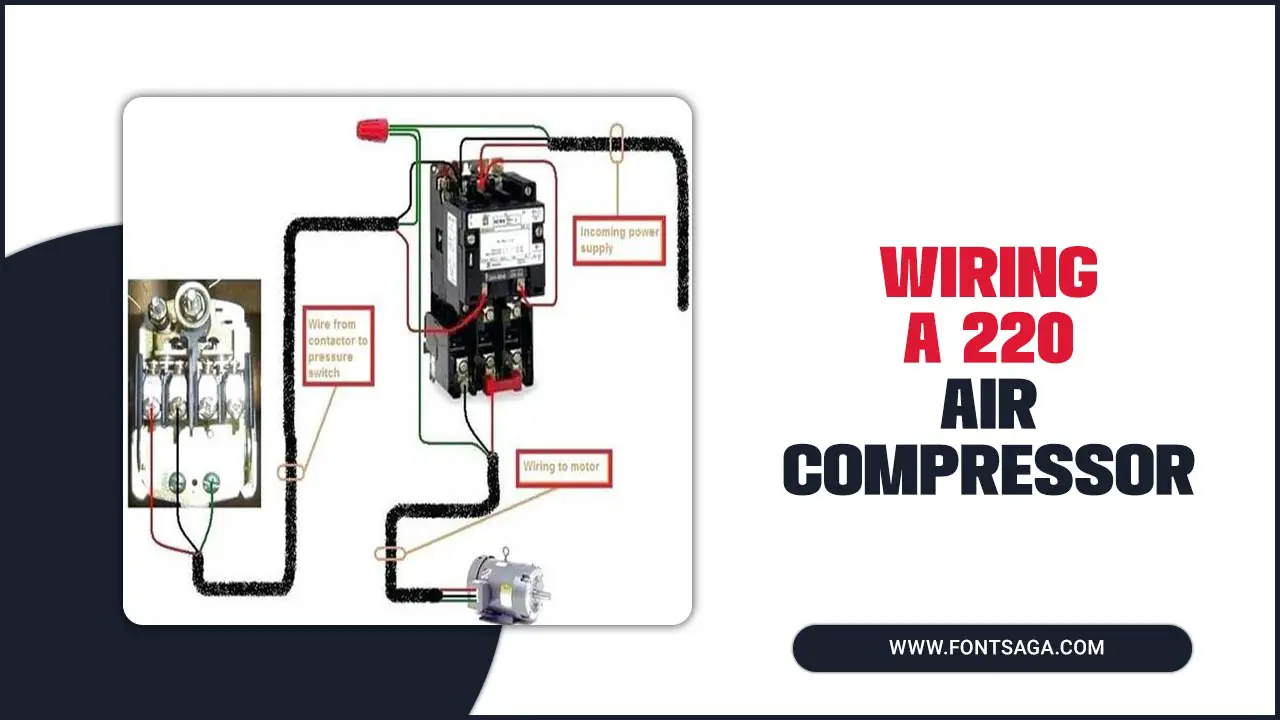
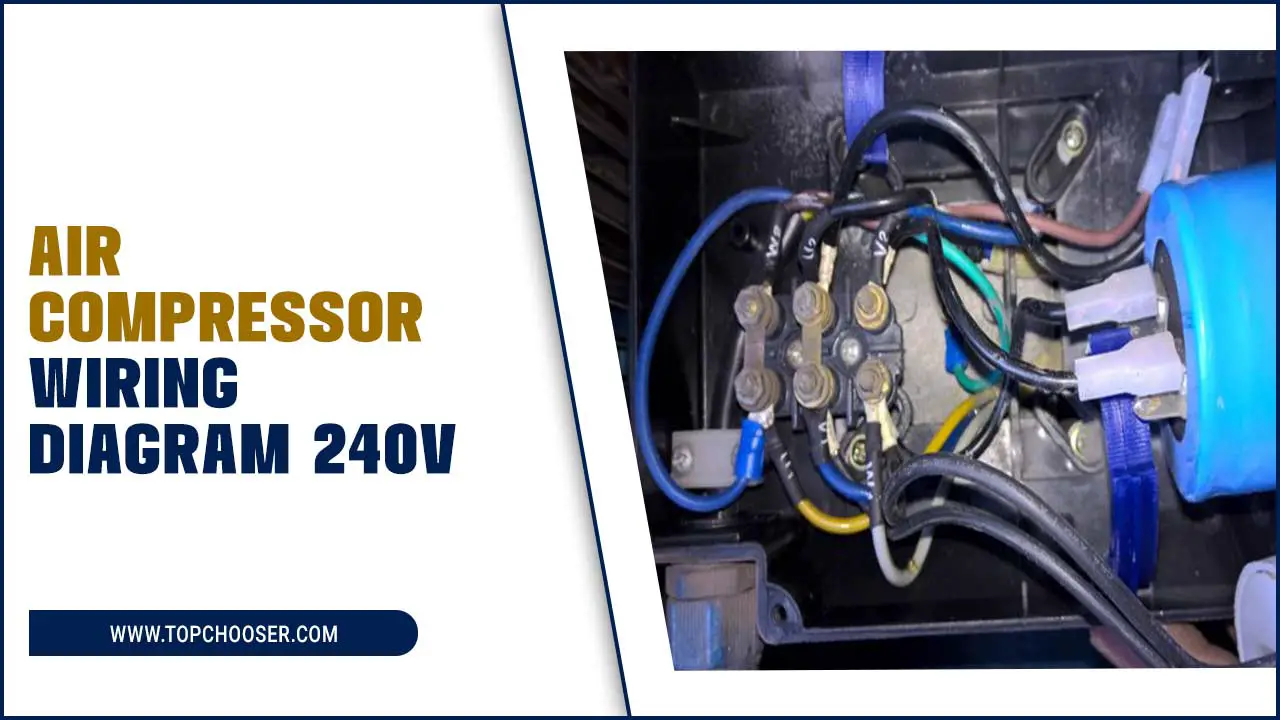
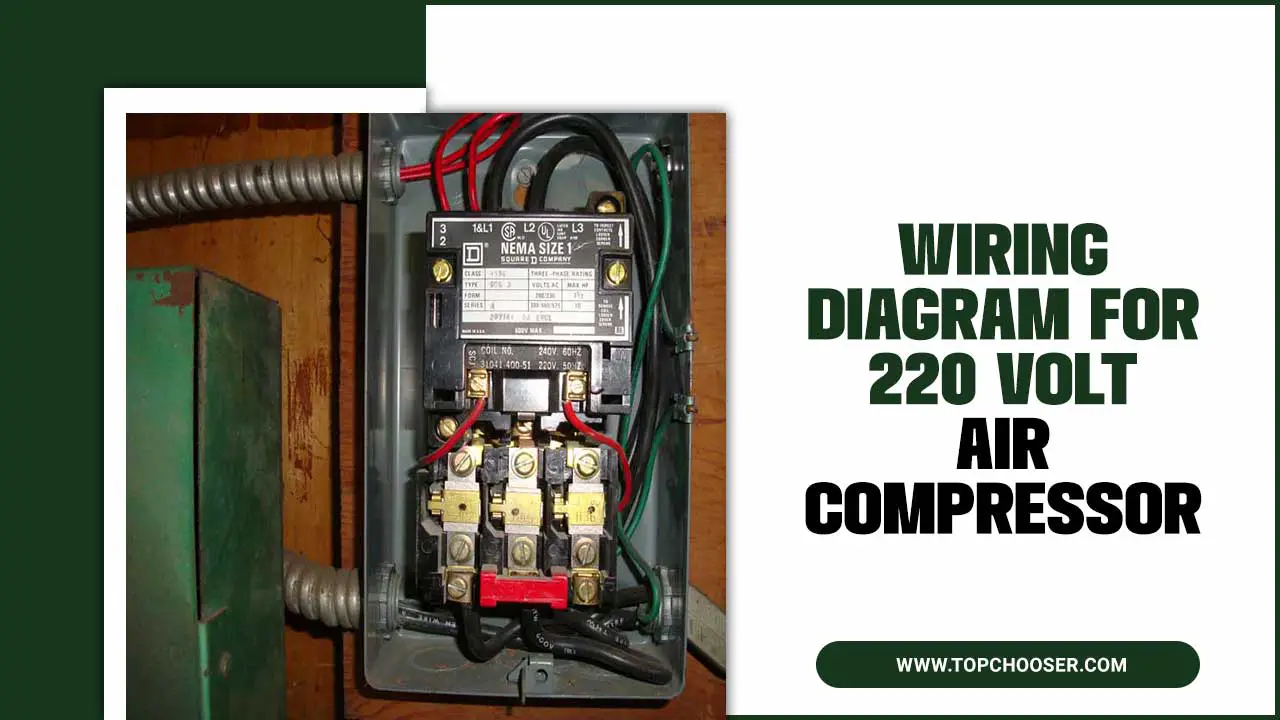
Components Involved In 220 Volt Air Compressor Wiring
Understanding the components of 220 volt air compressor wiring is crucial for a successful installation. The main components include the circuit breaker, power supply, motor starter, pressure switch, and compressor motor. Each component has a specific role in the wiring diagram and must be connected correctly to ensure safe operation.
It is advisable to consult the manufacturer’s instructions or an electrician when wiring a 220 volt air compressor to comply with safety standards. Following an easy-to-follow wiring diagram simplifies the installation process and minimizes the risk of electrical hazards.
Selecting The Perfect Spot For Your Air Compressor
Several factors must be considered when selecting the perfect spot for your air compressor. First and foremost, choose a location that is well-ventilated and provides ample space for the compressor. Ensuring the area is free from flammable materials or potential hazards is essential.
Additionally, think about the accessibility to a power source and the proximity to air tools or equipment you will be using. Noise level and vibrations should also be taken into account to minimize disruptions. Lastly, follow local electrical codes and regulations when determining the installation location.
Connecting The Machine And The Switch
Before starting the wiring process, ensure the power is disconnected to avoid accidents. Connect the incoming power wires to the appropriate terminals on the switch, making sure to follow the wiring diagram for accuracy.
Then, connect the outgoing power wires from the switch to the corresponding terminals on the compressor. Take the time to double-check all connections, ensuring they are tight and secure. Finally, test the wiring by turning on the power and operating the compressor switch.
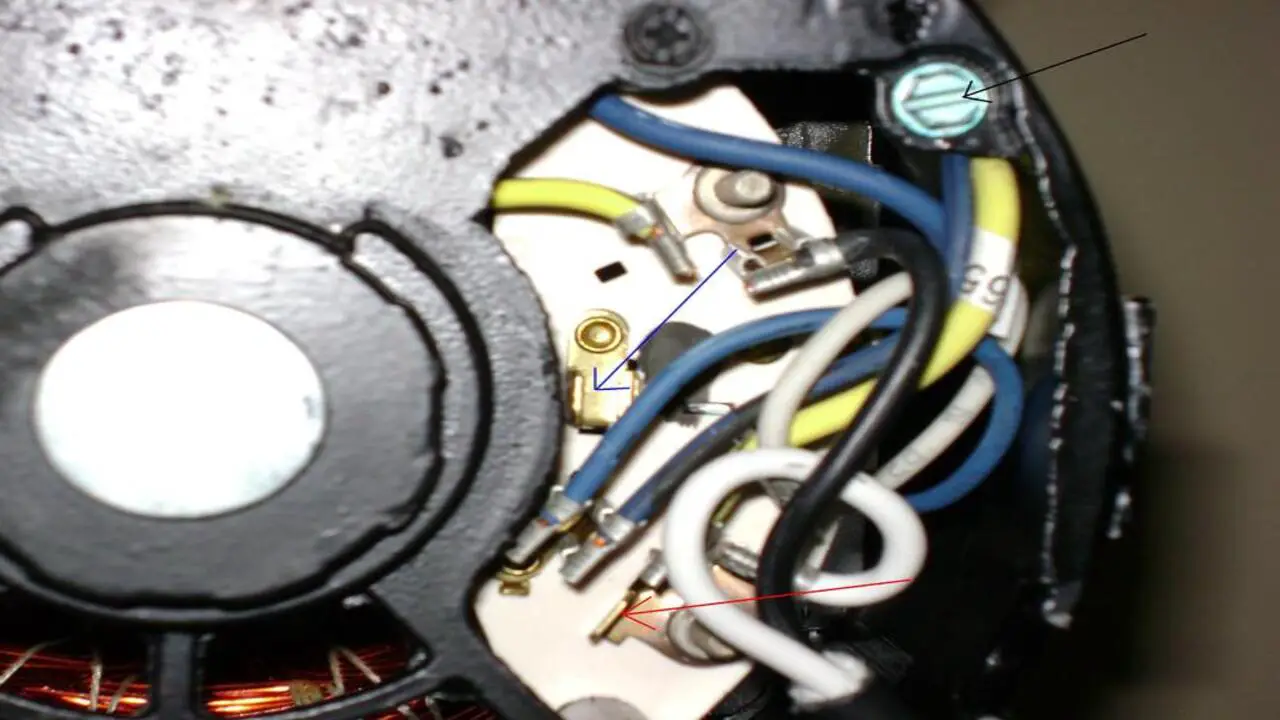
Integrating The Circuit With The 220-Volt Compressor
Before beginning any wiring work, always ensure the circuit breaker is turned off for safety. To integrate the circuit with the 220-volt compressor, connect the black wire from the circuit breaker to one of the hot terminals on the compressor.
Similarly, connect the red wire from the circuit breaker to the other hot terminal on the compressor. Next, connect the white wire from the circuit breaker to the neutral terminal on the compressor. Finally, connect the ground wire from the circuit breaker to the ground terminal on the compressor.
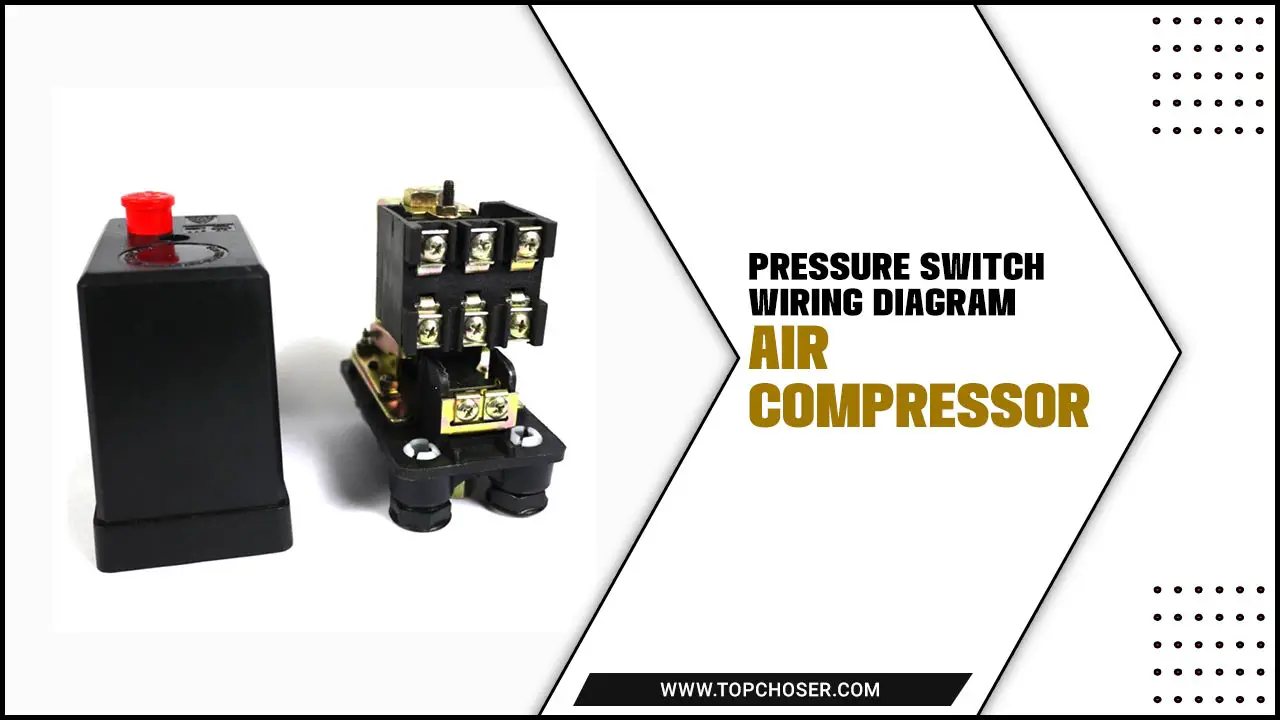
How To Test The Air Compressor Pressure Switch?
To test the air compressor pressure switch, disconnect the power supply. Use a multimeter to check for continuity across the terminals. If there’s no continuity, the switch may be faulty and need replacement. If there is continuity, adjust the settings as per manufacturer instructions. Here are some steps to test the air compressor pressure.
Understanding The Functioning Of Pressure Switch
The pressure switch plays a crucial role in controlling the operation of an air compressor. Its primary function is to monitor the pressure level in the air tank to ensure it stays within safe limits. When the pressure drops below a certain point, the pressure switch activates the compressor to build pressure again.
Conversely, when the pressure reaches a set maximum, the pressure switch shuts off the compressor to prevent over-pressurization. Testing the pressure switch involves checking for proper functionality and adjusting the cut-in and cut-out pressure settings if needed.
How To Deal With Wiring Issues?
If you encounter wiring issues with your 220-volt air compressor, it’s best to consult a professional electrician. Fixing electrical wiring problems without proper knowledge and experience can be dangerous. A professional electrician will have the expertise to safely diagnose and resolve any wiring problems. Prioritize safety by seeking professional help for electrical systems.
Identifying Common Wiring Problems
Loose connections, frayed wires, and faulty switches are common wiring problems that can occur with your air compressor. It is important to check for overloaded circuits and ensure proper grounding for safety. If you encounter any issues, consulting a professional electrician is recommended.
Regular maintenance and inspection can help prevent wiring problems and ensure smooth operation. Understanding basic wiring principles can also help troubleshoot and resolve minor issues with your air compressor.
Quick Ways To Fix Faulty Electrical Wiring
Check for loose or damaged connections to fix faulty electrical wiring in your 220-volt air compressor. Use a voltage tester to ensure proper power supply to the compressor. If you find any faulty wiring components, such as damaged wires or connectors, replace them. For more complex wiring problems, it’s best to consult a professional electrician. Remember to follow safety guidelines and always turn off the power before attempting any repairs.
Maintaining Your 220 Volt Air Compressor Post Wiring
To ensure the safe and efficient operation of your 220 volt air compressor after wiring, there are some important maintenance steps to follow. First, make sure the compressor is properly grounded to prevent electrical shock. Next, check all the wiring connections to ensure they are secure and properly connected.
It’s also crucial to regularly inspect the wiring for any signs of wear or damage. Follow the manufacturer’s guidelines for maintenance and servicing, and always use appropriate safety precautions when working with electrical equipment.
Conclusion
To ensure the safe and efficient functioning of your wiring diagram for 220 volt air compressor. Following the proper wiring diagram and taking necessary safety measures is crucial. You can wire your air compressor by understanding the components involved and following the detailed steps. Remember to test the pressure switch and address any wiring issues that may arise.
Additionally, maintain your air compressor through regular check-ups and updates. With these tips and precautions in mind, you can enjoy the reliable performance of your 220-volt air compressor for years to come. Always consult a qualified electrician if you have any doubts or concerns about the wiring installation process.
Frequently Asked Questions
[rank_math_rich_snippet id=”s-7cfe10a6-1908-4195-8155-75bf6ef89068″]

I am passionate about home engineering. I specialize in designing, installing, and maintaining heating, ventilation, and air conditioning systems. My goal is to help people stay comfortable in their homes all year long.