Have you ever wondered how to fit an undermount sink? It might seem tricky, but with the right steps, anyone can do it! Imagine finishing your kitchen, only to realize you still need a sink. You look around and see that an undermount sink would make everything look better.
Installing an undermount sink can seem daunting. But don’t worry! You’re not alone. Many people feel the same way at first. Picture this: you get your tools ready. You watch videos online. Suddenly, it seems much easier. But where do you start?
In this article, we will guide you through the process of fitting an undermount sink. With clear instructions and helpful tips, you’ll learn everything you need to know. So grab a seat and get ready to dive in!
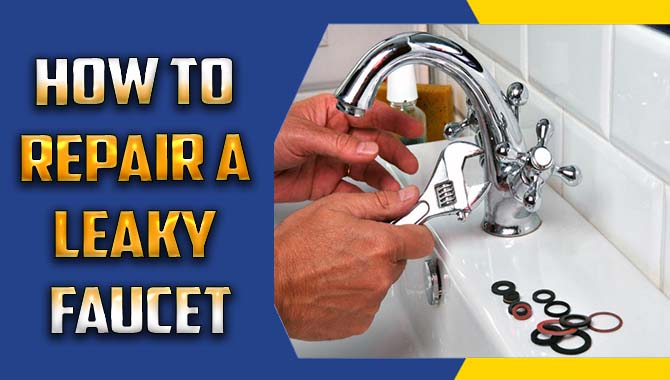
How To Fit Undermount Sink: A Step-By-Step Guide

How to Fit Undermount Sink
Fitting an undermount sink can seem tricky, but it’s easier than you think. First, measure your sink and countertop to ensure a perfect fit. Use strong adhesive or mounting clips to secure the sink. Did you know that a well-fitted undermount sink can enhance your kitchen’s style? After installation, always check for leaks to keep your kitchen dry. With these simple steps, you can enjoy a beautiful, functional sink in no time!Understanding Undermount Sinks
Definition and characteristics of undermount sinks. Advantages and disadvantages compared to other sink types.Undermount sinks are a popular choice for kitchens and bathrooms. They sit below the countertop, creating a smooth look. This design makes it easy to wipe crumbs and spills straight into the sink. These sinks are usually made of materials like stainless steel or porcelain. On the bright side, this style offers great aesthetics and maximizes counter space. However, they can be tricky to install and might need extra support. Here’s a quick look:
| Advantages | Disadvantages |
|---|---|
| Sleek appearance | More challenging to install |
| Easier to clean | May require extra maintenance |
In short, if you want a sink that looks great and makes cleaning easier, undermount sinks are a solid choice—just be ready for some installation fun!
Tools and Materials Needed
Essential tools for installation. Recommended materials and sink choices.To install an undermount sink successfully, gather your team of essential tools and materials. Grab a measuring tape to ensure perfect fit and a caulking gun to seal the deal. You’ll also need a level to keep things right and a drill to make holes where needed. Don’t forget your trusty screwdriver and safety goggles—because safety first! Choosing the right sink is key; granite and quartz are popular for their beauty and durability.
| Tools | Recommended Materials |
|---|---|
| Measuring tape | Granite or Quartz Sink |
| Caulking gun | Silicone Sealant |
| Level | Mounting Clips |
| Drill | Support Brackets |
| Screwdriver | Plumber’s Putty |
With these tools and materials, you’ll be ready to tackle your sink installation like a pro. Just remember, even pros sometimes make mistakes—just not when they’re measuring! Happy installing!
Preparing the Countertop
Steps to ensure the countertop is ready for installation. Importance of measuring and marking.Before you install that shiny undermount sink, get your countertop ready! Start by measuring the sink’s dimensions. A tiny mistake could lead to a big mess—like trying to fit an elephant into a tiny car! Once you have the correct measurements, mark where the sink will go. This ensures the perfect fit. Keep your workspace clean and free from crumbs. Crumbs can hide in unexpected places, and no one wants a surprise crunch in their new sink!
| Step | Action |
|---|---|
| 1 | Measure the sink |
| 2 | Mark the countertop |
| 3 | Prepare the area |
Having a solid preparation plan can save you from a headache later. Remember, a well-prepped countertop is key to a successful sink installation!
Installing the Undermount Sink
Detailed steps for securing the sink to the countertop. Tips for ensuring a watertight seal.To install your undermount sink, first, prepare the countertop. Make sure it’s clean and dry. Next, apply a good adhesive near the sink opening. Here are some steps:
- Position the sink under the countertop.
- Use clamps to hold it in place.
- Leave the sink to set for the recommended time.
For a watertight seal, apply silicone caulk around the edges. Press firmly and wipe off excess. Check the seal by running water to find leaks. This helps keep everything dry and neat.
How can I ensure a watertight seal on my sink?
To ensure a watertight seal, always use silicone caulk. Apply it before installing the sink and check for leaks afterward. Making sure everything is tight helps in preventing water damage.
Final Touches and Maintenance
Tips for sealing and caulking the sink edges. Maintenance advice for longevity.After fitting your undermount sink, it’s time to secure it properly. Sealing and caulking are important to prevent leaks. Use a good quality silicone caulk around the edges. Make sure to smooth it out for a clean finish. For maintenance, remember these tips:
- Wipe the sink regularly with a soft cloth.
- Avoid harsh cleaners that might damage the seal.
- Check for cracks or leaks every few months.
Taking these steps helps your sink last longer and stay looking great!
What is the best way to seal an undermount sink?
The best way is to use high-quality silicone caulk around the sink edge. Smooth it out for a clean finish. This keeps water from leaking underneath and protects your counter!
Common Mistakes to Avoid
Frequent errors during installation and how to prevent them. Troubleshooting tips if issues arise.Installing an undermount sink can be tricky, and making mistakes can lead to big headaches. One common error is not measuring correctly. If your sink doesn’t fit, it’s like trying to put a square peg in a round hole. Another blunder is using the wrong adhesive. You need a strong, waterproof one! If you run into leaks, check your caulking and fittings. A good tip: always double-check before sealing everything in. Trust me; your counters will thank you!
| Error | How to Prevent | Tip |
|---|---|---|
| Wrong Measurements | Measure twice, cut once! | Use a template! |
| Poor Adhesive Choice | Choose a quality, waterproof glue. | Read the label! |
| Not Checking for Leaks | Test before finishing. | Use a paper towel! |
Conclusion
In summary, fitting an undermount sink requires careful measurements, proper tools, and patience. Make sure you choose the right sink and countertop materials. Follow the installation steps closely for best results. Don’t rush, and ask for help if needed. For more tips and detailed guides, keep exploring and learning about home improvement projects! You can do it!FAQs
What Are The Necessary Tools And Materials Required For Installing An Undermount Sink?To install an undermount sink, you need several tools and materials. First, gather a measuring tape to check sizes. You will also need a drill to make holes. Get some silicone sealant to help keep water from leaking. Finally, have screws ready to secure the sink. Don’t forget safety goggles and a screwdriver too!
How Do You Properly Measure And Cut The Countertop For An Undermount Sink Installation?To measure for your undermount sink, first, place the sink upside down on the countertop. Then, trace around the sink using a pencil. Make sure to leave extra space for the sink’s edge. Next, use a straightedge to make clean, straight lines. Finally, carefully cut along those lines with a saw. Always wear safety gear and ask for help if you need it!
What Steps Should Be Taken To Ensure A Watertight Seal Between The Undermount Sink And The Countertop?To make sure your sink doesn’t leak, we need to follow some steps. First, clean both the sink and countertop really well. Next, we will use a special sealant to create a barrier. Then, carefully place the sink under the countertop and press it firmly. Finally, let the sealant dry completely before using the sink.
Are There Specific Types Of Adhesives Or Caulking Recommended For Securing An Undermount Sink?Yes, we can use special glue or caulk for an undermount sink. Silicone caulk is a great choice because it sticks well and makes a good seal. You can also use sink adhesive, which is made just for this purpose. Make sure to let it dry completely before using the sink. This helps keep everything in place and stops leaks.
How Do You Connect The Plumbing And Ensure Proper Drainage After Fitting An Undermount Sink?To connect the plumbing after fitting an undermount sink, first, attach the drain pipe to the sink’s drain. Make sure the pipe fits snugly and is straight. Next, connect the trap, which catches any gunk, under the sink. Tighten all the connections so they won’t leak. Finally, test the sink by running water to make sure it drains well!