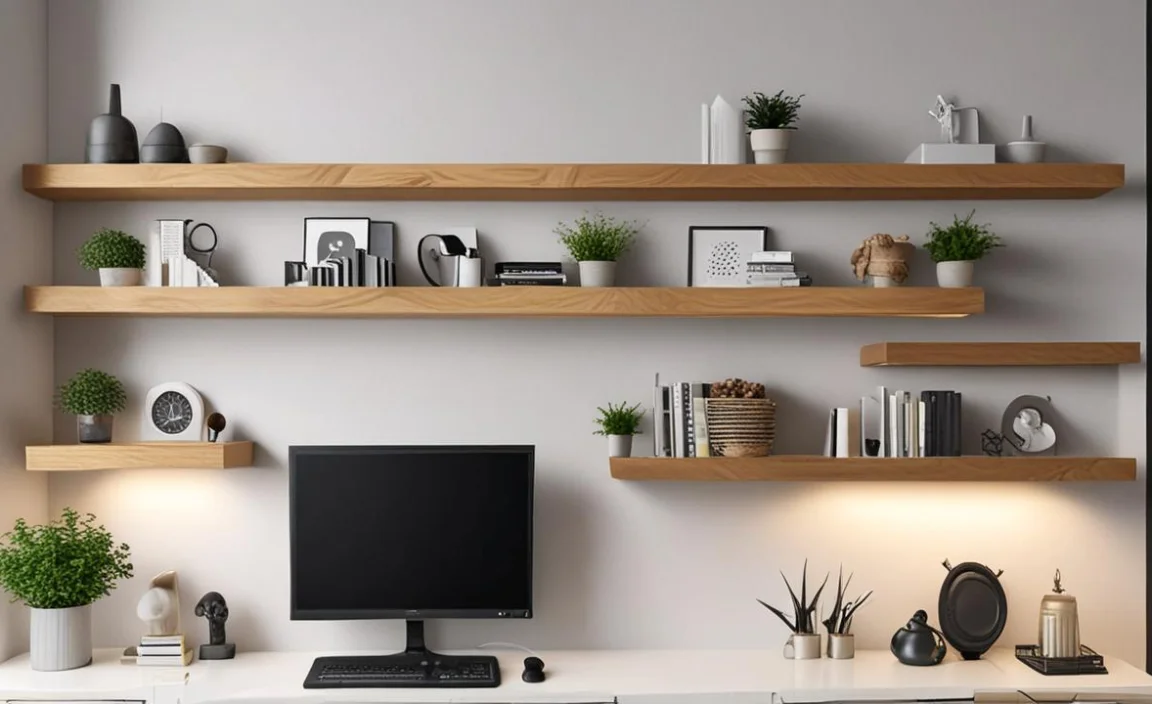
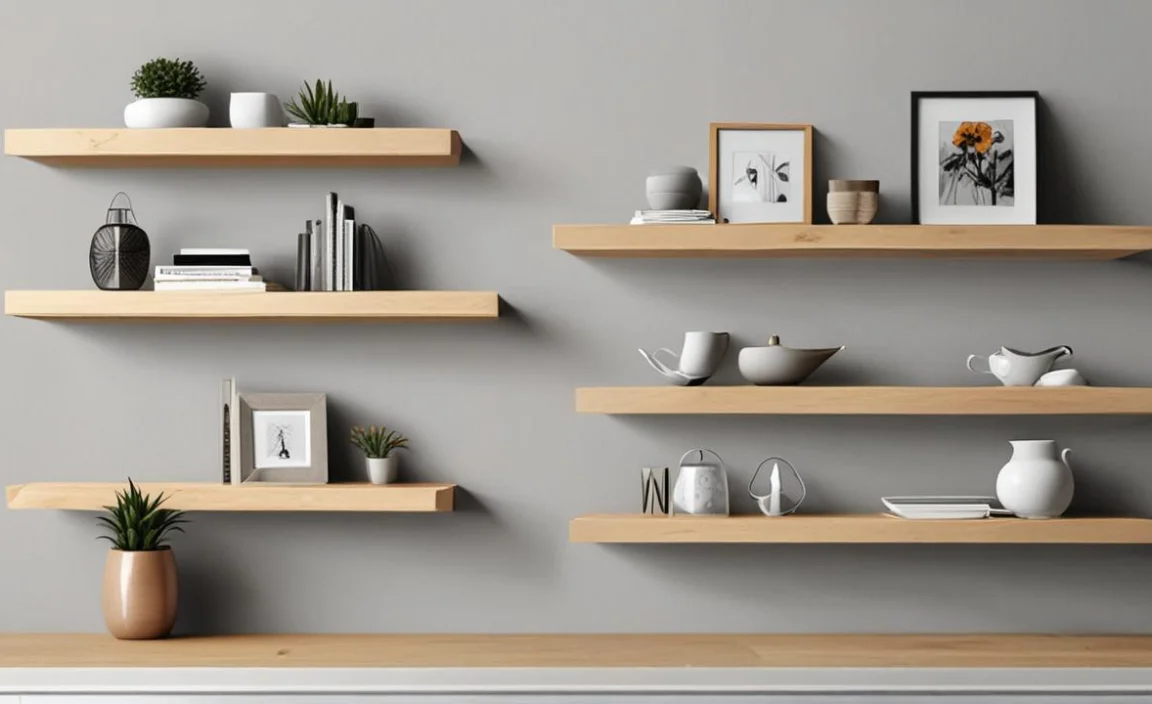
Have you ever wanted a cool shelf that looks like it’s floating?
These shelves don’t have any brackets.
But how to fix floating shelves without brackets can be tricky.
It’s like magic when they stay up.
But what happens when they start to droop?
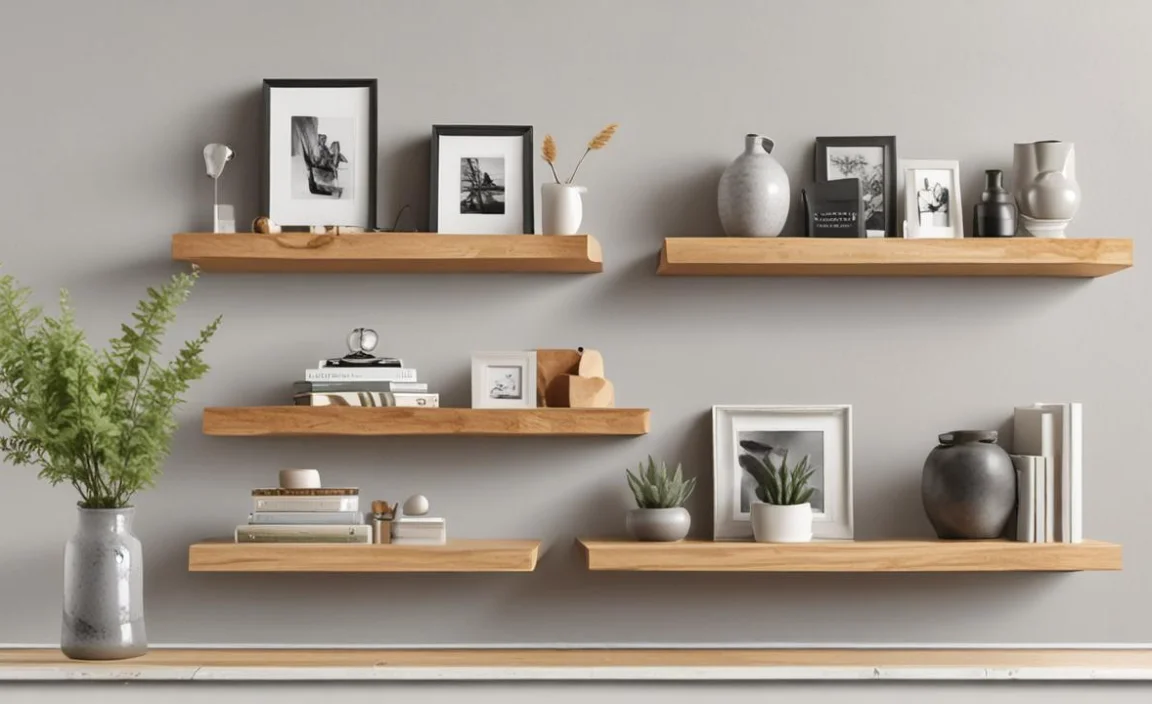
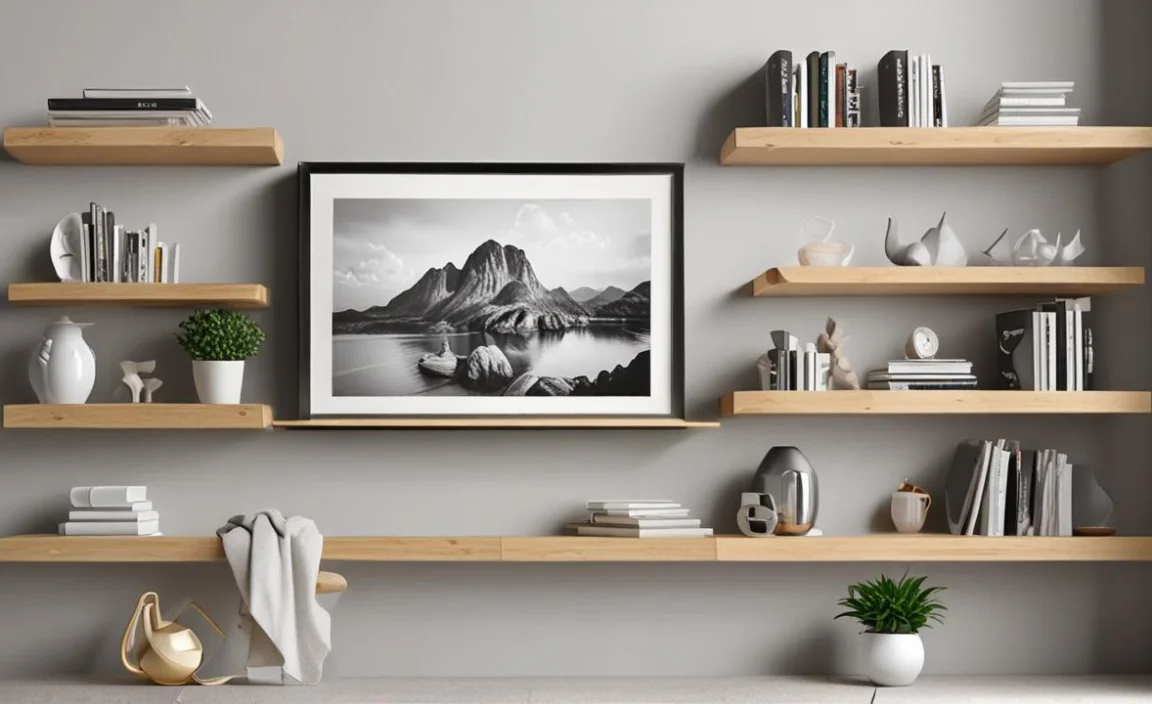
Floating shelves add a special touch to any room.
They can hold your favorite books or toys.
Sometimes, they need a little help to stay strong.
Let’s learn some easy ways to keep them in place.
We can make sure your floating shelves look great.
Key Takeaways
- Ensuring your floating shelves stay level involves careful measurement and precise installation.
- Use shims to correct minor tilting and prevent items from sliding off shelves.
- Stronger support can be achieved using heavy-duty anchors suited for your wall type.
- For deep shelves, consider adding hidden support rods for enhanced stability.
- Learn how to fix floating shelves without brackets using these simple methods.
How to Choose the Right Floating Shelf
Choosing the right floating shelf is the first step. Think about what you want to put on it. Small, light things like photos are easy. Big, heavy books need a stronger shelf. Look at the shelf’s material. Wood is good, but some woods are stronger than others. Pine is soft, while oak is hard. Also, check the shelf’s thickness. A thicker shelf can hold more weight. Consider the length, too. Long shelves might sag in the middle if they are not well supported. Make sure the shelf fits your style. Do you want it to be modern or rustic? The right shelf will look great and hold everything you need.
- Consider the weight the shelf needs to hold.
- Choose a wood type that is strong and durable.
- Check the thickness of the shelf for support.
- Think about the length and potential for sagging.
- Pick a style that matches your room’s decor.
Before you buy, read reviews. See what other people say about the shelf. Did they have trouble installing it? Does it hold the weight it’s supposed to? Look for shelves with good hardware. The hardware is what holds the shelf to the wall. Good hardware makes a big difference. Also, think about the color and finish. Make sure it matches your room. A well-chosen shelf will last a long time. It will also look amazing in your home. Taking your time to choose the right shelf will save you trouble later. You’ll be happy with your choice for years to come.
What Kind of Wall Do You Have?
Do you know what kind of walls you have? It makes a big difference. Walls can be drywall, plaster, or brick. Drywall is common but not very strong. Plaster is a bit stronger. Brick is the strongest. You need to use the right kind of anchors for your wall. Anchors help the screws grip the wall better. For drywall, use drywall anchors. For brick, use masonry anchors. Using the wrong anchor can cause the shelf to fall. It can also damage your wall. So, take a minute to figure out what your walls are made of. This will help you choose the right hardware. Then your shelf will stay up safely and securely.
How Much Weight Will the Shelf Hold?
How much weight do you plan to put on your shelf? This is a very important question. Light items like small plants are no problem. But heavy books or decorations are different. Every shelf has a weight limit. This is the most weight it can safely hold. You can usually find this information on the shelf’s packaging. If you put too much weight on the shelf, it could break. It could also pull away from the wall. So, be sure to check the weight limit. And don’t go over it. If you need to hold a lot of weight, choose a stronger shelf. Or use more support.
What Size Shelf Do You Need?
Think about the size of the shelf you need. Do you need a long shelf or a short one? Do you need a deep shelf or a shallow one? The size depends on what you want to put on it. If you have a lot of small items, a short shelf might be fine. If you have big items, you need a longer shelf. Deep shelves can hold bigger things. Shallow shelves are good for small items. Measure the space where you want to put the shelf. This will help you choose the right size. A shelf that is too big will look awkward. A shelf that is too small won’t hold everything you need.
Fun Fact or Stat: Studies show that shelves holding more than 20 pounds should be checked every six months for stability.
How to Find the Wall Studs
Finding wall studs is very important. Studs are the wooden beams inside your wall. They are strong and can hold a lot of weight. Floating shelves need to be attached to studs. This makes them more stable. Use a stud finder to locate the studs. A stud finder is a tool that beeps when it finds a stud. Mark the location of the studs with a pencil. If you don’t have a stud finder, you can try knocking on the wall. A solid sound usually means there is a stud. A hollow sound means there is no stud. Attaching your shelf to the studs will make it much stronger.
- Use a stud finder to locate the studs.
- Mark the stud locations with a pencil.
- Knock on the wall to find solid points.
- Ensure the shelf mounting aligns with studs.
- Use screws long enough to reach into the stud.
If you can’t find studs, don’t worry. You can use wall anchors. Wall anchors are special fasteners that grip the drywall. They provide extra support when you can’t use studs. There are different types of wall anchors. Some are better for heavy items. Others are better for light items. Read the instructions on the package to use them correctly. Using wall anchors can help you install your shelf safely. But remember, studs are always the best option. If possible, try to find them first. If not, wall anchors are a good alternative.
What is a Stud Finder?
Have you ever used a stud finder? It’s a small tool that helps you find studs. Studs are the wooden beams inside your walls. They are what hold your walls together. A stud finder uses sensors to locate these beams. You simply run it along the wall. When it finds a stud, it will beep or light up. This tells you where to drill your screws. Without a stud finder, it can be hard to find studs. You might end up drilling holes in the wrong places. A stud finder makes the job much easier and faster. It’s a great tool to have for any home project.
Why Are Wall Studs Important?
Wall studs are very important for hanging shelves. They are strong and can hold a lot of weight. When you attach a shelf to a stud, it’s much more secure. The shelf is less likely to fall down. If you only attach a shelf to drywall, it might not hold. Drywall is not very strong. It can easily crumble or break. That’s why it’s important to find the studs. They provide the support you need. Using studs will keep your shelves safe and secure. You won’t have to worry about them falling down.
Can You Install Shelves Without Studs?
Yes, you can install shelves without studs. But you need to use wall anchors. Wall anchors provide extra support when you can’t use studs. There are different types of wall anchors. Some are better for heavy items. Others are better for light items. Make sure you choose the right type for your shelf. Read the instructions carefully. Install the anchors correctly. If you do, your shelf should be safe and secure. Just remember, studs are always the best option. If you can find them, use them. But if not, wall anchors are a good alternative.
Fun Fact or Stat: The average distance between wall studs is 16 inches.
How to Use Wall Anchors Correctly
Wall anchors are super useful. They help shelves stay up when you can’t find studs. But using them right is key. First, pick the right anchor. Some are for light stuff, some for heavy. Check the package. It tells you how much weight they hold. Next, drill a hole. Make sure it’s the right size for the anchor. The package will tell you what size drill bit to use. Push the anchor into the hole. Sometimes you need to tap it gently with a hammer. Now, put the screw in. Turn it until the anchor grips the wall. Don’t turn it too tight. You don’t want to break the anchor. Now your shelf should be secure.
- Choose the right anchor for the weight.
- Drill a hole the correct size.
- Insert the anchor into the hole.
- Tighten the screw until secure.
- Avoid overtightening to prevent damage.
Using wall anchors can be tricky. If you’re not sure, ask for help. A hardware store employee can give you advice. They can help you pick the right anchors. They can also show you how to use them. If you still have trouble, consider hiring a professional. A handyman can install your shelves for you. They have the tools and experience to do it right. It might cost a little more, but it’s worth it. You’ll have peace of mind knowing your shelves are safe and secure. And you won’t have to worry about them falling down.
What Types of Wall Anchors Are There?
There are many types of wall anchors. Plastic anchors are good for light items. Metal anchors are better for heavy items. Toggle bolts are very strong. They can hold a lot of weight. Self-drilling anchors are easy to use. They drill their own hole. Each type has its own instructions. Read them carefully before you start. Choose the right anchor for your needs. This will help your shelf stay up safely. If you’re not sure which one to use, ask for help. A hardware store employee can give you advice.
How Much Weight Can Wall Anchors Hold?
Wall anchors have weight limits. This is the most weight they can safely hold. The weight limit depends on the type of anchor. Plastic anchors might only hold a few pounds. Metal anchors can hold much more. Toggle bolts are the strongest. They can hold a lot of weight. Check the package for the weight limit. Don’t put more weight on the shelf than the anchor can hold. This could cause the shelf to fall down. Always be careful and follow the instructions.
Can You Reuse Wall Anchors?
It’s usually not a good idea to reuse wall anchors. Once you take a screw out of an anchor, it can become loose. The anchor might not grip the wall as well the second time. This could make your shelf unstable. It’s better to use new anchors each time. They are not very expensive. It’s worth it to have the peace of mind knowing your shelf is secure. If you have to move your shelf, replace the anchors with new ones. This will help ensure your shelf stays up safely.
Fun Fact or Stat: Toggle bolts are among the strongest wall anchors, capable of holding over 100 pounds in drywall.
How to Level Floating Shelves
Making sure your shelves are level is super important. If they’re not, things will slide off. You’ll need a level. It’s a tool that shows if something is straight. Put the level on top of the shelf. If the bubble is in the middle, it’s level. If not, you need to adjust it. Use shims to make small adjustments. Shims are thin pieces of wood or plastic. Slide them under the shelf until it’s level. Check the level again. Keep adjusting until the bubble is in the middle. Now your shelf is level, and things won’t slide off.
- Use a level to check if the shelf is straight.
- Adjust with shims until the bubble is centered.
- Check the level at different points on the shelf.
- Secure shims in place with glue if needed.
- Recheck the level after adding weight.
Sometimes, walls are not perfectly straight. This can make it hard to level a shelf. Don’t worry, there’s a trick. Use a long level. A longer level will give you a more accurate reading. It will show you if the wall is uneven. You can also use a laser level. A laser level projects a straight line onto the wall. This makes it easy to see if your shelf is level. If you’re having trouble, ask for help. A friend or family member can hold the level while you adjust the shelf. Working together can make the job easier.
Why is Leveling Important?
Leveling is important because it makes your shelves look nice. It also keeps things from sliding off. If a shelf is not level, it will look crooked. This can be distracting. It can also make the room look messy. Level shelves create a clean, organized look. Plus, things won’t fall off. Imagine putting a glass of water on a crooked shelf. It would spill! Level shelves prevent accidents. They also protect your belongings. Taking the time to level your shelves is worth it.
What are Shims?
Shims are thin pieces of wood or plastic. They are used to make small adjustments. You can use them to level shelves. You can also use them to fill gaps. Shims come in different sizes and shapes. You can buy them at a hardware store. You can also make your own. Just cut small pieces of wood or plastic. Slide the shims under the shelf. This will raise it up a little bit. Keep adding shims until the shelf is level. Shims are a simple but effective tool.
How Do You Secure Shims?
Once you have the shelf level, you need to secure the shims. This will keep them from falling out. You can use glue to secure them. Put a small amount of glue on the shim. Then slide it back under the shelf. Hold it in place for a few seconds. This will give the glue time to dry. You can also use small nails to secure the shims. Hammer the nails into the shim and the wall. Be careful not to damage the wall. Securing the shims will keep your shelf level for a long time.
Fun Fact or Stat: A perfectly level shelf can reduce the risk of items falling by up to 80%.
How to Add Hidden Support
Want to make your floating shelf even stronger? Try adding hidden support. This means adding extra support that you can’t see. One way to do this is with metal rods. Drill holes in the wall and the shelf. Slide the rods into the holes. The rods will hold the shelf up. Make sure the rods are strong enough to hold the weight. You can also use L-brackets. Attach them to the underside of the shelf. Make sure they are hidden from view. Hidden support can make a big difference. It will keep your shelf from sagging or falling down.
- Use metal rods inserted into the wall and shelf.
- Attach L-brackets to the underside of the shelf.
- Ensure supports are strong enough for the weight.
- Conceal supports for a clean, floating look.
- Regularly inspect hidden supports for stability.
When adding hidden support, think about the design. You want the support to be strong but also invisible. Choose materials that match your shelf. For example, if you have a wooden shelf, use wooden supports. This will help them blend in. You can also paint the supports to match the wall. This will make them even less noticeable. Take your time and plan carefully. Hidden support can be a great way to make your shelves stronger and more stylish. It’s like magic when people can’t see how the shelf is staying up.
What are Metal Support Rods?
Metal support rods are long, thin pieces of metal. They are used to add extra support to shelves. You can insert them into the wall and the shelf. The rods will hold the shelf up. They are usually made of steel or aluminum. These metals are strong and durable. Make sure the rods are the right size for your shelf. They should be long enough to go deep into the wall. They should also be thick enough to hold the weight. Metal support rods are a great way to make your shelves stronger.
How Do L-Brackets Help?
L-brackets are metal brackets shaped like the letter “L.” You can attach them to the underside of the shelf. One side of the L-bracket attaches to the shelf. The other side attaches to the wall. This provides extra support. The L-brackets help distribute the weight. This keeps the shelf from sagging. Make sure the L-brackets are strong enough to hold the weight. You can buy them at a hardware store. Choose L-brackets that match your shelf. This will make them less noticeable.
How to Hide the Supports?
Hiding the supports is important for a floating shelf. You want it to look like it’s floating. One way to hide the supports is to paint them. Paint them the same color as the wall. This will make them blend in. You can also use decorative covers. These covers go over the supports. They can be made of wood or metal. Choose covers that match your shelf. Another trick is to recess the supports. This means making them flush with the wall. This will make them almost invisible.
Fun Fact or Stat: Hidden supports can increase a floating shelf’s weight capacity by as much as 50%.
How to Fix Sagging Floating Shelves
Uh oh, is your floating shelf starting to sag? Don’t worry, it happens. Sometimes shelves start to bend in the middle. This is called sagging. First, check the weight. Are you putting too much stuff on the shelf? Remove some items to lighten the load. Next, check the supports. Are they still strong? If not, you might need to replace them. You can also add extra supports. Try adding hidden support rods or L-brackets. These will help hold up the shelf. If the shelf is still sagging, you might need to replace it. Choose a stronger shelf next time.
| Problem | Solution |
|---|---|
| Sagging Shelf | Remove weight, add supports |
| Loose Anchors | Replace with stronger anchors |
| Unlevel Shelf | Use shims to adjust |
| Weak Material | Replace with stronger shelf |
Fixing a sagging shelf can be easy. The key is to find the cause of the problem. Is it too much weight? Are the supports weak? Once you know the cause, you can fix it. Sometimes a simple adjustment is all you need. Other times, you might need to add extra support. Don’t be afraid to ask for help. A handyman can help you fix a sagging shelf. They have the tools and experience to do it right. And remember, prevention is key. Choose a strong shelf and don’t overload it.
What Causes Sagging?
Sagging is when a shelf starts to bend in the middle. There are several reasons why this might happen. One reason is too much weight. If you put too many heavy items on the shelf, it can start to bend. Another reason is weak supports. If the supports are not strong enough, they can’t hold the weight. The shelf will start to sag. The material of the shelf can also be a factor. Some materials are stronger than others. A weak material is more likely to sag. Finally, time can cause sagging. Over time, even a strong shelf can start to bend.
How Can Weight Affect a Shelf?
Weight can have a big impact on a shelf. If you put too much weight on a shelf, it can break. It can also start to sag. The weight puts stress on the shelf. This stress can cause the material to weaken. The supports can also start to fail. That’s why it’s important to know the weight limit of your shelf. Don’t put more weight on the shelf than it can handle. Spread the weight evenly across the shelf. This will help prevent sagging.
How to Reinforce a Sagging Shelf?
If your shelf is sagging, you can try to reinforce it. This means making it stronger. One way to do this is to add extra supports. You can use metal rods or L-brackets. Attach them to the underside of the shelf. This will help hold up the shelf. You can also add a support in the middle. This will prevent the shelf from bending. Another option is to replace the shelf. Choose a stronger material. A thicker shelf will also be more resistant to sagging.
Fun Fact or Stat: Adding a center support can reduce sagging by up to 75%.
How to Prevent Future Problems
Want to avoid problems with your floating shelves? Here are some tips. First, choose the right shelf. Pick a strong material. Make sure it can hold the weight you need. Second, install it correctly. Use a stud finder to find the studs. Use the right wall anchors. Make sure the shelf is level. Third, don’t overload the shelf. Know the weight limit and don’t exceed it. Fourth, check the shelf regularly. Look for signs of sagging or loose supports. By following these tips, you can keep your floating shelves looking great for years to come.
- Choose a strong shelf material.
- Install shelves correctly using studs and anchors.
- Avoid overloading the shelf with too much weight.
- Check shelves regularly for signs of sagging.
- Tighten screws and adjust supports as needed.
Preventing problems is always better than fixing them. It saves you time and money. It also keeps your shelves looking their best. Take a few minutes to inspect your shelves every few months. Make sure the supports are tight. Make sure the shelf is level. If you see any problems, fix them right away. Don’t wait until it’s too late. A little bit of maintenance can go a long way. Your floating shelves will thank you for it.
What Materials Are Best for Shelves?
The best materials for shelves are strong and durable. Wood is a popular choice. Oak, maple, and birch are good options. They are all strong and can hold a lot of weight. Metal is another good choice. Steel and aluminum are both strong and lightweight. They are also resistant to rust. Glass is a beautiful option. But it is not as strong as wood or metal. It’s best for light items. Choose a material that fits your style and needs.
How Often Should You Check Your Shelves?
You should check your shelves every few months. This will help you catch problems early. Look for signs of sagging or loose supports. Make sure the shelf is still level. If you see any problems, fix them right away. A little bit of maintenance can prevent big problems. It will also keep your shelves looking their best. Set a reminder on your calendar to check your shelves regularly. This will help you stay on top of it.
What Tools Do You Need for Shelf Maintenance?
You don’t need a lot of tools for shelf maintenance. A screwdriver is essential. You’ll need it to tighten screws. A level is also important. You’ll need it to make sure the shelf is level. A stud finder is helpful for finding studs. A measuring tape is useful for measuring. A pencil is handy for marking. With these few tools, you can keep your shelves in great shape. You probably already have most of these tools at home.
Fun Fact or Stat: Regular maintenance can extend the life of a floating shelf by up to 30%.
Summary
Floating shelves look amazing. They add a touch of style to any room. But they can be tricky to install. It’s important to choose the right shelf. You need to find the studs in your wall. And you need to use the right wall anchors. Leveling the shelf is also important. If your shelf starts to sag, don’t worry. There are ways to fix it. You can add hidden support. You can also replace the shelf. Learning how to fix floating shelves without brackets is a great skill.
By following these tips, you can keep your floating shelves looking great. You can also prevent future problems. Choose a strong shelf material. Install the shelf correctly. Don’t overload the shelf with weight. Check the shelf regularly for signs of sagging. With a little bit of care, your floating shelves will last for years. They will also add beauty to your home.
Conclusion
Floating shelves are a cool way to show off your favorite things. Making sure they stay up takes a little work. You need to find the studs or use good wall anchors. Keep an eye on them to make sure they don’t sag. Now you know how to fix floating shelves without brackets. With a few simple steps, your shelves will look great for a long time. You can enjoy your floating shelves for years to come.
Frequently Asked Questions
Question No 1: How do I know if my floating shelf is overloaded?
Answer: You can tell if your floating shelf is overloaded if it starts to sag or bend. You might also see the wall anchors pulling away from the wall. If you notice these signs, remove some items from the shelf. This will reduce the weight and prevent further damage. It is also a great idea to check the weight limit of your shelf when installing it. Knowing the weight limit will help you avoid accidentally overloading it, and potentially damaging the shelf or the wall. If you’re unsure how to fix floating shelves without brackets when overloaded, consult a professional.
Question No 2: What kind of screws should I use for floating shelves?
Answer: Use screws that are long enough to go through the shelf and into the wall stud. If you’re not using a stud, use screws that are designed for wall anchors. The type of screw will depend on the type of wall anchor you’re using. Read the instructions on the wall anchor package to find out what kind of screws to use. Using the wrong kind of screws can cause the shelf to fall down. It can also damage the wall. Always use the correct screws for a safe and secure installation. Keep in mind that the quality of the screws is important to ensure the shelf has a good and strong installation. If you are not confident in your ability to select the correct screws for the type of shelf and wall, it is best to seek the advice of a professional or a hardware store employee. They will be able to assist you in selecting the correct screws for your specific needs. Knowing how to fix floating shelves without brackets also means understanding the right hardware.
Question No 3: How do I make sure my floating shelf is straight?
Answer: Use a level to make sure your floating shelf is straight. Place the level on top of the shelf. Adjust the shelf until the bubble in the level is in the middle. This means the shelf is level. If the shelf is not level, things will slide off. You can use shims to make small adjustments. Shims are thin pieces of wood or plastic. Slide them under the shelf until it’s level. Check the level again. Keep adjusting until the bubble is in the middle. If you have trouble keeping the level balanced, ask a friend or family member to help. They can hold the level while you adjust the shelf. How to fix floating shelves without brackets often comes down to leveling.
Question No 4: Can I install floating shelves on a concrete wall?
Answer: Yes, you can install floating shelves on a concrete wall. But you need to use special anchors. These anchors are designed for concrete. They are called masonry anchors. You’ll need to drill holes in the concrete wall. Then, insert the masonry anchors into the holes. Make sure the anchors are strong enough to hold the weight of the shelf and the items you’ll put on it. Concrete walls are very strong. But it’s important to use the right anchors. Otherwise, the shelf could fall down. Follow the instructions on the masonry anchor package carefully. If you are not comfortable drilling into concrete, it is best to hire a professional to do the job. They will have the tools and experience to install the shelves safely and securely. Knowing the right techniques helps when figuring out how to fix floating shelves without brackets on concrete.
Question No 5: How do I remove a floating shelf without damaging the wall?
Answer: To remove a floating shelf without damaging the wall, first remove any items from the shelf. Then, use a screwdriver to remove the screws that are holding the shelf to the wall. If the shelf is attached to wall studs, the screws will be long and sturdy. If the shelf is attached using wall anchors, the screws may be shorter and the anchors may need to be removed as well. Gently wiggle the shelf back and forth to loosen it from the wall. If the shelf is stuck, use a putty knife to carefully separate the shelf from the wall. Once the shelf is removed, you may need to patch any holes in the wall with spackle. Let the spackle dry, then sand it smooth and paint it to match the wall. Removing the shelf carefully will minimize damage to the wall. Understanding how to fix floating shelves without brackets includes knowing how to remove them properly.
Question No 6: What if my wall is not perfectly flat?
Answer: If your wall is not perfectly flat, you can use shims to level the floating shelf. Shims are thin pieces of wood or plastic that can be inserted between the shelf and the wall to compensate for any unevenness. Place a level on top of the shelf and insert shims where needed until the shelf is level. You may need to use multiple shims to achieve a perfectly level surface. Once the shelf is level, you can secure the shims in place with glue or small nails. Be sure to use a level to check the shelf from different angles to ensure that it is level in all directions. Using shims is a simple and effective way to install floating shelves on walls that are not perfectly flat. When considering how to fix floating shelves without brackets, always account for wall imperfections.
