Have you ever admired a beautiful tile backsplash and thought, “I want that in my kitchen?” Grouting might seem tricky, but it’s easier than you think! Many people worry about making a mess or choosing the wrong color. What if I told you that with a little practice, anyone can grout a tile backsplash like a pro?
Grouting not only fills the gaps between tiles; it also adds a finishing touch. Imagine transforming your kitchen into a stylish space without spending a fortune. Did you know that the right grout can improve the tiles‘ look and protect them from water damage? Now, that sounds worth the effort!
In this article, we will dive into how to grout tile backsplash easily and confidently. You’ll learn useful tips and tricks to make the job smooth. So, roll up your sleeves. Let’s uncover the secrets of grouting and make your kitchen shine!
How To Grout Tile Backsplash: A Step-By-Step Guide Grouting A Tile Backsplash Is An Essential Part Of Achieving A Polished And Professional Finish In Your Kitchen Or Bathroom. Whether You’Re Working With Ceramic, Glass, Or Stone Tiles, The Grouting Process Will Not Only Enhance The Look Of Your Installation But Also Seal The Edges Of Your Tiles, Preventing Moisture Damage. Below Is A Comprehensive Guide On How To Grout A Tile Backsplash Effectively. Materials You Will Need: – Grout (Choose Sanded Or Unsanded Based On Your Tile Gap) – Grout Float – Bucket For Mixing Grout – Sponge And Clean Water – Sealant (Optional, For Additional Protection) – Caulk (For Edges If Necessary) Preparing Your Workspace: 1. **Clean The Tile Surface**: Ensure That All Dust And Debris Are Cleared Away After Your Tiles Are Installed. A Clean Surface Allows For Better Adhesion Of The Grout. 2. **Mix The Grout**: Follow The Manufacturer’S Instructions To Mix Your Grout In A Bucket. The Consistency Should Be Similar To Peanut Butter—Smooth Yet Thick Enough To Stay In The Joints. Grouting Process: 1. **Apply The Grout**: Using The Grout Float, Apply The Grout Diagonally Across The Tiles. Work In Small Sections To Ensure The Grout Doesn’T Dry Before You Can Wipe It Off The Surface. 2. **Fill The Joints**: Make Sure To Fill All Joints And Gaps Between The Tiles Completely, With No Voids. 3. **Remove Excess Grout**: Hold The Grout Float At A 45-Degree Angle And Scrape Away Excess Grout From The Surface Of The Tiles. Cleaning Up: 1. **Initial Cleaning**: After Applying Grout, Wait About 10-15 Minutes For It To Set Slightly. Then, Using A Damp Sponge, Gently Wipe The Surface Of The Tiles To Remove Any Remaining Grout. 2. **Final Cleaning**: Once The Grout Has Cured For A Few Hours, You Can Polish The Surface With A Dry Cloth To Achieve A Uniform Shine. Sealing The Grout (Optional): To Prolong The Life Of Your Grout And Prevent Stains, It’S A Good Idea To Apply A Grout Sealer After It Has Fully Cured (Usually A Few Days, Based On The Grout Type). Conclusion: Grouting Your Tile Backsplash May Seem Daunting, But By Following These Steps And Taking Your Time, You Can Achieve A Beautiful And Long-Lasting Finish. With The Right Materials And A Little Patience, You’Ll Transform Your Space In No Time. Happy Tiling!
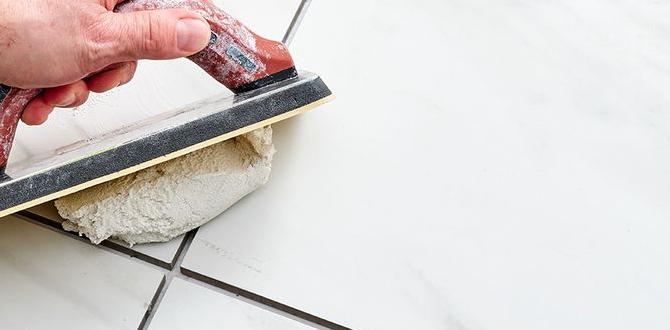
How to Grout Tile Backsplash
Have you ever wondered how to showcase those beautiful tile designs? Grouting a tile backsplash is easier than you think! First, mix the grout properly to achieve a smooth blend. Next, apply it using a float, pressing it into the joints. Remember to wipe off excess grout before it dries. After a short wait, seal the grout to protect it from stains. Did you know that grouting can transform your kitchen into a work of art? Grab your tools and start your project today!Understanding Grout Types
Define different types of grout (sanded, unsanded, epoxy).. Discuss when to use each type based on tile material and application..Grout is the glue that holds tiles together. There are three main types: sanded, unsanded, and epoxy. Each one works best in different situations.
- Sanded grout: Best for large gaps. Great for floors and walls.
- Unsanded grout: Ideal for tight spaces. Works well for delicate tiles.
- Epoxy grout: Strong and water-resistant. Perfect for kitchens and bathrooms.
Choosing the right grout depends on the kind of tile you have. Think about where you want to use it. This helps make a tile backsplash look great!
What are the types of grout?
There are three main types: sanded, unsanded, and epoxy grout. Each has its unique purpose and best uses based on tile type and design.
Tools and Materials Needed
List essential tools for grouting (sponge, float, bucket).. Provide a comprehensive list of materials including grout and sealant..Before starting, gather your tools and materials. Here’s what you’ll need:
- Sponge: For cleaning up extra grout.
- Float: Helps to spread grout evenly.
- Bucket: To mix your grout.
Now for the materials:
- Grout: Choose the right type for your tiles (sanded or unsanded).
- Sealant: Protects your grout from stains and moisture.
Having the right stuff makes all the difference! Are you ready to make your backsplash shine?
What tools do you need to grout a tile backsplash?
Tools include a sponge, float, and bucket. These are essential for mixing, applying, and cleaning the grout.
Preparing the Tile Surface
Explain cleaning and drying the tiled surface properly before grouting.. Discuss the importance of ensuring even tile alignment for optimal grout fill..Before grouting, make sure your tile surface is sparkling clean and dry. Dust and dirt do not make good friends with grout. Wipe each tile and the spaces in between with a damp cloth. Also, dry those tiles with a towel. Next, check if your tiles are aligned like a well-formed army. Uneven tiles can lead to grout-filled gaps or even worse, a crooked backsplash. A straight alignment means a smooth grout job!
| Cleaning Steps | Importance |
|---|---|
| Wipe tiles with a damp cloth | Removes dust and debris |
| Dry with a towel | Prevents grout from sticking |
| Check tile alignment | Ensures even grout fill |
Mixing the Grout
Provide stepbystep instructions for mixing grout to the right consistency.. Offer tips for avoiding common mixing mistakes..Start by pouring the powdered grout into a clean bucket. Next, add water according to the package instructions. Mix it well using a paddle or a mixing stick. The consistency should be like creamy peanut butter—smooth but not runny. Here’s a handy table for mixing:
| Grout Type | Water Ratio |
|---|---|
| Vinyl | 1 part water to 4 parts grout |
| Cement | 1 part water to 3 parts grout |
Keep mixing until there are no lumps. Avoid adding too much water, or your grout will be sad and weak, like a wilted lettuce leaf. If you’re in doubt, remember this tip: less is more! Now you’re ready to start grouting.
Applying the Grout
Outline the best techniques for applying grout to achieve a uniform finish.. Discuss methods for filling the joints effectively without excess..Grouting a tile backsplash can be easy with the right techniques. First, use a rubber float to spread the grout evenly. Push it into the joints. This helps fill every space. Next, wipe off excess grout with a damp sponge. Make smooth, gentle strokes. This keeps the surface clean. Be quick! Grout can dry fast. A consistent finish looks great and makes your backsplash shine.
How do I fill the joints effectively without excess?
Use a float at a 45-degree angle to push grout into joints. Be sure to remove extra grout right away. Clean your sponge often to avoid spreading grout where it shouldn’t go. This way, your edges stay sharp and neat.
Cleaning Up Excess Grout
Explain the process of removing excess grout from the tile surface.. Provide timing tips for cleaning before the grout sets to avoid damage..After you spread that grout like a pro, it’s time for a little cleanup magic. Grab a damp sponge and a bucket of water. Lightly wipe the tile surface to remove excess grout, but be gentle—like you’re petting a baby kitten! It’s best to do this within 15 to 30 minutes after applying grout. Waiting too long can lead to some tough scrubbing later, and nobody wants to fight with hardened grout! Here’s a quick table for timing:
| Time After Grouting | Action |
|---|---|
| 0-15 minutes | Wipe away excess grout |
| 15-30 minutes | Do a final clean-up |
| After 30 minutes | Get ready for intense scrubbing! |
Don’t forget—cleaning up quickly means less stress and more time to admire your beautiful backsplash!
Sealing the Grout
Discuss the reasons for sealing grout and when it should be done.. Provide guidance on choosing the right sealant and application method..Sealing grout is an important step for your tile backsplash. Sealing protects the grout from stains and moisture. It keeps the grout looking nice and lasting longer. You should seal the grout after it dries, usually 48 to 72 hours after installation. Choosing the right sealant is key. Look for a type labeled as “tile grout sealant.” Apply it with a small brush or a spray. Follow the instructions on the product for the best results.
Why should I seal my grout?
Sealing your grout prevents staining and damage, helping it last longer.
How to choose the right sealant?
- Pick a sealer designed for wall tiles.
- Check if it’s water-based or solvent-based.
- Read reviews for quality assurance.
Maintenance Tips for Grouted Tile Backsplash
Share cleaning tips to maintain the appearance of the grouted tiles.. Discuss how to check for and address grout damage over time..Keeping your tile backsplash clean is easier than you might think. For regular upkeep, a mix of warm water and mild soap works wonders. Use a soft cloth, and voila! Sparkling tiles. If your grout starts to look sad or cracks appear, don’t panic! Inspect it every few months. To fix any damage, squeeze some fresh grout into the cracks. It’s like giving your tiles a mini spa day! Remember, happy grout means happy tiles!
| Task | Frequency |
|---|---|
| Clean Tiles | Weekly |
| Inspect Grout | Every 6 Months |
| Repair Grout | As Needed |
Conclusion
In conclusion, grouting your tile backsplash is easy and rewarding. First, choose the right grout. Then, mix it correctly and apply it evenly. Don’t forget to clean off excess grout right away. With practice, you can achieve a professional look. Now, grab your tools and start your project! For more tips, check out our other articles!FAQs
Sure! Here Are Five Related Questions On The Topic Of Grouting A Tile Backsplash:Grouting a tile backsplash is important because it keeps water out. You mix the grout, then apply it between the tiles. Use a sponge to clean off extra grout. Once it dries, your backsplash looks neat and is protected! It makes your kitchen look nice, too.
Sure! Please tell me what question you would like me to answer.
What Materials And Tools Do I Need To Grout A Tile Backsplash Effectively?To grout a tile backsplash, you’ll need grout, which fills the spaces between tiles. Grab a grout float to spread the grout evenly. Use a sponge and water to clean off extra grout from the tiles. Don’t forget a bucket for mixing the grout and a pair of gloves to keep your hands clean!
How Long Should I Wait After Installing The Tile Before Applying Grout To A Backsplash?You should wait about 24 hours after you install the tile before putting on the grout. This time lets the adhesive dry properly. If it’s still wet, the grout won’t stick well. Always check the instructions on the adhesive you used, too. It’s best to follow those carefully!
What Is The Best Technique For Applying Grout To Ensure Even Coverage In The Tile Joints?To apply grout evenly in tile joints, you can use a grout float. Start by scooping some grout with the float. Press it into the joints between the tiles. Move the float at a slight angle to spread it out. Wipe off any extra grout with a damp sponge. This way, you’ll get neat and even lines!
How Do I Properly Clean Excess Grout From The Tile Surface After Grouting?To clean excess grout from the tile surface, wait for about 15 to 30 minutes after grouting. Use a damp sponge to wipe the tiles gently. Rinse the sponge in clean water to keep it fresh. If needed, repeat this until the tiles look clean. Make sure to dry the tiles with a soft cloth to avoid stains.
What Are Some Tips For Choosing The Right Grout Color To Complement My Tile Backsplash?When choosing a grout color for your tile backsplash, think about contrast. Light grout can make dark tiles pop, and dark grout can make light tiles stand out. You can also pick a grout that matches your tiles for a smooth look. Always test a small area first to see how it looks. Finally, consider the room’s colors to make everything match nicely!

