Have you ever looked up at a beautiful chandelier and thought about how to remove it? It can feel like a daunting task. But don’t worry! Many people wonder how to do this safely and easily.
Imagine you have a lovely, shiny chandelier in your home. You want to change the look of your room or maybe even do some repairs. It’s not hard to remove it, but you must be careful. Did you know that thousands of people change their light fixtures each year? Some do it for fun, while others need to fix broken parts. Whatever the reason, understanding how to remove a chandelier is useful.
Are you ready to learn the steps? With some basic tools and a little help, you can make it happen. Let’s dive into the process of chandelier removal. You’ll discover how easy it can be when you know what to do!
How To Remove A Chandelier: Step-By-Step Guide

How to Remove a Chandelier
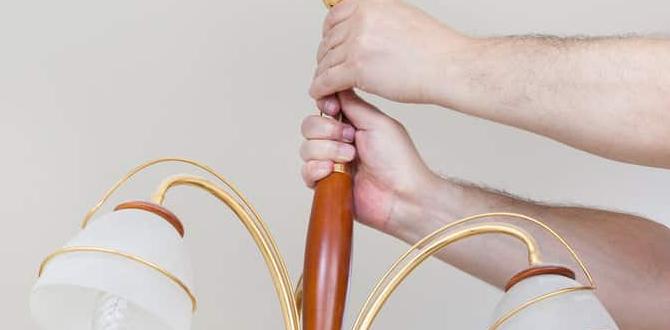
Removing a chandelier can seem daunting, but it’s manageable with the right steps. First, ensure you turn off the power. Have someone help you support the weight. Disconnect the wires carefully; remember where they go! Then, unscrew the chandelier from its mount. Did you know chandeliers can weigh more than 50 pounds? This makes it crucial to have a buddy. Follow these steps, and brighten your space with ease!
Gathering Necessary Tools and Supplies
List of essential tools (ladder, screwdriver, etc.). Safety equipment (gloves, goggles, etc.).
Before you embark on your chandelier adventure, gather your goodies! You need a sturdy ladder and a trusty screwdriver. Safety comes first, so grab gloves and goggles too. You’d want to protect those peepers and delicate fingers! Here’s a handy list:
| Tools | Supplies |
|---|---|
| Ladder | Gloves |
| Screwdriver | Goggles |
| Wire cutters | Electrical tape |
Remember, it’s better to be safe than sorry! You wouldn’t want to turn your chandelier removal into an unplanned circus act! So gather those tools, and get ready for some fun.
Preparing the Space for Removal
Ensuring safety by clearing the area around the chandelier. Turning off power supply to the fixture.
Before you take down the chandelier, make sure the area is safe. Remove any furniture beneath it, and clear the floor of any items. This way, you have space to work and no one will trip. Next, turn off the power supply to the fixture. Find the right switch on your circuit breaker or fuse box. Double-check that the light is off. Safety first!
Why is it important to prepare the space?
Clearing the area and turning off the power protects you from accidents. You won’t trip or touch a live wire while removing the chandelier.
- Clear space around the chandelier
- Turn off the circuit breaker
- Use a ladder if necessary
Steps to Safely Remove the Chandelier
Detailed process of detaching the chandelier from the ceiling. Removing wiring and securing components.
First, turn off the power to the chandelier at the circuit breaker. Use a sturdy ladder to reach it safely. Next, gently cover the chandelier with a blanket to protect it from scratches. Unscrew the bulbs and glass parts carefully, placing them aside. Once all the pieces are removed, detach the main body from the ceiling. This may require assistance for safe handling. Finally, remove the wires by unscrewing the wire nuts and securely covering any open wires.
How do I safely disconnect the wires?
To disconnect wires, unscrew the wire nuts carefully. Make sure to note which wires go together so you can safely reconnect them later if needed.
Handling and Storing the Chandelier
Proper handling techniques to avoid damage. Recommendations for storage options.
To keep your chandelier safe, handle it with care. Use both hands and avoid any tight grips. This way, you won’t drop it like a hot potato! For storage, choose a soft, dry spot away from sharp objects. Wrapping it in bubble wrap can help, because who doesn’t love popping those bubbles later? Check out this storage table for tips:
| Storage Option | Description |
|---|---|
| Soft Box | Utilize a padded box for secure storage. |
| Hanging Method | Hang from a sturdy ceiling hook, if possible. |
| Bubble Wrap | Wrap it up! It’s like a cozy blanket for your chandelier. |
Following these tips will help you avoid damage and keep your chandelier shiny for years to come!
Common Challenges and Solutions
Typical problems encountered during chandelier removal. Effective solutions to overcome these challenges.
Removing a chandelier can feel tricky, like trying to catch a slippery fish. One common challenge is tangled wires. Don’t panic! Use labeled zip ties to keep wires sorted. Another issue is heavy weight. This might make you feel like you’re lifting a small elephant. Grab a friend for support—teamwork makes the dream work! Check out the table below for quick tips:
| Typical Problems | Effective Solutions |
|---|---|
| Tangled wires | Use zip ties to organize |
| Too heavy to lift | Ask a friend for help |
| Mounting issues | Check if you need tools |
With a little planning and some giggles, you’ll conquer your chandelier removal in no time!
When to Call a Professional
Signs that indicate the need for professional assistance. Benefits of hiring an electrician for chandelier removal.
Sometimes you need help with removing a chandelier. Look out for these signs:
- Heavy fixture: If it’s too heavy for you to handle.
- Electrical issues: If you see any loose wires or other problems.
- Fear or uncertainty: If you feel unsure about working safely.
Hiring a professional electrician can make the job smooth. They ensure your safety and prevent damage. Experts have the right tools and skills for delicate tasks. This can save you time and stress. So, if you notice these warning signs, it’s a good idea to call for help!
When should I call an electrician for chandelier removal?
If you’re unsure or nervous about removing a chandelier, you should call an electrician. Also, if it’s heavy or has electrical problems, get help. It’s safer this way!
Conclusion
In summary, removing a chandelier involves a few simple steps. First, turn off the power and gather your tools. Next, carefully detach the chandelier from the ceiling. Always ensure safety first! If you’re unsure, consider asking for help. For detailed guides, you can read more online. Now, you’re ready to tackle that chandelier with confidence!
FAQs
What Safety Precautions Should I Take Before Removing A Chandelier?
Before you remove a chandelier, make sure to turn off the power at the circuit breaker. This keeps you safe from electric shock. Next, use a sturdy step ladder so you can reach the chandelier easily. It’s a good idea to have someone help you hold it while you take it down. Finally, wear safety goggles to protect your eyes from falling dust or debris.
How Do I Properly Disconnect The Electrical Wiring From A Chandelier?
First, make sure the power is off by turning off the switch and unplugging it if needed. Then, use a screwdriver to remove any screws holding the chandelier to the ceiling. Carefully hold the chandelier while you unscrew the wire nuts that connect the wires. Remember to take note of where each wire connects. After that, gently lower the chandelier down.
What Tools Do I Need To Remove A Chandelier Safely?
To remove a chandelier safely, you need a few tools. First, get a ladder to reach the light. You also need a screwdriver to unscrew it. Use pliers to help with any tight wires. Don’t forget gloves to keep your hands safe!
How Can I Ensure That I Don’T Damage The Ceiling Or The Chandelier During Removal?
To avoid damaging the ceiling or chandelier, start by turning off the power. Use a sturdy ladder to reach the chandelier safely. Support the chandelier with one hand while you remove the screws with the other. Make sure to take your time and keep everything steady. If it feels too heavy, ask a friend for help!
Are There Specific Techniques For Removing Different Styles Of Chandeliers, Such As Flush Mounts Or Hanging Chandeliers?
Yes, there are different ways to remove chandeliers. For flush mount lights, you need to unscrew the base and pull it down. Hanging chandeliers usually have hooks or chains. You can lift them up and disconnect the wires carefully. Always make sure the power is off first!


