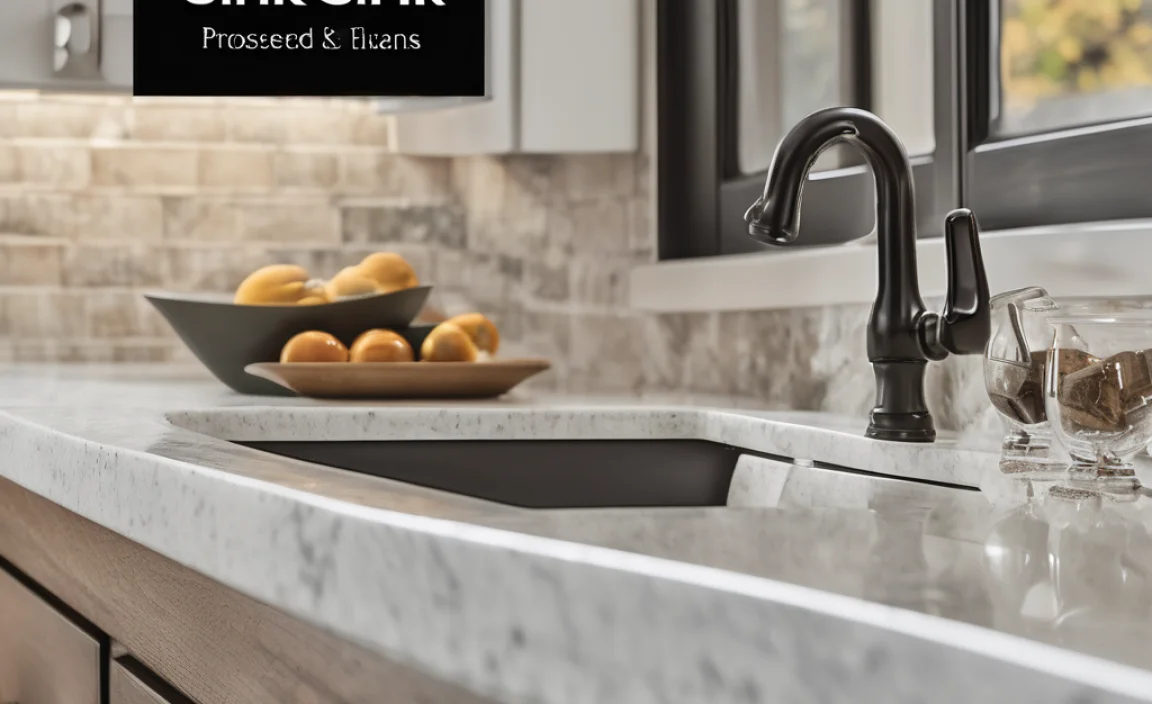
Do you have a cool sink in your kitchen? Maybe it’s an undermount sink. These sinks sit under your granite countertop. They look neat and clean. But what happens if it gets broken? Or if you want a new one? Then, you need to learn how to remove undermount sink from granite. It might seem hard, but you can do it. Let’s find out how!
Key Takeaways
- Knowing how to remove undermount sink from granite saves money on repairs.
- Gather the right tools: utility knife, caulk remover, and safety glasses.
- Carefully cut the caulk or adhesive around the sink’s edges.
- Gently detach the sink clips or mounting hardware underneath the counter.
- Always prioritize safety to prevent damage to the granite or yourself.
Steps for How to Remove Undermount Sink
Removing an undermount sink from a granite countertop might look tricky. Granite is strong but can crack. Undermount sinks are held tightly. They use caulk and clips. You must be careful. The goal is to take the sink out without hurting the granite. You need to go step by step. First, get your tools ready. You’ll need a utility knife. A caulk remover will help. Safety glasses are a must. You’ll also want a bucket. This will catch water. A pry bar can help, but use it gently. Now, are you ready to start? Let’s learn how to remove undermount sink from granite the right way. Safety first!
- Gather all your tools before you start.
- Turn off the water supply to the sink.
- Clear everything from under the sink.
- Wear safety glasses to protect your eyes.
- Have a helper if the sink is heavy.
Knowing the right steps makes the job easier. It also keeps you safe. Start by cutting the caulk. This is what seals the sink to the granite. Use your utility knife. Cut carefully around the sink’s edge. Then, check for clips. These hold the sink up. Loosen them gently. Now, the sink should start to come loose. If it’s stuck, don’t force it. Use the caulk remover again. Once the sink is free, lift it out slowly. Have your helper hold it if it’s heavy. Now you know the basics. You can remove that old sink. You’re one step closer to your new kitchen!
Fun Fact or Stat: Did you know that undermount sinks became popular in the early 2000s? People loved how they made countertops look seamless and modern!
Prep the Area Before Sink Removal
Before you start to remove undermount sink from granite, you need to prep. Why is prep so important? Think of it like baking a cake. You need all the ingredients ready. Removing a sink is the same. First, turn off the water. This stops any leaks. Next, clear out the space under the sink. Move all those cleaning supplies. You want room to work. Get your tools within reach. Have your safety glasses on. Prep helps you work safely and quickly. It also stops you from making mistakes. A little prep goes a long way. Now you’re set to start removing that sink!
Loosen the Caulk with Care
Imagine the caulk is like glue. It sticks the sink to the granite. You must loosen it carefully. Why? Because you don’t want to break the granite. Grab your utility knife. Gently cut along the caulk line. Go slowly. Use a caulk remover if needed. This softens the caulk. Be patient. Don’t rush. If the caulk is old, it might be tough. Keep working at it. A little heat can help too. Use a hairdryer on low. Heat softens the caulk. Once the caulk is loose, the sink will move easier. You’re one step closer! Learning how to remove undermount sink from granite involves patience.
Identify and Detach Sink Mounting Clips
Sink mounting clips are like little helpers. They hold the sink up tight. You need to find them. Look under the sink. They might be screws or brackets. Each clip needs to be loosened. Use a screwdriver or wrench. Turn slowly. Don’t force anything. Some clips are easy to reach. Others are hidden. Use a flashlight. This helps you see better. As you loosen the clips, the sink will start to drop. Be ready to support it. Have a helper ready. This part can be tricky. But with patience, you can do it. Understanding the clips is key. It helps you remove undermount sink from granite safely.
Detach Plumbing Before Sink Removal
Before you even think about how to remove undermount sink from granite, think plumbing! Why? Because your sink is attached to pipes. These pipes bring water in and take it away. You can’t just pull the sink out with the pipes still connected. That would be a mess! You need to disconnect them first. Turn off the water supply. This is super important. Then, get a wrench. Loosen the nuts on the pipes. Have a bucket ready. Some water will spill out. Disconnect the drain too. It might have a P-trap. This is a curved pipe. It catches debris. Take it apart carefully. Now the plumbing is free. You can move on to the next step. Remember, safety first!
- Turn off the water supply valves.
- Place a bucket under the pipes.
- Use a wrench to loosen pipe connections.
- Disconnect the drain and P-trap.
- Check for any remaining connections.
- Dispose of old plumbing parts properly.
Working with plumbing can seem scary. But it’s just like following a recipe. Each step is important. If you’re not sure, ask for help. A plumber can give you advice. Or, watch a video online. There are many guides to show you what to do. Just take your time. Don’t rush. Rushing can lead to mistakes. Mistakes can cause leaks. Leaks can damage your kitchen. So, be careful. Once the plumbing is disconnected, you’re ready. The sink is almost free. Keep going. You’re doing great!
Fun Fact or Stat: About 10% of homeowners attempt DIY plumbing repairs each year. Always be cautious and know your limits!
Shut Off Water Supply to Avoid Leaks
Imagine you’re a superhero. Your mission is to stop the flood. The flood is water leaking from the pipes. The way to stop it? Turn off the water supply! How do you do this? Look under your sink. You’ll see two valves. One for hot water, one for cold. Turn them both clockwise. Turn until they stop. Now the water is off. You’ve saved the day! Why is this so important? Water can damage your cabinets. It can cause mold. Mold is bad for your health. So, always turn off the water first. It’s a simple step that saves a lot of trouble. Learning how to remove undermount sink from granite begins with this crucial step.
Disconnect Drain Pipes Securely
The drain pipes are like the sink’s exit route. They carry water away. You need to disconnect them safely. Why? Because they can be full of gunk. And old water. Gross! Get your bucket ready. Place it under the pipes. Use your wrench to loosen the nuts. Turn them slowly. The pipes will start to come apart. Be careful. The P-trap might have water in it. Let it drain into the bucket. Check for any rubber washers. These seal the pipes. Keep them safe. You might need them later. Now the drain pipes are free. You’re one step closer to removing the sink. And one step closer to a cleaner kitchen!
Inspect and Clear Any Remaining Connections
Think of this step as a final check. You want to make sure everything is disconnected. Look closely under the sink. Are there any more pipes? Any wires? Anything still attached? If so, disconnect them now. Why is this important? You don’t want to pull the sink and break something. That would be a disaster. Use a flashlight to see better. Feel around with your hands. Make sure nothing is holding the sink. This step might seem small. But it can save you big trouble. It ensures you can safely remove undermount sink from granite.
Safely Lift and Remove the Sink
Okay, you’ve done the hard part. Now it’s time to lift. But how to remove undermount sink from granite safely? This is important. Granite can break. Sinks can be heavy. You need to be careful. Get a good grip on the sink. If it’s too heavy, ask for help. Don’t try to lift it alone. Lift slowly and steadily. Don’t jerk the sink. This could damage the granite. As you lift, watch for any snags. Is anything still connected? If so, stop. Fix the problem before you keep lifting. Once the sink is free, set it down gently. You did it! You removed the sink. Now you can install a new one. Or fix the old one. Great job!
- Get a firm grip on the sink.
- Lift slowly and steadily.
- Have a helper for heavy sinks.
- Watch for any remaining connections.
- Set the sink down gently.
Lifting the sink is like moving furniture. You need to use your muscles. But you also need to use your brain. Think about what you’re doing. Plan your move. This will help you avoid accidents. If you feel pain, stop. Don’t push yourself too hard. It’s better to ask for help. Or take a break. Remember, safety first. Lifting the sink is the last big step. Once it’s out, you can relax. You’ve learned a valuable skill. You know how to remove undermount sink from granite. You can be proud of yourself!
Fun Fact or Stat: The average kitchen sink weighs between 20 and 50 pounds. Some cast iron sinks can weigh over 100 pounds!
Use Proper Lifting Techniques to Avoid Injury
Your back is important. You need to protect it. How? By using proper lifting techniques. Bend your knees, not your back. Keep your back straight. Hold the sink close to your body. Don’t twist. Turn your whole body. If the sink is too heavy, don’t lift it. Ask for help. Or use a dolly. A dolly is a small cart. It can help you move heavy things. Lifting correctly keeps you safe. It prevents back pain. It lets you enjoy your new sink. Learning how to remove undermount sink from granite includes learning to lift safely.
Have a Helper for Heavy or Awkward Sinks
Some sinks are big. Some are heavy. Some are both! These sinks need a helper. Why? Because they’re hard to lift alone. A helper can steady the sink. They can help you lift. They can watch for problems. Two people are always better than one. Especially when lifting heavy things. Ask a friend or family member. Offer them pizza. Or a cold drink. Having a helper makes the job easier. And safer. You’ll be glad you asked for help. Plus, you can celebrate together when you remove undermount sink from granite.
Inspect for Any Snags or Obstructions During Lifting
Imagine you’re exploring a cave. You need to watch for obstacles. Rocks. Low ceilings. The same is true when lifting the sink. You need to watch for snags. Are there any wires in the way? Any pipes still connected? Anything blocking the sink? If so, stop lifting. Fix the problem first. Snags can cause damage. They can break the granite. They can hurt you. Inspect carefully. Take your time. Make sure the path is clear. Then, you can lift the sink safely. This careful approach is essential when learning how to remove undermount sink from granite.
Clean the Granite Surface After Removal
You got the sink out! Great job. But the work isn’t quite done. Now you need to clean. Why? Because there’s probably old caulk. And maybe some glue. The granite might be dirty. You want a clean surface. This helps the new sink stick better. Get a scraper. Gently scrape off the old caulk. Use a cleaner to wipe down the granite. Make sure it’s safe for granite. Some cleaners can damage it. Now the surface is clean. It’s ready for the new sink. Cleaning is important. It makes the new sink look better. And last longer. Knowing how to remove undermount sink from granite also means knowing how to clean up.
| Cleaning Supply | Purpose | Notes |
|---|---|---|
| Plastic Scraper | Removes old caulk | Avoid metal to prevent scratches |
| Granite Cleaner | Cleans the surface | Check the label for granite safety |
| Soft Cloth | Wipes down the granite | Microfiber cloths work well |
| Rubbing Alcohol | Removes adhesive residue | Use sparingly |
Cleaning might seem boring. But it’s like the final touch on a painting. It makes everything look perfect. Think of it as preparing for a party. You want your house to be clean. So your guests feel welcome. A clean granite surface welcomes the new sink. It says, “Come on in! Make yourself at home!” Cleaning is also a chance to inspect the granite. Look for cracks or chips. If you find any, fix them. This will keep your granite looking great for years to come. So, don’t skip the cleaning step. It’s worth the effort. You’ll be glad you did it!
Fun Fact or Stat: Regular cleaning of granite countertops can extend their lifespan by up to 10 years!
Scrape Away Old Caulk and Adhesive Residue
The old caulk is like a stubborn sticker. It doesn’t want to come off. But you can get it off! Use a plastic scraper. Metal can scratch the granite. Scrape gently. Don’t push too hard. If the caulk is really stuck, try heat. Use a hairdryer. Heat softens the caulk. Then it’s easier to scrape. You can also use a caulk remover. This is a special liquid. It dissolves the caulk. Follow the instructions on the bottle. Once the caulk is gone, wipe the surface clean. Removing the old caulk is key when you remove undermount sink from granite.
Use Granite-Safe Cleaners for the Surface
Granite is like a delicate flower. It needs special care. You can’t just use any cleaner. Some cleaners can damage it. Look for cleaners that say “granite safe.” These cleaners are gentle. They won’t hurt the stone. Avoid cleaners with acid. Or bleach. These can etch the granite. Etching is like scratching. It makes the granite look dull. Use a soft cloth to wipe the granite. Don’t use a scrub brush. Scrub brushes can also scratch the granite. Clean the granite regularly. This will keep it looking shiny and new. Keeping the granite clean is essential after you remove undermount sink from granite.
Inspect Granite for Damage and Make Repairs
Now that the granite is clean, look closely. Do you see any cracks? Any chips? Any stains? If so, you need to fix them. Small cracks can be filled. Use a granite repair kit. These kits have special glue. And color. The color matches your granite. Follow the instructions on the kit. For bigger cracks, call a professional. They can fix the granite properly. Stains can be removed. Use a poultice. A poultice is a paste. It draws the stain out of the granite. Fixing damage keeps your granite strong. And beautiful. This careful inspection is crucial after you remove undermount sink from granite.
Install New Sink or Reinstall Old Sink
You’ve removed the old sink. Now what? You can install a new one. Or put the old one back. Either way, you need to follow the instructions. Each sink is different. Read the instructions carefully. Make sure you have all the parts. And the right tools. Apply new caulk around the sink’s edge. This seals the sink to the granite. Connect the plumbing. Turn on the water. Check for leaks. If there are no leaks, you’re done! You installed a sink. You can be proud of yourself. This final step is the reward for knowing how to remove undermount sink from granite.
- Read the sink installation instructions.
- Apply new caulk around the sink’s edge.
- Connect the plumbing properly.
- Turn on the water and check for leaks.
- Clean up your work area.
- Admire your new or reinstalled sink!
Installing a sink is like building a puzzle. Each piece needs to fit just right. If something doesn’t fit, don’t force it. Check the instructions again. Make sure you’re doing it correctly. If you’re not sure, ask for help. A plumber can install the sink for you. But if you follow the instructions, you can do it yourself. It’s a rewarding feeling. Knowing you fixed something with your own hands. So, take your time. Be careful. And enjoy the process. You’re creating a beautiful and functional kitchen.
Fun Fact or Stat: A properly installed sink can last for 15-20 years with proper maintenance!
Apply Fresh Caulk for a Watertight Seal
Caulk is like the glue that holds everything together. It seals the sink to the granite. This stops water from leaking. Use a good quality caulk. Make sure it’s waterproof. And mildew resistant. Mildew is a type of mold. It can grow in damp places. Apply the caulk evenly. Use a caulk gun. This makes it easier. Smooth the caulk with your finger. Or a caulk smoothing tool. This makes it look neat. Let the caulk dry completely. Follow the instructions on the tube. Fresh caulk keeps your sink leak-free. This is a vital step after you remove undermount sink from granite.
Reconnect Plumbing Lines and Check for Leaks
Remember those pipes you disconnected? Now it’s time to reconnect them. Use your wrench to tighten the nuts. But don’t overtighten. Overtightening can damage the pipes. Turn on the water slowly. Watch for leaks. Check all the connections. If you see a leak, tighten the nut a little more. If the leak is still there, you might need new washers. Washers are small rubber rings. They seal the pipes. Reconnecting the plumbing correctly is essential. It prevents water damage. And headaches. After you remove undermount sink from granite, this step ensures your sink works perfectly.
Ensure Proper Alignment and Support for the Sink
The sink needs to be straight. And level. Use a level to check. A level is a tool with a bubble. The bubble shows if something is straight. If the sink is not level, adjust it. You might need shims. Shims are thin pieces of wood. Or plastic. They go under the sink. To level it. The sink also needs support. Make sure the clips are tight. The clips hold the sink up. If the sink is wobbly, add more support. Proper alignment and support keep the sink stable. It prevents it from cracking the granite. This final check is crucial after you remove undermount sink from granite.
Summary
Removing an undermount sink from a granite countertop needs care. Granite can crack if you are not careful. The first step is to gather the right tools. These include a utility knife, caulk remover, and safety glasses. Turning off the water supply is important. This prevents leaks. Disconnecting the plumbing is next. Loosen the pipes with a wrench. Then, you must cut the caulk. Do this gently around the sink’s edge. Loosen the sink clips. Lift the sink slowly. Ask for help if it’s heavy. Clean the granite surface after removing the sink. This makes sure the new sink fits well. How to remove undermount sink from granite can be easy if you take your time.
Installing a new sink involves applying fresh caulk. This creates a watertight seal. Reconnect the plumbing lines. Check for leaks. Make sure the sink is aligned. And has support. With these steps, you can remove and replace your sink. Remember to be patient. And always put safety first. Removing a sink from granite can improve your kitchen. It lets you update your style. Or fix a broken sink. You can do it yourself with the right tools and steps.
Conclusion
Removing an undermount sink from granite is a task you can handle. Take your time and be gentle. Gather your tools before you start. Disconnect the plumbing with care. Cut the caulk slowly. Lift the sink with help if needed. Clean the granite after removal. These steps will protect your countertop. They will also help you install a new sink. You can save money by doing it yourself. Learning how to remove undermount sink from granite empowers you to tackle home repairs.
Frequently Asked Questions
Question No 1: What tools do I need to remove an undermount sink from granite?
Answer: You’ll need a few key tools. First, get a utility knife. This is for cutting the caulk. Next, a caulk remover helps soften old caulk. Safety glasses are a must. They protect your eyes. A wrench is needed for the plumbing. You’ll also want a bucket. To catch water. A plastic scraper helps remove residue. Having these tools ready makes the job easier. Knowing how to remove undermount sink from granite also means knowing what tools you need.
Question No 2: How do I disconnect the plumbing before removing the sink?
Answer: Disconnecting the plumbing is important. First, turn off the water supply. Look under the sink for valves. Turn them clockwise to shut off the water. Place a bucket under the pipes. This catches any spills. Use a wrench to loosen the nuts on the pipes. Disconnect the drain pipes. Be careful, they might have water in them. Make sure all pipes are free before moving on. Knowing how to remove undermount sink from granite includes understanding basic plumbing.
Question No 3: How do I safely cut the caulk without damaging the granite?
Answer: Cutting the caulk needs a gentle touch. Use a sharp utility knife. Cut along the caulk line. Go slowly and carefully. Don’t apply too much pressure. You don’t want to scratch the granite. If the caulk is old and hard, use a caulk remover. This softens the caulk. Making it easier to cut. You can also use a hairdryer on low heat. Heat can soften the caulk too. Patience is key. Don’t rush the process. This helps you safely remove undermount sink from granite.
Question No 4: What if the sink is really stuck and won’t come loose?
Answer: If the sink is stuck, don’t force it. This could damage the granite. Check again for any remaining caulk. Or clips. Make sure you’ve removed everything. Use the caulk remover again. Apply more to soften the caulk. Gently try to wiggle the sink. A pry bar can help. But use it carefully. Place a piece of wood between the pry bar and the granite. This protects the granite. Be patient. Keep working at it gently. Eventually, the sink will come loose. This careful approach is essential when learning how to remove undermount sink from granite.
Question No 5: How do I clean the granite surface after removing the sink?
Answer: Cleaning the granite is important. It prepares the surface for a new sink. Use a plastic scraper to remove old caulk. And adhesive. Then, use a granite-safe cleaner. Wipe down the surface with a soft cloth. Avoid cleaners with acid or bleach. These can damage the granite. Inspect the granite for any cracks or chips. Fix them if needed. A clean surface helps the new sink stick better. And look better. This final touch is vital when you remove undermount sink from granite.
Question No 6: How do I know if I need to call a professional?
Answer: Sometimes, the job is too big to handle alone. If you’re not comfortable with plumbing, call a plumber. If the sink is very heavy, get help. If you see cracks in the granite, call a professional. They can repair the granite safely. If you’re not sure about something, it’s always better to ask for help. Professionals have experience. And the right tools. They can ensure the job is done correctly. Knowing when to ask for help is key when learning how to remove undermount sink from granite.