Do you love yummy tomatoes? How about crunchy cucumbers? You can grow them yourself! It all starts with tiny seeds. But it’s cold outside. So, how to start seeds indoors for gardening? It’s easier than you think! Let’s learn how to grow your own food.
Starting seeds inside keeps them safe. You can have a garden even when it’s cold. It’s like giving your plants a head start. Soon, you’ll have lots of tasty veggies. Are you ready to become a super gardener? Let’s get started and learn the secrets.
Key Takeaways
- Starting seeds indoors for gardening lets you grow plants even when it’s cold outside.
- Use clean containers and fresh seed starting mix for the best results.
- Give your seedlings plenty of light and water, but don’t overdo it.
- Harden off your seedlings before planting them outdoors to help them adjust.
- Be patient and watch your tiny seeds grow into strong, healthy plants.
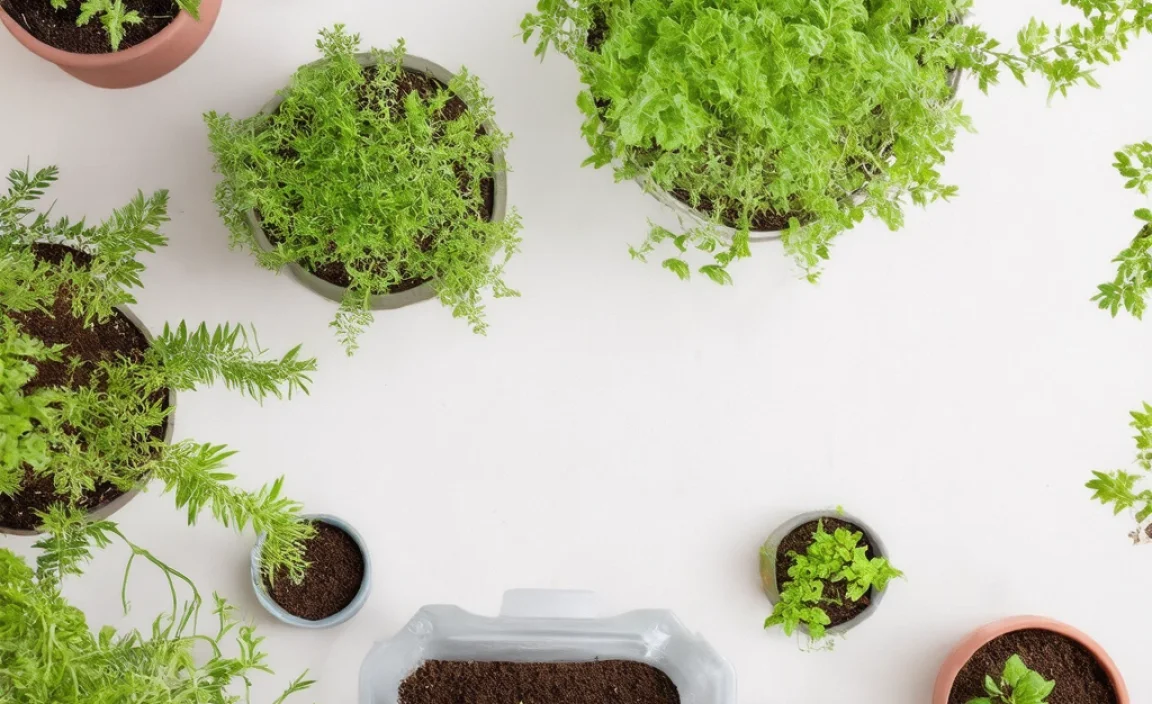
How to Start Seeds Indoors: Getting Ready
Before you even think about how to start seeds indoors for gardening, you need to get ready. This means gathering all your supplies. Think of it like preparing for a fun science experiment. You need the right tools to make it work. First, you need containers. Small pots or trays work great. Make sure they have holes in the bottom. This lets extra water drain out. Next, you need seed starting mix. This is special soil for baby plants. Don’t use regular garden soil. It can be too heavy. You also need seeds! Pick the veggies or flowers you want to grow. Finally, you need a place to put your seeds. A sunny windowsill or a grow light works well. Getting ready is half the fun! It’s like preparing for a big adventure.
- Gather your containers, like small pots or trays.
- Use seed starting mix, not regular garden soil.
- Choose the seeds of your favorite plants.
- Find a sunny spot or use a grow light.
- Make sure your containers have drainage holes.
Now that you have everything, let’s talk about why getting ready is so important. Imagine trying to bake a cake without flour or eggs. It wouldn’t work very well, right? It’s the same with seeds. If you don’t have the right soil, your seeds won’t grow. If you don’t have enough light, your plants will be weak. Taking the time to prepare makes a big difference. It gives your seeds the best chance to sprout and grow strong. So, take your time and have fun gathering your supplies. You’re one step closer to having your own amazing garden. Remember, a little preparation goes a long way!
Choosing the Right Containers
What kind of container should you use? There are many choices! You can use small plastic pots. You can also use trays with little cells. Some people even use egg cartons! The most important thing is drainage. Your container must have holes in the bottom. This lets extra water escape. If the water stays in the pot, the seeds can rot. Choose a container that is easy to handle. You will need to move it around. Make sure it is clean. You don’t want to spread any diseases to your new plants. Have you ever seen a plant growing in a funny container?
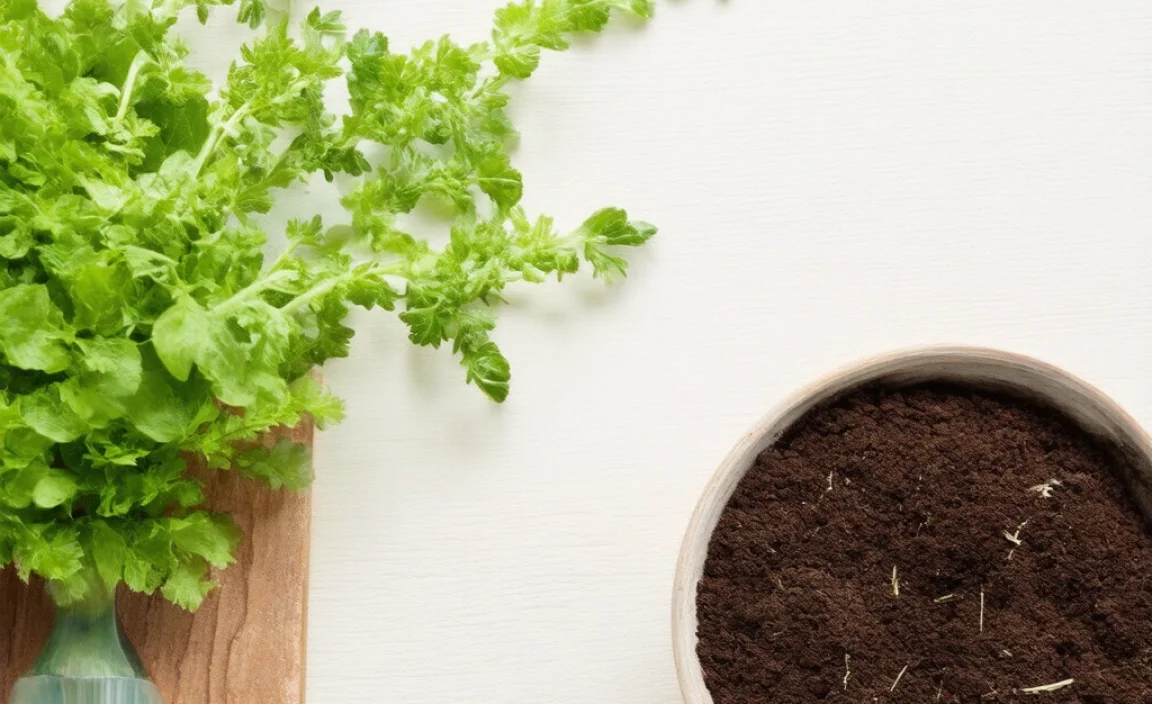
Picking the Perfect Seed Starting Mix
Why can’t you use regular garden soil? Garden soil is too heavy for baby seeds. It can also have diseases or bugs. Seed starting mix is light and fluffy. It helps the seeds sprout easily. It also drains well. This means the water doesn’t stay too long. Look for a mix that says “seed starting” on the bag. You can find it at most garden stores. It’s like giving your seeds a soft bed to sleep in. Have you ever felt the difference between regular soil and seed starting mix?
Selecting Your Favorite Seeds
What do you want to grow? Tomatoes? Peppers? Flowers? The choice is yours! Read the seed packet carefully. It will tell you when to start the seeds indoors. Some seeds need to be started earlier than others. Think about how much space you have. Some plants get very big. Choose seeds that will fit in your garden. It’s like planning a party. You need to know how many people are coming! Did you know that some seeds need to be soaked in water before planting?
Fun Fact or Stat: Did you know that some seeds can stay alive for hundreds of years? Scientists have found seeds that are centuries old and still able to sprout!
Planting Your Seeds: A Step-by-Step Guide
Now comes the fun part: planting! Knowing how to start seeds indoors for gardening involves a few simple steps. First, moisten the seed starting mix. You want it to be damp, but not soaking wet. Fill your containers with the mix. Leave a little space at the top. Next, make a small hole in the center of each container. The seed packet will tell you how deep to plant the seeds. Usually, it’s only about ¼ inch deep. Place one or two seeds in each hole. Cover the seeds gently with more mix. Lightly pat the soil down. Finally, water the seeds gently. Use a spray bottle to avoid washing them away. Now, wait and watch!
- Moisten the seed starting mix before filling containers.
- Make a small hole in each container for the seeds.
- Plant one or two seeds per hole.
- Cover the seeds with mix and pat gently.
- Water the seeds gently with a spray bottle.
Why is it important to follow these steps carefully? Well, think about it like baking cookies. If you don’t measure the ingredients correctly, the cookies won’t turn out right. It’s the same with planting seeds. If you plant them too deep, they might not be able to reach the surface. If you don’t water them enough, they’ll dry out. Following the steps ensures that your seeds have the best chance to grow. It’s like giving them a good start in life. So, take your time and be careful. You’ll be rewarded with lots of healthy seedlings.
Moistening the Seed Starting Mix
Why do you need to moisten the mix first? Dry mix can repel water. This means the water won’t soak in evenly. Moisten the mix in a bowl or bucket. Add water slowly and mix it in. You want the mix to be damp, like a wrung-out sponge. If it’s too wet, it will be muddy. Too dry, and the seeds won’t get enough water. It’s like finding the perfect balance. Have you ever tried to make mud pies?
Making the Perfect Hole
How deep should you plant the seeds? The seed packet will tell you. Most seeds need to be planted shallowly. A good rule of thumb is to plant them about two to three times as deep as they are wide. Use your finger or a pencil to make the hole. Be gentle! You don’t want to squish the soil too much. It’s like making a tiny bed for the seed. Have you ever seen a tiny ant hole?
Covering and Watering the Seeds
Why do you need to cover the seeds? Covering them protects them from drying out. It also helps them stay in place. Use a light touch when covering the seeds. Don’t pack the soil down too hard. Water the seeds gently. A spray bottle works best. This prevents the seeds from being washed away. Keep the soil moist, but not soggy. It’s like giving the seeds a gentle hug. Have you ever watered a delicate flower?
Fun Fact or Stat: Some seeds need light to germinate! Don’t cover these seeds with soil. Just press them gently onto the surface of the moist mix.
Light and Water: Caring for Your Seedlings
Once your seeds are planted, they need light and water. This is a very important part of how to start seeds indoors for gardening. Light helps them grow strong. Water keeps them from drying out. But be careful! Too much water can be bad. It can cause the seeds to rot. A sunny windowsill is a good place to start. But sometimes, it’s not enough. You might need a grow light. Keep the light on for about 12-16 hours a day. Check the soil every day. If it feels dry, water it gently. Don’t let the soil dry out completely. Your seedlings are like babies. They need lots of care and attention.
- Provide 12-16 hours of light per day.
- Use a sunny windowsill or a grow light.
- Check the soil moisture every day.
- Water gently when the soil feels dry.
- Avoid overwatering to prevent rot.
Why are light and water so important? Light is like food for plants. They use it to make energy through a process called photosynthesis. Without enough light, they’ll be weak and spindly. Water is also essential. It carries nutrients from the soil to the plant. It also helps keep the plant cool. But too much water can drown the roots. So, it’s important to find the right balance. Think of it like taking care of a pet. You need to give it food and water, but not too much. With the right care, your seedlings will thrive.
The Importance of Light
Why do seedlings need so much light? They are growing very quickly. They need lots of energy. Sunlight is the best source of light. But sometimes, there isn’t enough sunlight indoors. That’s where grow lights come in handy. Grow lights provide the same kind of light as the sun. You can buy them at most garden stores. Place the light close to the seedlings. But not too close! You don’t want to burn them. Have you ever seen a plant reaching for the sun?
Watering Just Right
How do you know when to water? Stick your finger in the soil. If it feels dry, it’s time to water. Water gently, so you don’t wash away the seeds. Use a spray bottle or a watering can with a gentle spout. Water until the soil is moist, but not soggy. Be careful not to overwater! This can cause the roots to rot. It’s like giving your plants a drink, but not drowning them. Have you ever seen a plant that’s been overwatered?
Recognizing Problems
What if your seedlings start to look sick? They might be getting too much or too little light or water. If the leaves are yellow, they might need more light. If the leaves are droopy, they might need more water. If the stems are thin and weak, they might not be getting enough light. Check your seedlings every day. Look for signs of trouble. The sooner you catch a problem, the easier it will be to fix. It’s like being a plant doctor! Have you ever helped a sick plant get better?
Fun Fact or Stat: Seedlings can grow towards the light. This is called phototropism. Rotate your seedlings regularly to keep them growing straight!
Temperature and Air: Creating the Perfect Environment
Temperature and air are also important for your seedlings. This is another factor in how to start seeds indoors for gardening. Seeds like warm temperatures to sprout. A good temperature is between 65 and 75 degrees Fahrenheit. You can use a heat mat to keep the soil warm. Once the seeds have sprouted, they don’t need as much warmth. Good air circulation is also important. It helps prevent diseases. You can use a small fan to keep the air moving. Don’t put the fan too close to the seedlings. You don’t want to blow them over! Think of it like creating a cozy home for your baby plants.
| Factor | Ideal Condition | Why It’s Important |
|---|---|---|
| Temperature | 65-75°F (18-24°C) | Promotes germination and growth |
| Air Circulation | Gentle airflow | Prevents diseases and strengthens stems |
| Humidity | Moderate (40-60%) | Helps seedlings absorb water |
| Cleanliness | Sterile environment | Reduces risk of fungal infections |
- Maintain a temperature between 65 and 75 degrees Fahrenheit.
- Use a heat mat to warm the soil if needed.
- Provide good air circulation with a small fan.
- Avoid placing the fan too close to the seedlings.
- Keep the air circulating to prevent diseases.
Why are temperature and air so important? Temperature affects how quickly the seeds sprout. Warm temperatures speed up the process. Cold temperatures slow it down. Air circulation helps prevent diseases like damping-off. Damping-off is a fungal disease that can kill young seedlings. Good air circulation also helps strengthen the stems of the seedlings. This makes them less likely to fall over. Creating the right environment is like giving your seedlings a healthy start in life.
The Right Temperature for Germination
What is germination? Germination is when the seed starts to sprout. It needs warmth to do this. You can use a heat mat to keep the soil warm. Place the heat mat under the seed trays. Check the temperature of the soil. You want it to be between 65 and 75 degrees Fahrenheit. Once the seeds have sprouted, you can remove the heat mat. It’s like giving the seeds a warm blanket to snuggle in. Have you ever felt the warmth of the sun on your skin?
The Importance of Air Circulation
Why is air circulation so important? Stagnant air can lead to diseases. A small fan can help keep the air moving. Place the fan a few feet away from the seedlings. Set it on a low setting. You don’t want to blow the seedlings over! Good air circulation also helps strengthen the stems. This makes them less likely to fall over. It’s like giving the seedlings a gentle breeze. Have you ever felt the wind blowing through your hair?
Maintaining Humidity
What is humidity? Humidity is the amount of moisture in the air. Seedlings need some humidity to thrive. You can increase the humidity by covering the seed trays with a plastic dome. Remove the dome once the seeds have sprouted. You can also mist the seedlings with water. This will help keep the air moist. Be careful not to overdo it! Too much humidity can lead to diseases. It’s like giving the seedlings a refreshing mist. Have you ever felt the mist from a waterfall?
Fun Fact or Stat: Some plants need cooler temperatures to germinate. Check the seed packet for specific instructions.
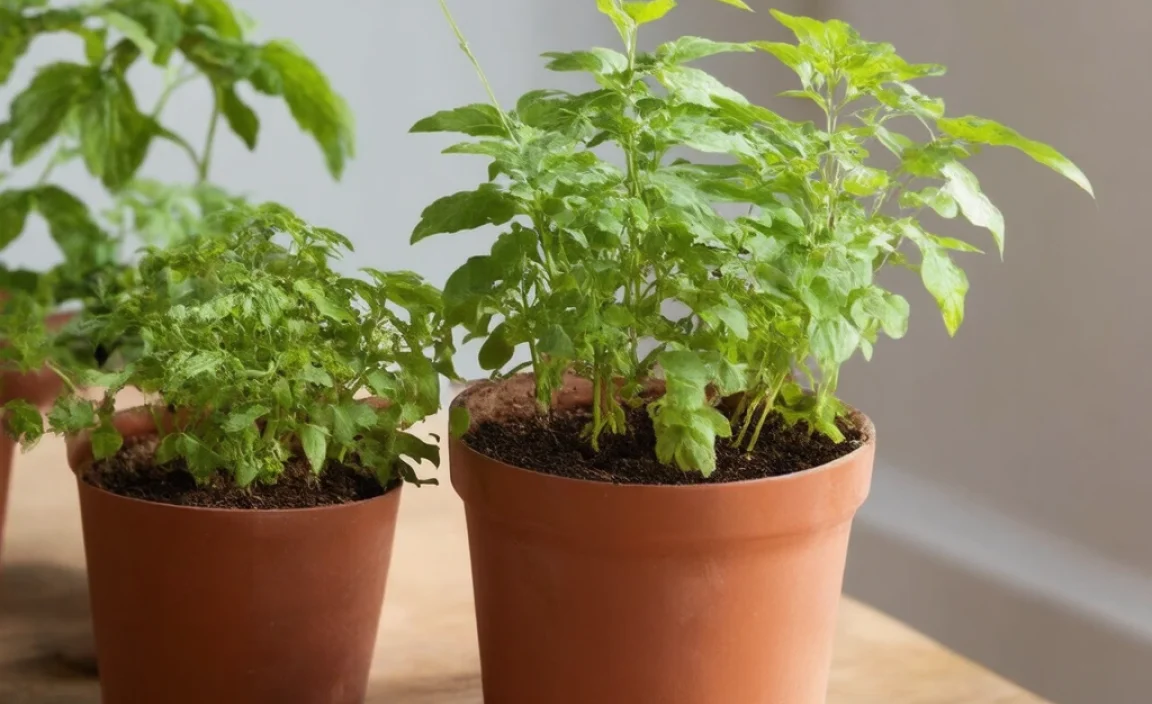
Transplanting Seedlings: Moving to Bigger Pots
As your seedlings grow, they will need more space. Knowing how to start seeds indoors for gardening also means knowing when to transplant. Transplanting means moving the seedlings to bigger pots. You’ll know it’s time to transplant when the seedlings have their first “true” leaves. These are the leaves that look like the leaves of the adult plant. Gently remove the seedlings from their small containers. Be careful not to damage the roots. Plant them in bigger pots filled with potting soil. Water them gently. Give them plenty of light. Now they have room to grow big and strong!
- Transplant when seedlings have their first true leaves.
- Gently remove seedlings from small containers.
- Be careful not to damage the roots.
- Plant them in bigger pots with potting soil.
- Water them gently and provide plenty of light.
Why is transplanting necessary? The small containers don’t have enough room for the roots to grow. The seedlings will become root-bound. This means the roots will start to circle around the pot. This can stunt their growth. Transplanting gives the roots more space to spread out. It also provides the seedlings with fresh nutrients from the potting soil. Think of it like moving to a bigger house. You have more room to stretch out and relax. Transplanting gives your seedlings the same opportunity.
Recognizing True Leaves
What are true leaves? The first leaves that sprout are called cotyledons. These leaves are part of the seed. They provide the seedling with food until it can make its own. True leaves look like the leaves of the adult plant. They are usually larger and more detailed than cotyledons. Once the seedlings have true leaves, they are ready to be transplanted. It’s like seeing the first signs of adulthood. Have you ever noticed the difference between baby leaves and adult leaves?
Removing Seedlings Carefully
How do you remove the seedlings without damaging them? Moisten the soil before removing the seedlings. This will help loosen the roots. Gently push up from the bottom of the container. Use your fingers to support the seedling. Be careful not to pull on the stem. If the roots are tangled, gently tease them apart. Handle the seedlings with care. They are still delicate. It’s like handling a fragile butterfly. Have you ever tried to catch a butterfly without hurting it?
Planting in Bigger Pots
What kind of soil should you use for transplanting? Use potting soil, not seed starting mix. Potting soil is richer in nutrients. It will help the seedlings grow strong. Fill the bigger pots with potting soil. Make a hole in the center of each pot. Gently place the seedling in the hole. Cover the roots with soil. Water gently. Now the seedlings have plenty of room to grow! It’s like giving them a new home with lots of good food. Have you ever moved to a new house?
Fun Fact or Stat: Some plants don’t like to be transplanted. Start these seeds directly in their final containers.
Hardening Off Seedlings: Preparing for the Outdoors
Before you plant your seedlings in the garden, you need to harden them off. This is another important step in how to start seeds indoors for gardening. Hardening off means gradually exposing the seedlings to outdoor conditions. This helps them adjust to the sun, wind, and temperature changes. Start by placing the seedlings outside for a few hours each day. Increase the amount of time each day. After a week or two, they will be ready to plant in the garden. This process makes them strong and ready for their new home!
- Gradually expose seedlings to outdoor conditions.
- Start with a few hours each day.
- Increase the time each day for one to two weeks.
- Protect seedlings from strong winds and direct sun.
- This process helps them adjust to the garden environment.
Why is hardening off necessary? Seedlings that have been grown indoors are used to a very sheltered environment. They haven’t experienced the harshness of the sun or the wind. If you plant them directly in the garden, they can get shocked. This can stunt their growth or even kill them. Hardening off allows them to gradually adjust to the outdoor conditions. It’s like training for a marathon. You wouldn’t run the whole race without training first, right? Hardening off prepares your seedlings for the challenges of the garden.
The Process of Hardening Off
How do you harden off seedlings? Start by placing them in a shady spot outdoors. Protect them from strong winds. Leave them out for a few hours. The next day, leave them out for a little longer. Gradually increase the amount of time they spend outdoors. After a week or two, they can stay outside all day and night. It’s like slowly getting used to the cold water. Have you ever jumped into a cold pool?
Protecting from Sun and Wind
Why do you need to protect the seedlings from sun and wind? The sun can scorch their leaves. The wind can dry them out. Place them in a sheltered spot. Use a shade cloth to protect them from the sun. Water them regularly to keep them from drying out. Be gentle with them! They are still delicate. It’s like protecting a baby from the elements. Have you ever worn sunscreen to protect yourself from the sun?
Knowing When They’re Ready
How do you know when the seedlings are ready to plant in the garden? They should be strong and sturdy. Their leaves should be green and healthy. They should have been outside for at least a week. They should be able to tolerate the sun and wind. Once they meet these criteria, they are ready to go! It’s like knowing when a bird is ready to fly. Have you ever watched a baby bird leave its nest?
Fun Fact or Stat: Cloudy days are great for hardening off seedlings. The sun is less intense, making the transition easier.
Planting in the Garden: Giving Your Seedlings a New Home
Now that your seedlings are hardened off, it’s time to plant them in the garden! This is the final step in how to start seeds indoors for gardening. Choose a sunny spot in your garden. Dig a hole that is big enough for the roots. Gently remove the seedling from its pot. Place it in the hole. Cover the roots with soil. Water the seedling gently. Give it plenty of space to grow. Now you can watch your plants grow and produce delicious vegetables! It’s like giving your seedlings a new adventure.
- Choose a sunny spot in your garden.
- Dig a hole big enough for the roots.
- Gently remove the seedling from its pot.
- Place the seedling in the hole and cover the roots.
- Water the seedling gently and give it space to grow.
Why is it important to choose the right spot in the garden? Different plants have different needs. Some plants need lots of sun. Others need shade. Some plants need well-drained soil. Others need moist soil. Before you plant, research the needs of your plants. Choose a spot that meets those needs. This will give your plants the best chance to thrive. It’s like finding the perfect home for your family. You want a place that is comfortable and safe.
Choosing the Right Location
What kind of location should you choose? Look for a spot that gets at least six hours of sunlight per day. Make sure the soil is well-drained. If the soil is heavy clay, add some compost. Compost will help improve drainage. Avoid areas that are prone to flooding. Choose a spot that is easy to access. You will need to water and weed your plants regularly. It’s like finding the perfect place to build a house. Have you ever helped build a sandcastle?
Planting Techniques
How do you plant the seedlings? Dig a hole that is big enough for the roots. Gently remove the seedling from its pot. Place it in the hole. Cover the roots with soil. Water the seedling gently. Be careful not to damage the roots. Give the seedling plenty of space to grow. Follow the instructions on the seed packet for spacing. It’s like giving the seedling a comfortable bed. Have you ever planted a tree?
Ongoing Care
What kind of care do the plants need after planting? Water them regularly. Weed them regularly. Fertilize them as needed. Watch for pests and diseases. Take action to control them if necessary. Harvest the vegetables when they are ripe. Enjoy the fruits of your labor! It’s like taking care of a pet. You need to give it food, water, and attention. Have you ever grown your own vegetables?
Fun Fact or Stat: Companion planting can help your plants grow better. Plant certain plants together to deter pests and attract beneficial insects.
Summary
How to start seeds indoors for gardening is a fun and rewarding project. You can grow your own vegetables and flowers. It all starts with preparing your supplies. You need containers, seed starting mix, and seeds. Then, you plant the seeds and provide them with light and water. Keep the temperature warm and the air circulating. As the seedlings grow, you transplant them to bigger pots. Before planting them in the garden, you harden them off. This prepares them for the outdoor conditions.
Finally, you plant them in the garden and provide ongoing care. With a little effort, you can have a beautiful and productive garden. Starting seeds indoors gives you a head start. You can grow plants that wouldn’t otherwise survive in your climate. It’s a great way to extend the growing season. So, get started today and enjoy the fruits (and vegetables) of your labor!
Conclusion
Starting seeds indoors is a great way to get a head start on your garden. You can grow plants that might not otherwise survive. It’s also a fun and rewarding experience. You get to watch your tiny seeds grow into strong, healthy plants. Then, you can enjoy the delicious vegetables or beautiful flowers that they produce. How to start seeds indoors for gardening is a skill that anyone can learn. With a little practice, you’ll be a pro in no time. So, grab your supplies and get planting! You’ll be amazed at what you can grow.
Frequently Asked Questions
Question No 1: What are the best seeds to start indoors?
Answer: Some popular choices for starting indoors include tomatoes, peppers, eggplants, and broccoli. These plants need a longer growing season than what our climate allows. Starting them inside gives them a head start. It’s important to consider your local climate and growing season when choosing seeds. Look for varieties that are well-suited to your area. You can find this information on seed packets or from your local garden center. It is really fun to watch the seeds grow. Knowing how to start seeds indoors for gardening can really help with the process!
Question No 2: How much light do seedlings need?
Answer: Seedlings need a lot of light, typically 12-16 hours per day. A sunny windowsill can work, but it might not provide enough consistent light, especially on cloudy days. Grow lights are a great option to ensure your seedlings get the light they need. Place the grow lights a few inches above the seedlings. Adjust the height as the seedlings grow. Insufficient light can lead to weak, leggy seedlings. Adequate light is crucial for healthy growth, so make sure you provide enough. With the right care, you will be on your way to knowing how to start seeds indoors for gardening!
Question No 3: How often should I water my seedlings?
Answer: You should water your seedlings when the top inch of soil feels dry. Overwatering can lead to root rot, which is a common problem for seedlings. Use a spray bottle or watering can with a gentle spout to avoid disturbing the delicate seedlings. Make sure the containers have drainage holes so excess water can escape. Check the soil moisture daily and adjust your watering schedule as needed. Factors like temperature and humidity can affect how quickly the soil dries out. Being attentive to your seedlings’ needs will help them thrive. Don’t drown your plants!
Question No 4: What is “damping off” and how can I prevent it?
Answer: Damping off is a fungal disease that affects young seedlings, causing them to rot and die. To prevent damping off, use sterile seed starting mix and clean containers. Avoid overwatering, and ensure good air circulation around the seedlings. You can also use a fungicide specifically designed for seedlings. Proper sanitation and ventilation are key to preventing this disease. If you notice any signs of damping off, remove the affected seedlings immediately to prevent it from spreading. It is good to know how to start seeds indoors for gardening to avoid this!
Question No 5: When should I transplant my seedlings to bigger pots?
Answer: You should transplant your seedlings to bigger pots when they have their first set of “true” leaves. These are the leaves that look like the leaves of the adult plant, not the initial seed leaves (cotyledons). The seedlings should also be large enough to handle without damaging them. Gently remove the seedlings from their small containers and plant them in bigger pots filled with potting soil. This gives them more room to grow and access more nutrients. Transplanting at the right time promotes healthy development. It is important to get them in bigger pots at the right time!
Question No 6: What is “hardening off” and why is it important?
Answer: Hardening off is the process of gradually exposing your seedlings to outdoor conditions before transplanting them into the garden. This helps them adjust to the sun, wind, and temperature changes. Start by placing the seedlings outside for a few hours each day in a sheltered spot. Gradually increase the amount of time they spend outdoors over a week or two. Hardening off prevents transplant shock. It also makes the seedlings more resilient to the outdoor environment. Skipping this step can weaken or even kill your seedlings. Knowing how to start seeds indoors for gardening also means knowing how to prepare them for the outside!
