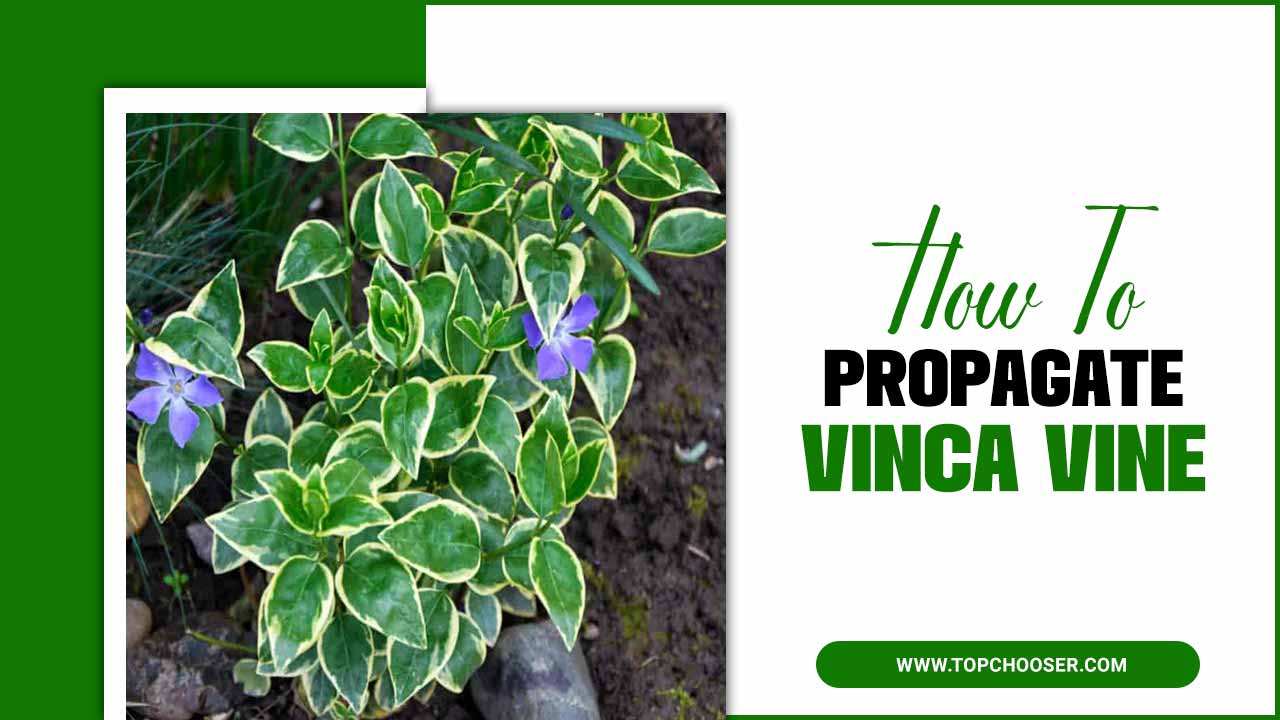
Vinca Vine is a beautiful and versatile plant that can add a touch of elegance to any garden or indoor space. With its glossy green leaves and delicate flowers, it’s no wonder why the vinca vine is a popular choice among gardeners and plant enthusiasts.
One of the best things about the vinca vine is that it’s easy to propagate, making it an ideal plant for those who want to expand their collection or share it with friends and family. Here we’ll take you through how to propagate vinca vine, from identifying the right parts of the plant to preparing the soil and caring for your new cuttings. Whether you’re a seasoned gardener or a newbie in the world of plants, this guide will provide you with all the information you need to propagate the Vinca vine successfully.

10 Easy Steps On How To Propagate Vinca Vine

To propagate the vinca vine, select a healthy and mature vine. Prepare a rooting medium with perlite and peat moss. Take 4-6 inch cuttings, remove lower leaves, and dip the ends in the rooting hormone. Plant the cuttings at an angle in the prepared medium. Cover them with water and a plastic bag or dome for humidity. Here are 10 Easy Steps for how to propagate vinca vine
Step 1: Gather The Necessary Supplies

Vinca vine is creeping and can be propagated by planting seeds or cuttings. It can also be grown from cuttings, which can be done at any time of year. Before you begin propagating the vinca vine, it is important to gather the necessary supplies. Here are the items you will need:
- Vinca vine cuttings: Select healthy, mature stems from an existing vinca vine plant. Make sure to choose stems that are at least 4-6 inches long and have several sets of leaves.
- Clean, sharp pruning shears or scissors: These will be used to make clean cuts when taking the cuttings.
- Rooting hormone: This can help stimulate root growth in the new cuttings. You can find rooting hormone powder or gel at your local garden center or online.
- Small pots or containers: Choose containers with drainage holes to ensure proper water drainage.
- Potting mix: Use a well-draining mix suitable for growing plants in containers.
- Watering can or spray bottle: You will need this to water the newly propagated cuttings.
You can propagate your vinca vine once you have gathered all these supplies.
Step 2: Start With Seeds Or Cuttings
Starting from seeds requires patience and can take longer for the plants to establish. Propagating from cuttings allows for quicker growth and ensures the characteristics of the parent plant. When starting from seeds, sow them in well-draining soil and keep them consistently moist.
Choose healthy stems with a few leaves and place them in well-draining soil or water for cuttings until roots develop. Both methods require regular watering and protection from extreme temperatures.
Step 3: Prepare The Soil
To propagate the vinca vine, you should plant the seeds in well-drained soil, such as potting soil. Preparing the soil is an important step in propagating the vinca vine. Start by selecting a well-draining soil mix that is rich in organic matter. Vinca vines thrive in moist, but not waterlogged, soil conditions. Consider adding sand or perlite to improve drainage if your soil is heavy or clay-like.
- Next, choose a suitable location for your propagated vinca vine. Vinca vines prefer full sun to partial shade, so find a spot that receives at least six hours of direct sunlight daily.
- Before planting your cuttings, loosen the soil with a garden fork or tiller to improve its structure and allow for better root penetration. Remove any weeds or grass from the area to reduce competition for nutrients and water.
- Once the soil is prepared, dig a hole slightly larger than the size of your cutting. Place the cutting into the hole and backfill it with soil, ensuring it is firmly in place. Water the newly planted cutting thoroughly to help settle the soil around the roots.
Proper soil preparation gives your propagated vinca vine the best chance of establishing itself and flourishing in its new location.
Step 4: Plant The Seeds Or Cuttings

Propagating vinca vine can be done through seeds or cuttings. To propagate through seeds, start by collecting mature pods from an existing plant. Remove the seeds from the pods and sow them in a well-draining soil mix. Keep the soil moist and place it in a warm, sunny spot. The seeds should germinate within a few weeks. Take 4-6 inch stem cuttings from a healthy vinca vine plant to propagate through cuttings.
Remove the lower leaves and dip the cut end in the rooting hormone. Plant the cutting in a pot filled with moist soil and place it in a warm, bright area. Keep the soil consistently moist until roots develop, which usually takes 2-3 weeks. Once roots have formed, you can transplant the new vinca vine into its own container or directly into your garden.
Step 5: Water The Plant Regularly
Watering the vinca vine regularly is essential for successful propagation. Vinca vines require consistent moisture to establish roots and grow. When propagating the vinca vine, water the plant thoroughly after planting. This will help settle the soil around the roots and provide hydration to encourage root development.
As the plant continues to grow, monitor the soil moisture levels and water as needed to keep it consistently moist but not waterlogged. Additionally, it is important to avoid overwatering, as this can lead to root rot and other issues. You can ensure its healthy growth and establishment in your garden or container by providing adequate water to your propagated vinca vine.
Step 6: Provide Adequate Sunlight
When propagating vinca vine, providing adequate sunlight for successful growth is important. Vinca vines thrive in full sun to partial shade conditions, so choosing a location that receives at least 4-6 hours of direct sunlight per day is best.
This will ensure the plants receive enough light to promote healthy growth and vibrant foliage. If you are propagating vinca vine indoors, place the plant near a bright window or use artificial grow lights to mimic natural sunlight. Providing the right amount of sunlight can help your propagated vinca vine flourish and thrive.
Step 7: Fertilize The Plant

Fertilizing the vinca vine is an important step in propagating this plant. Before you begin, make sure to choose a high-quality, balanced fertilizer that is suitable for houseplants. During the growing season, typically spring to fall, apply the fertilizer every two weeks to provide the necessary nutrients for healthy growth. Be sure to follow the instructions on the fertilizer packaging for proper application rates.
Additionally, it is important to water the plant thoroughly before applying fertilizer to prevent root burn. Regularly fertilizing your vinca vine can promote strong and vigorous growth, making it easier to propagate new plants.
Step 8: Monitor For Pests And Diseases
Regularly inspect the vinca vine for signs of pests, such as aphids, or diseases like powdery mildew. Pests and diseases can hinder the growth and health of the vinca vine if not addressed promptly. Look for yellowing leaves, wilting, or unusual spots as potential pest or disease issues indicators.
Use organic pest control methods or consult a professional to manage pest or disease problems effectively. Maintaining a healthy and pest-free environment will ensure the successful propagation of the vinca vine.
Step 9: Prune And Deadhead The Plant
Pruning and deadheading are important steps in propagating the vinca vine. To propagate the plant, start by pruning any overgrown or leggy stems. This will help promote new growth and a fuller, healthier plant. Additionally, deadheading the plant by removing faded or spent flowers will encourage the development of new blooms and prevent the plant from expending energy on seed production.
When pruning and deadheading, be sure to use clean, sharp tools to minimize damage to the plant. By following these steps, you can successfully propagate the vinca vine and enjoy its beautiful blooms year after year.
Step 10: Transplant The Plant When Ready

Once your vinca vine cuttings have developed roots, it is time to transplant them into their own containers or a larger pot or garden bed. Gently remove the cuttings from the rooting medium, careful not to damage the delicate roots. Prepare a well-draining potting mix or garden soil and create a hole large enough to accommodate the root system of each cutting.
Place the cutting in the hole and gently firm the soil around it, ensuring the roots are fully covered. Water the newly transplanted cuttings thoroughly and place them in a location with bright, indirect light. Monitor their progress and continue to water as needed to help them establish and thrive in their new environment.
Conclusion
Propagating the vinca vine is a rewarding and enjoyable process that allows you to expand your garden and share the beauty of this versatile plant. Whether you choose to start from seeds or cuttings, providing the right conditions, including well-draining soil, regular watering, and adequate sunlight, is important.
Additionally, proper fertilization, monitoring for pests and diseases, and regular pruning will help ensure the health and vitality of your vinca vine. With patience and care, you will soon have a thriving plant that can be transplanted to enhance any garden or landscape. We have provided bulk information on how to propagate vinca vine and hope our information was helpful from your perspective.
Frequently Asked Questions
[rank_math_rich_snippet id=”s-d9dd81ba-6747-4f07-80b4-47ff00afe88b”]

I am passionate about home engineering. I specialize in designing, installing, and maintaining heating, ventilation, and air conditioning systems. My goal is to help people stay comfortable in their homes all year long.


