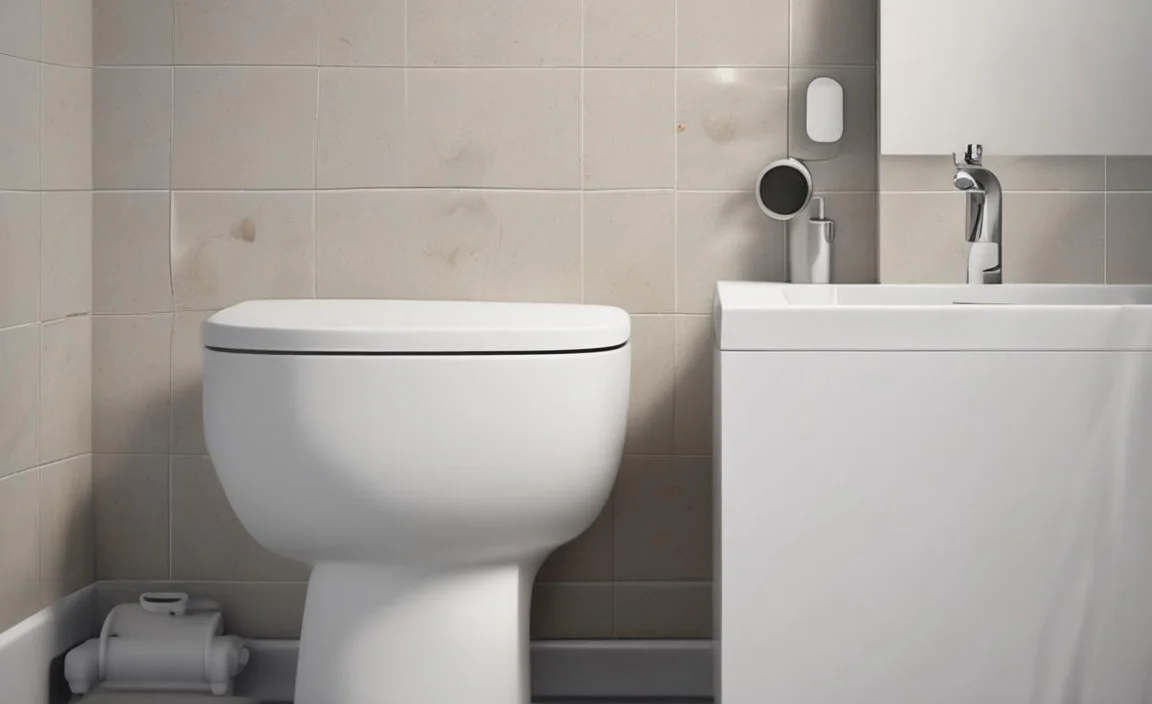
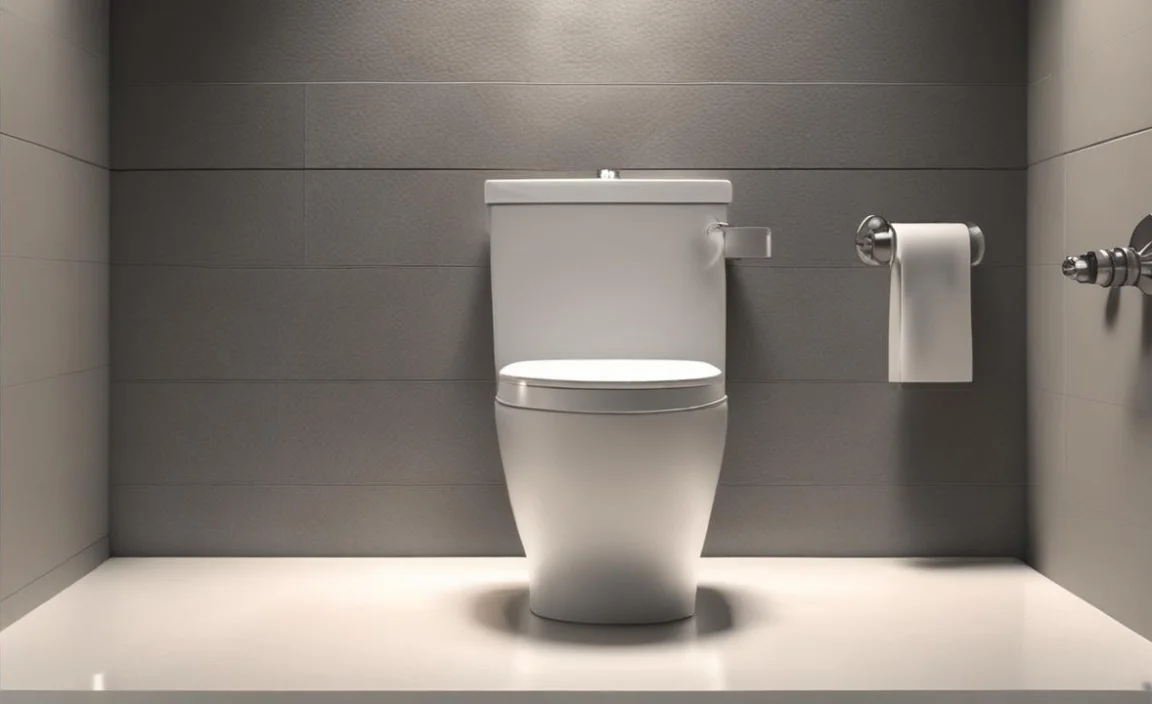
Did you ever wonder how a toilet stays put? It is all thanks to the toilet flange. This important part connects the toilet to the drainpipe. The flange needs the right size hole in the floor. Knowing {what size hole for toilet flange} is key. It stops leaks and keeps everything working well.
Think of a time you saw a wobbly toilet. It probably did not have the right fit. The wrong size hole can cause big problems. Let’s learn how to get it right.
Key Takeaways
- Knowing {what size hole for toilet flange} ensures a secure and leak-free installation.
- A standard 4-inch drain pipe usually needs a flange with a matching inner diameter.
- Incorrect hole sizes can lead to wobbly toilets and potential water damage.
- Always measure carefully before cutting any holes for the toilet flange.
- Use the right tools and follow instructions to avoid costly mistakes.
Understanding What Size Hole For Toilet Flange

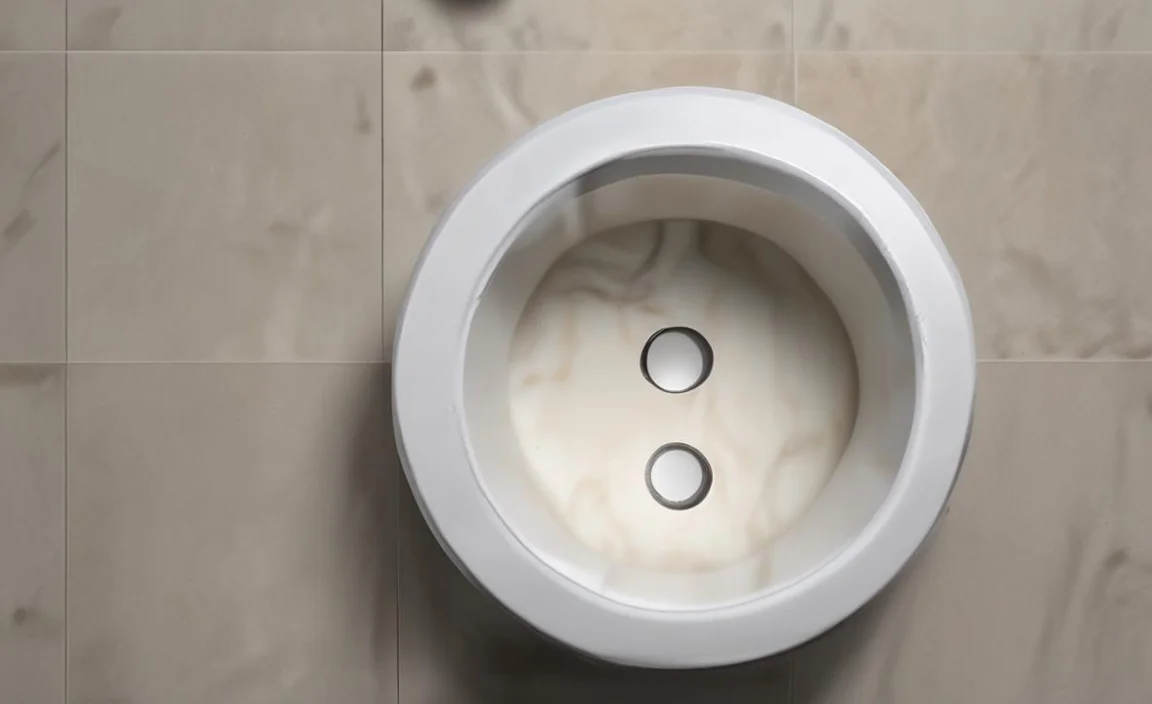
The toilet flange is a ring that connects your toilet to the drainpipe. It is usually made of plastic or metal. The flange sits on the floor around the drainpipe. It has slots or holes for bolts. These bolts hold the toilet down tight. The size of the hole in your floor for the flange is very important. If the hole is too small, the flange will not fit. If the hole is too big, the flange will not be secure. This can cause leaks and other problems. The standard size for a toilet drainpipe is 4 inches. So, the hole for the flange should be big enough to fit a 4-inch pipe. But, you also need to consider the thickness of the flange itself. Always check the manufacturer’s instructions for the exact size needed. Getting this measurement right will save you time and trouble.
- Measure the diameter of your drainpipe carefully.
- Check the flange manufacturer’s instructions for the recommended hole size.
- Use a hole saw or other appropriate tool to cut the hole.
- Make sure the hole is clean and free of debris.
- Test-fit the flange before securing it permanently.
Choosing the right size hole for the toilet flange is a key step. This ensures a proper and secure installation. It prevents leaks and keeps your toilet stable. Imagine the frustration of a wobbly toilet. Or the mess of water leaking onto your bathroom floor. By taking the time to measure carefully and follow instructions, you can avoid these headaches. Remember to consider not just the drainpipe size, but also the flange itself. A little extra care in this step will pay off in the long run with a well-functioning and worry-free toilet.
Fun Fact or Stat: The average toilet flange lasts about 20–30 years if installed correctly!
Why Accurate Measurements Matter
Have you ever tried to fit a puzzle piece into the wrong spot? It just does not work, right? The same goes for a toilet flange. Accurate measurements are very important. If your measurements are off, the flange will not fit correctly. This can lead to all sorts of problems. A hole that is too small will prevent the flange from fitting at all. A hole that is too big will leave gaps around the flange. These gaps can allow water to leak through. Water leaks can cause damage to your floor and subfloor. They can also lead to mold growth. Mold can be harmful to your health. Taking the time to measure carefully ensures a snug and secure fit. This prevents leaks and protects your home.
Tools Needed for Cutting the Hole
Imagine trying to cut a piece of wood with a butter knife. It would be very difficult, wouldn’t it? Using the right tools makes any job easier. When cutting a hole for a toilet flange, you will need a few specific tools. A hole saw is a circular saw blade that attaches to a drill. It is perfect for cutting round holes in various materials. You will also need a drill to power the hole saw. A measuring tape is essential for accurate measurements. A pencil is useful for marking the cutting area. Safety glasses will protect your eyes from flying debris. And finally, a dust mask will prevent you from breathing in harmful particles. Having the right tools will make the job safer and more efficient.
Avoiding Common Mistakes
Nobody is perfect. We all make mistakes from time to time. But, some mistakes are easier to avoid than others. When installing a toilet flange, there are a few common mistakes to watch out for. One mistake is not measuring carefully. Double-check your measurements before cutting. Another mistake is using the wrong size hole saw. Make sure the hole saw matches the required hole size. A third mistake is cutting the hole too quickly. Take your time and let the tool do the work. Forcing the tool can damage the material and create a messy cut. By being aware of these common mistakes, you can avoid them and ensure a successful installation.
Standard Toilet Flange Hole Size: What to Know
What is the most common size hole you will need? The standard toilet flange usually needs a hole that fits a 4-inch drainpipe. This is because most homes use a 4-inch drainpipe for the toilet. However, the actual hole size might be a bit bigger than 4 inches. This extra space is needed to accommodate the flange itself. The flange has a lip or edge that sits on top of the floor. This lip adds to the overall diameter of the flange. So, you will need to consider this extra width when cutting the hole. Always refer to the manufacturer’s instructions for the exact hole size. These instructions will provide the most accurate measurement for your specific flange. Ignoring these instructions can lead to problems during installation.
- Most toilets use a 4-inch drainpipe.
- The hole size needs to be slightly larger than 4 inches.
- Consider the flange’s lip or edge when measuring.
- Always check the manufacturer’s instructions.
- Using the wrong size can cause leaks.
- Double-check measurements before cutting.
Understanding the standard toilet flange hole size is important. It helps you plan your installation correctly. Knowing that most toilets use a 4-inch drainpipe gives you a starting point. But, remember that the actual hole size may vary. Always account for the flange’s design. The lip or edge of the flange needs extra space. The manufacturer’s instructions are your best guide. They provide the exact measurements for your specific model. By following these guidelines, you can ensure a proper fit and avoid costly mistakes. A little knowledge can go a long way in making your toilet installation a success.
Fun Fact or Stat: Some older homes may have non-standard drainpipe sizes, so always measure before you assume!
Measuring the Existing Hole
Do you already have a hole in your floor? Maybe you are replacing an old toilet. If so, you will need to measure the existing hole. This will help you determine if it is the right size for your new toilet flange. Measuring an existing hole is fairly simple. Use a measuring tape to measure the diameter of the hole. Place the tape across the center of the hole. Make sure you are measuring from edge to edge. If the hole is not perfectly round, measure it in a few different places. Then, take the average of those measurements. Compare your measurement to the recommended hole size for your new flange. If the existing hole is too small, you will need to enlarge it. If it is too big, you may need to use a flange extender or repair the floor.
Dealing with Odd-Sized Drains
Sometimes, things are not as straightforward as we would like. You might encounter an odd-sized drain. This means the drainpipe is not the standard 4 inches. Older homes are more likely to have odd-sized drains. In these cases, you will need to take extra care. First, accurately measure the drainpipe diameter. Then, find a toilet flange that is compatible with that size. Flanges come in different sizes to accommodate various drainpipes. You might need to use a reducer or adapter to connect the flange to the drainpipe. These fittings allow you to connect different sized pipes together. Consult with a plumbing professional if you are unsure how to proceed. They can help you find the right parts and ensure a proper installation.
When to Call a Professional
Are you feeling overwhelmed? Do you have doubts about your ability to install the toilet flange correctly? If so, it might be time to call a professional. Plumbing can be tricky. Mistakes can be costly. A professional plumber has the experience and expertise to handle the job safely and efficiently. They can accurately measure the hole size, select the right flange, and install it properly. They can also identify and address any potential problems, such as damaged drainpipes or uneven floors. Hiring a professional can give you peace of mind knowing that the job is done right. It can also save you time and money in the long run by preventing leaks and other plumbing issues.
Tools Needed to Cut the Hole for Toilet Flange
Cutting the right size hole for your toilet flange requires the right tools. Without them, the job becomes much harder. You might even damage your floor. The most important tool is a hole saw. A hole saw is a circular saw blade. It attaches to a drill. It cuts a perfect circle in the floor. Make sure the hole saw is the correct size for your flange. You will also need a drill to power the hole saw. A measuring tape is essential for accurate measurements. A pencil helps you mark the cutting area. Safety glasses protect your eyes from flying debris. A dust mask prevents you from breathing in harmful particles. A utility knife is useful for trimming any excess material. Having these tools on hand will make the job easier and safer.
- Hole saw (correct size for the flange)
- Drill
- Measuring tape
- Pencil
- Safety glasses
- Dust mask
- Utility knife
Having the right tools is half the battle. Cutting a hole for a toilet flange can seem daunting. But, with the proper equipment, it becomes much more manageable. A hole saw is specifically designed for this task. It creates a clean, precise hole. The other tools are equally important. Accurate measurements ensure the hole is the right size. Safety glasses and a dust mask protect you from potential hazards. A utility knife helps with any finishing touches. Investing in these tools is a worthwhile investment. They will not only make this project easier, but also come in handy for other home improvement tasks.
Fun Fact or Stat: Hole saws come in various sizes, from tiny to large enough to cut holes for pipes!
Choosing the Right Hole Saw
Not all hole saws are created equal. They come in different sizes and materials. Choosing the right one for your toilet flange project is important. First, determine the exact hole size you need. Check the manufacturer’s instructions for your flange. Then, select a hole saw that matches that size. Hole saws are typically made of carbon steel or bi-metal. Bi-metal hole saws are more durable and last longer. They are also better at cutting through tougher materials. Consider the material you will be cutting through. If it is wood, a carbon steel hole saw might be sufficient. If it is tile or concrete, you will need a bi-metal hole saw. Investing in a good quality hole saw will ensure a clean and accurate cut.
Using a Drill Safely
A drill is a powerful tool. It can be dangerous if used improperly. Safety should always be your top priority. Before using a drill, read the manufacturer’s instructions carefully. Wear safety glasses to protect your eyes from flying debris. Make sure the drill bit is securely attached to the drill. Hold the drill firmly with both hands. Keep your fingers away from the drill bit. Start drilling slowly and gradually increase the speed. If the drill bit gets stuck, stop the drill and try again. Never force the drill. This can damage the tool and cause injury. When you are finished drilling, unplug the drill and allow it to cool down before storing it.
Marking the Cutting Area
Accurate measurements are essential for a successful toilet flange installation. Before you start cutting, you need to mark the cutting area. Use a measuring tape to find the center of the drainpipe. Then, use a pencil to draw a circle around the center point. The circle should be the same size as the hole you need to cut. Double-check your measurements before you start cutting. Make sure the circle is in the correct location. If you are cutting through tile, use a tile scribe to score the tile along the cutting line. This will help prevent the tile from chipping. Taking the time to mark the cutting area accurately will help you avoid mistakes and ensure a clean cut.
Step-by-Step Guide to Cutting the Hole

Ready to cut that hole? Here is a simple step-by-step guide. This will help you cut the perfect size hole for your toilet flange. First, gather all your tools. You will need a hole saw, a drill, a measuring tape, a pencil, safety glasses, and a dust mask. Next, measure the diameter of your drainpipe. Add a little extra for the flange. Mark the center of the hole on the floor. Use your pencil to draw a circle. The circle should be the same size as the hole you need to cut. Put on your safety glasses and dust mask. Attach the hole saw to your drill. Place the tip of the hole saw in the center of the circle. Start drilling slowly. Apply gentle pressure. Let the hole saw do the work. Once you have cut through the floor, remove the hole saw. Clean up any debris. Now you are ready to install your toilet flange.
| Step | Action | Notes |
|---|---|---|
| 1 | Gather Tools | Hole saw, drill, measuring tape, pencil, safety gear |
| 2 | Measure and Mark | Diameter of drainpipe + extra for flange |
| 3 | Wear Safety Gear | Safety glasses and dust mask are essential |
| 4 | Drill Slowly | Apply gentle pressure, let the saw do the work |
| 5 | Clean Up | Remove debris after cutting |
Cutting a hole in your floor might seem scary. But, by following these steps, you can do it safely and accurately. Remember to take your time. Do not rush the process. Accurate measurements are key. Make sure you are wearing the right safety gear. This will protect you from injury. Let the hole saw do the work. Do not force it. Once you have cut the hole, clean up any debris. This will make it easier to install the toilet flange. With a little patience and attention to detail, you can successfully cut the perfect hole for your new toilet.
Fun Fact or Stat: Some hole saws have a pilot drill bit in the center to help guide the cut!
Preparing the Area
Before you start cutting, you need to prepare the area. This will help ensure a clean and accurate cut. First, clear any obstacles from the area. Remove any furniture, rugs, or other items that might get in the way. Next, protect the surrounding floor. Cover it with a drop cloth or plastic sheeting. This will prevent dust and debris from damaging the floor. If you are cutting through tile, use painter’s tape to protect the surrounding tiles. The tape will help prevent chipping. Finally, make sure you have good lighting. This will help you see what you are doing. A well-prepared area will make the cutting process much easier and safer.
Cutting Through Different Materials
Floors are made of different materials. You might be cutting through wood, tile, or concrete. Each material requires a different approach. When cutting through wood, use a sharp hole saw. Apply gentle pressure. Let the saw do the work. When cutting through tile, use a diamond-tipped hole saw. Start slowly and gradually increase the speed. Use water to cool the saw blade. This will prevent the tile from overheating and cracking. When cutting through concrete, use a carbide-tipped hole saw. Apply firm pressure. Use water to cool the saw blade. Be patient. Cutting through concrete can take some time. Knowing how to cut through different materials will help you avoid mistakes and ensure a clean cut.
Cleaning Up After Cutting
Once you have cut the hole, it is important to clean up the area. This will make it easier to install the toilet flange. First, remove any debris from the hole. Use a vacuum cleaner to suck up any dust or wood shavings. Next, inspect the edges of the hole. Make sure they are smooth and even. If there are any rough edges, use a utility knife to trim them. Finally, wipe down the surrounding floor with a damp cloth. This will remove any remaining dust or debris. A clean area will make the installation process much easier and more enjoyable.
Installing the Toilet Flange After Cutting
You have cut the perfect hole. Now it is time to install the toilet flange. This is the final step in preparing for your new toilet. First, make sure the hole is clean and free of debris. Next, apply a bead of plumber’s putty around the base of the flange. This will create a watertight seal. Insert the flange into the hole. Make sure it is sitting flush with the floor. Attach the flange to the floor with screws. Use the screws that came with the flange. Tighten the screws until the flange is secure. Do not overtighten them. This can damage the flange. Finally, clean up any excess plumber’s putty. Now your toilet flange is installed. You are ready to install your new toilet.
- Clean the hole thoroughly.
- Apply plumber’s putty to the flange base.
- Insert the flange into the hole.
- Secure the flange with screws.
- Clean up excess putty.
- Ensure the flange is level.
Installing the toilet flange is the culmination of all your hard work. It is the final step before you can enjoy your new toilet. A properly installed flange ensures a watertight seal. This prevents leaks and protects your floor. Take your time and follow these steps carefully. Do not rush the process. Make sure the flange is sitting flush with the floor. Tighten the screws evenly. This will prevent the flange from cracking. Clean up any excess plumber’s putty. This will give your installation a professional look. With a little care and attention to detail, you can successfully install your toilet flange and enjoy a leak-free toilet for years to come.
Fun Fact or Stat: Plumber’s putty is a soft, pliable clay-like substance that creates a watertight seal!
Checking for Leaks
After installing the toilet flange, it is important to check for leaks. This will ensure that your installation is watertight. First, fill the toilet bowl with water. Then, flush the toilet. Watch carefully for any leaks around the base of the toilet. If you see any leaks, tighten the screws on the flange. If the leaks persist, you may need to remove the flange and reapply the plumber’s putty. Make sure the flange is sitting flush with the floor. If you are still experiencing leaks, it is best to call a professional plumber. They can diagnose the problem and provide a solution.
Securing the Flange Properly
A properly secured toilet flange is essential for a leak-free toilet. The flange needs to be firmly attached to the floor. This will prevent it from shifting or moving. Use the screws that came with the flange to secure it to the floor. Make sure the screws are long enough to penetrate the floor joists. Tighten the screws until the flange is snug. Do not overtighten them. This can damage the flange. If you are installing the flange on a concrete floor, you will need to use concrete screws. These screws are designed to grip into concrete. A properly secured flange will provide a stable and watertight connection for your toilet.
Connecting the Toilet
Now that the toilet flange is installed, you are ready to connect the toilet. First, place a wax ring on the flange. The wax ring will create a watertight seal between the toilet and the flange. Next, carefully lower the toilet onto the flange. Make sure the toilet is aligned with the flange bolts. Press down firmly on the toilet to compress the wax ring. Attach the toilet to the flange with bolts and washers. Tighten the bolts until the toilet is snug. Do not overtighten them. This can crack the toilet. Finally, connect the water supply line to the toilet. Turn on the water and check for leaks. Congratulations, you have successfully installed your new toilet!
Troubleshooting Common Problems
Sometimes, things do not go as planned. You might encounter problems while installing a toilet flange. Here are some common problems and how to fix them. If the hole is too small, use a larger hole saw to enlarge it. If the hole is too big, use a flange extender to fill the gap. If the flange is not sitting flush with the floor, shim it with shims. If the screws are not tightening properly, use longer screws. If the toilet is leaking, tighten the bolts or replace the wax ring. If you are unsure how to fix a problem, consult with a professional plumber. They can help you troubleshoot the issue and provide a solution.
- Hole too small: Use a larger hole saw.
- Hole too big: Use a flange extender.
- Flange not flush: Use shims.
- Screws not tightening: Use longer screws.
- Toilet leaking: Tighten bolts or replace wax ring.
- Uneven floor: Use shims to level the flange.
Troubleshooting is a valuable skill. It helps you solve problems and get the job done. Installing a toilet flange can be challenging. But, by knowing how to troubleshoot common problems, you can overcome these challenges. Do not get discouraged if you encounter a problem. Take a deep breath and think about the possible causes. Consult with online resources or a professional plumber if needed. With a little patience and persistence, you can successfully install your toilet flange and enjoy a functioning toilet.
Fun Fact or Stat: A wobbly toilet can often be fixed by simply tightening the bolts that hold it to the flange!
Dealing with a Wobbly Toilet
A wobbly toilet can be annoying and potentially dangerous. It is usually caused by an uneven floor or a loose toilet flange. To fix a wobbly toilet, first check the flange bolts. Make sure they are tight. If the bolts are tight and the toilet is still wobbly, you may need to shim the toilet. Shims are small, thin pieces of plastic or wood. They are used to level the toilet. Place the shims under the base of the toilet. Add shims until the toilet is stable. Then, trim any excess shim material with a utility knife. A stable toilet is a safe and comfortable toilet.
Fixing a Leaky Flange
A leaky toilet flange can cause water damage to your floor and subfloor. It is important to fix a leaky flange as soon as possible. The first step is to identify the source of the leak. Is it coming from the base of the toilet or from the flange itself? If the leak is coming from the base of the toilet, try tightening the bolts. If the leak persists, you may need to replace the wax ring. If the leak is coming from the flange itself, the flange may be cracked or damaged. In this case, you will need to replace the flange. A professional plumber can help you diagnose and repair a leaky flange.
When to Replace the Flange
A toilet flange can last for many years. But, eventually, it may need to be replaced. Common signs that a flange needs to be replaced include cracks, leaks, and corrosion. If you notice any of these signs, it is best to replace the flange. Replacing a flange is a relatively straightforward process. But, it does require some plumbing knowledge and skills. If you are not comfortable replacing the flange yourself, it is best to call a professional plumber. They can replace the flange quickly and efficiently. A new flange will ensure a watertight and reliable connection for your toilet.
Summary
Knowing {what size hole for toilet flange} is very important for toilet installation. The standard drainpipe size is usually 4 inches. The hole needs to be slightly larger to fit the flange. Accurate measurements are key. Use the right tools, like a hole saw. Follow the manufacturer’s instructions. This ensures a proper fit. It also prevents leaks and wobbly toilets. If you face problems, troubleshoot carefully. You might need shims or a flange extender. When in doubt, call a professional plumber. They can help you with complex issues. A well-installed toilet flange ensures a safe and functional bathroom.
Conclusion
Installing a toilet can seem hard. But, understanding the basics makes it easier. Knowing {what size hole for toilet flange} is a key part. Measure carefully and use the right tools. Take your time and follow the steps. A properly installed toilet flange will prevent leaks. It will also ensure a stable toilet. With a little effort, you can successfully complete the job. You will have a working toilet that lasts for years.
Frequently Asked Questions
Question No 1: What happens if the hole for the toilet flange is too small?
Answer: If the hole is too small, the toilet flange will not fit properly. You will not be able to insert the flange into the hole. This can prevent you from connecting the toilet to the drainpipe. You will need to enlarge the hole. Use a hole saw that is the correct size. Carefully cut around the existing hole. Enlarge it until the flange fits snugly. Make sure you wear safety glasses and a dust mask. This will protect you from flying debris. Take your time and be careful not to damage the surrounding floor. A properly sized hole is essential for a successful toilet installation.
Question No 2: What happens if the hole for the toilet flange is too big?
Answer: If the hole is too big, the toilet flange will not be secure. It will wobble and move around. This can lead to leaks and other problems. The flange needs to be tightly secured to the floor. If the hole is too big, you will need to fill the gap. You can use a flange extender or shims. A flange extender is a ring that fits around the flange. It fills the gap between the flange and the floor. Shims are small pieces of plastic or wood. You can place them under the flange to stabilize it. Make sure the flange is level and secure before installing the toilet.
Question No 3: How do I measure the existing hole for a toilet flange?
Answer: Measuring the existing hole is important when replacing a toilet. It helps you determine if the hole is the correct size. Use a measuring tape to measure the diameter of the hole. Place the tape across the center of the hole. Make sure you are measuring from edge to edge. If the hole is not perfectly round, measure it in a few different places. Then, take the average of those measurements. Compare your measurement to the recommended hole size for your new toilet flange. If the existing hole is too small or too big, you will need to take corrective action.
Question No 4: Can I use a regular saw to cut the hole for a toilet flange?
Answer: While you might be tempted to use a regular saw, it is not recommended. A regular saw will not create a clean, round hole. It can also be difficult to control, which can lead to mistakes. A hole saw is the best tool for cutting a hole for a toilet flange. A hole saw is a circular saw blade that attaches to a drill. It is designed to cut perfect circles in various materials. Make sure you use a hole saw that is the correct size for your flange. This will ensure a clean and accurate cut.
Question No 5: What kind of safety gear should I wear when cutting the hole for a toilet flange?
Answer: Safety should always be your top priority when working with tools. When cutting the hole for a toilet flange, it is important to wear the right safety gear. Safety glasses will protect your eyes from flying debris. A dust mask will prevent you from breathing in harmful particles. Gloves will protect your hands from cuts and scrapes. Wear appropriate clothing. Avoid loose clothing that could get caught in the tools. By wearing the right safety gear, you can minimize the risk of injury.
Question No 6: What should I do if I am not comfortable cutting the hole for the toilet flange myself?
Answer: If you are not comfortable cutting the hole for the toilet flange yourself, it is best to call a professional plumber. Plumbing can be tricky. Mistakes can be costly. A professional plumber has the experience and expertise to handle the job safely and efficiently. They can accurately measure the hole size, select the right flange, and install it properly. They can also identify and address any potential problems. Hiring a professional can give you peace of mind knowing that the job is done right. It can also save you time and money in the long run.
