Have you ever walked into a stuffy bathroom and wished for fresh air? Installing a bathroom exhaust fan can help with that. It removes moisture and odors, making your bathroom a pleasant place to be. But how do you go about it? Don’t worry; it’s not as hard as you might think!
Many people wonder if they can do it themselves. The truth is, many homeowners find this DIY project rewarding. Just picture yourself taking a simple step to improve your home. Plus, a bathroom exhaust fan can help prevent mold and mildew. That’s a win-win!
Are you ready to dive in? Let’s explore just how you can install a bathroom exhaust fan like a pro. It’s easier than you think, and soon you’ll enjoy a fresh and airy bathroom every time you walk in!
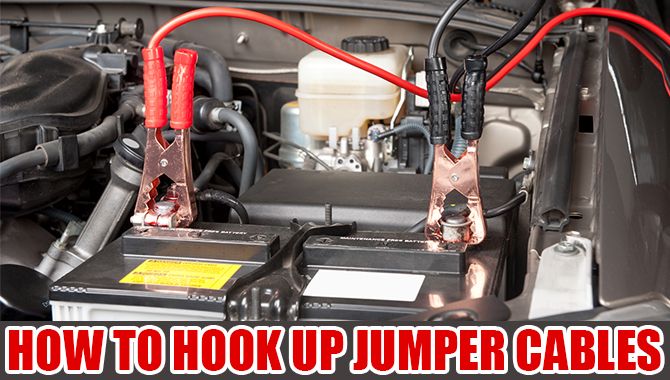
How To Install A Bathroom Exhaust Fan: A Step-By-Step Guide

How to Install a Bathroom Exhaust Fan
Installing a bathroom exhaust fan helps reduce humidity and odors. First, gather your tools: a fan, screwdriver, and wires. Next, pick the right spot. Place the fan near moisture, like a shower. Cut an opening in the ceiling and attach the fan securely. Connect the wiring, ensuring it’s safe. Did you know that a good exhaust fan can prevent mold? Enjoy a fresher bathroom by following these simple steps!Understanding the Importance of Bathroom Exhaust Fans
Benefits of proper ventilation. Common issues caused by inadequate ventilation.Good ventilation keeps your bathroom fresh and dry. An exhaust fan helps remove moisture and odors. Without it, your bathroom can have problems like:
- Too much mold and mildew
- Damaged walls and ceilings
- Unpleasant smells that linger
- Health issues from poor air quality
Installing an exhaust fan is a simple way to avoid these problems. A small fan can make a big difference!
What are the benefits of a bathroom exhaust fan?
Benefits include removing humidity, preventing damage, and improving air quality. This keeps your space comfortable and safe.
Choosing the Right Bathroom Exhaust Fan
Key features to consider (CFM rating, noise level, etc.). Types of exhaust fans available in the market.Picking the right bathroom exhaust fan is key for freshness and comfort. First, check the CFM rating; this measures airflow strength. A higher number means better ventilation. Next, consider the noise level. Some fans are loud, while others are quiet, which can affect your peace. Lastly, there are various types of fans. For example:
- Standard ceiling-mounted fans
- Wall-mounted fans
- Energy-efficient models
Choose based on your needs and space!
What features matter in a bathroom exhaust fan?
Important features include CFM rating for airflow and noise level for quietness. Energy-saving options are also vital to lower your bills.
Tools and Materials Needed for Installation
Essential tools for installation. List of materials and safety gear required.Are you ready to tackle the daunting task of installing a bathroom exhaust fan? First, let’s talk tools and materials. You’ll need a few essentials to get the job done. Grab a screwdriver, a hole saw, a measuring tape, and a ladder if you’re feeling adventurous! Don’t forget your safety gear—gloves and goggles are a must. Now, for the materials. You’ll need the exhaust fan itself, ductwork, and screws. Safety first! Remember: “It’s better to wear the gear than to shed a tear!”
| Tools | Materials | Safety Gear |
|---|---|---|
| Screwdriver | Exhaust Fan | Gloves |
| Measuring Tape | Ductwork | Goggles |
| Hole Saw | Screws | |
| Ladder |
Preparing for Installation
Assessing bathroom layout for optimal fan placement. Preparing the electrical circuit and location for ducting.Before installing a bathroom exhaust fan, grab your thinking cap! First, check the layout of your bathroom. This helps to find the best spot for the fan. It should be where the steam goes, like right above your shower. Next, you need to prepare the electrical circuit. Make sure you know where the power will come from. Lastly, think about where the duct will go. That’s where the bad air escapes! Don’t forget to measure twice! Here’s a helpful table:
| Task | Details |
|---|---|
| Bathroom Layout | Choose a spot over the shower or tub. |
| Electrical Circuit | Know your power source. Safety first! |
| Duct Location | Plan the path to the outside. |
Remember, installing a fan is not rocket science; it’s more like fixing a sandwich—simple and satisfying!
Step-by-Step Installation Process
Removing old fixtures and preparing the area. Installing the exhaust fan and securing it. Connecting the ductwork and electrical wiring.To start, remove the old fixtures carefully. Check for screws or clips. Once they are off, clean the area to prepare for the new fan. Next, install the exhaust fan. Make sure it fits snugly and fasten it securely. Then, connect the ductwork to vent air outside. Lastly, tackle the electrical wiring. Follow the connections shown in your fan’s instructions.
How can I safely remove the old fan?
Turn off the power before starting. Use a screwdriver to take off the old fan. Make sure nothing is still connected before removing it completely.
Testing the Exhaust Fan
Steps to ensure proper functionality. Common troubleshooting tips.After installing the bathroom exhaust fan, testing it is essential. Start by turning it on. Listen for a steady hum. You should feel air blowing out. If it feels weak, check these steps:
- Ensure it’s connected to power.
- Remove any obstructions in the vent.
- Inspect for loose wires.
If it doesn’t work, try resetting the switch. Gather your tools and check the manual for guidance. Professional help may be needed for serious issues. Always remember, a good fan helps keep the bathroom fresh!
What should I do if my exhaust fan isn’t working?
Check the power source first. If it’s plugged in and still not working, reset or replace the fan.
Maintenance Tips for Long-Lasting Performance
Regular cleaning and inspection guidelines. Signs that your exhaust fan needs replacing.To keep your exhaust fan working well, do some easy checks. Clean it every few months. Dust can make it less effective. Look for signs that show it needs replacing:
- It makes strange noises.
- Airflow seems weak.
- There’s a bad smell.
Doing these things can help your fan last longer. Remember, a well-maintained fan keeps your bathroom fresh and dry!
How often should I clean my bathroom exhaust fan?
Clean your fan at least every three months for the best results. This keeps dust from building up and helps it work better.
FAQs About Bathroom Exhaust Fan Installation
Addressing common concerns and questions. Clarifying misconceptions around ventilation systems.Many ask about the tricky world of bathroom exhaust fan installation. Don’t worry; we’ve got you covered! First off, some think these fans only work in fancy homes. Wrong! They can help any bathroom feel fresher. Another common question is about noise. Yes, some fans sound like a jet engine! But quiet options exist. Want to know what size fan you need? It’s often based on your bathroom size. Check out the table below for a quick guide to clear up your queries:
| Bathroom Size (sq ft) | Recommended Fan Size (CFM) |
|---|---|
| 50 | 50 |
| 100 | 100 |
| 150 | 150 |
What about installation? Some fear the tools, but a screwdriver and some simple steps can do wonders. Remember, it’s not rocket science; it’s more like assembling a LEGO set—fun and a bit messy!
Conclusion
To install a bathroom exhaust fan, you need to choose the right fan, gather tools, and follow safety steps. Start by turning off the power. Then, cut an opening, attach the fan, and connect the wiring. Remember to seal any gaps. We can all improve our bathrooms with good ventilation. For detailed guides, check out trusted websites or videos next!FAQs
Sure! Here Are Five Related Questions On The Topic Of Installing A Bathroom Exhaust Fan:Sure! Here are five related questions about installing a bathroom exhaust fan: 1. **What is a bathroom exhaust fan?** A bathroom exhaust fan helps move moisture and bad smells out of the bathroom. 2. **Why do we need a bathroom exhaust fan?** We need it to keep the air fresh and stop mold from growing. 3. **How do you install a bathroom exhaust fan?** First, turn off the power. Then, cut a hole in the ceiling, attach the fan, and connect the wires. 4. **Can I install it myself?** Yes, you can if you follow the steps carefully. But ask an adult for help. 5. **How do you know if it’s working?** You can check if air is moving from the fan when it’s on. If it blows air, it’s working!
Sure! Please give me the question you would like me to answer, and I will help you with a short answer.
What Tools And Materials Are Needed To Install A Bathroom Exhaust Fan?To install a bathroom exhaust fan, you need a few tools and materials. First, you’ll need a screwdriver to attach the fan. Then, get a drill to make holes. You should also have duct tape for sealing edges. Don’t forget the wiring tools if you need to connect electricity. Lastly, you need the exhaust fan itself!
How Do I Determine The Correct Size And Type Of Bathroom Exhaust Fan For My Space?To find the right bathroom exhaust fan, first measure your bathroom’s size in square feet. You can do this by multiplying the length and width of the room. Next, look for a fan that can move air well. A good guide is to choose a fan that moves 1 CFM (Cubic Feet per Minute) for every square foot. Finally, check for extra features you might want, like a light or a timer.
What Are The Steps To Properly Wire The Exhaust Fan To An Electrical Source?First, we turn off the power to avoid shocks. Then, you connect the fan’s wires to the electricity source. Usually, there are black and white wires. Connect the black wire to the black wire and the white wire to the white one. Finally, we check everything is tight and turn the power back on.
How Do I Ensure Proper Ventilation And Ducting When Installing A Bathroom Exhaust Fan?To ensure good air flow when you install a bathroom exhaust fan, start by picking the right size fan for your bathroom. Make sure the fan has a vent that leads outside. Use a straight and short duct to connect the fan to the vent. Keep the duct away from sharp bends to help the air move easily. Finally, check for any blockages in the duct to keep everything working well.
Are There Any Safety Precautions To Take Before Starting The Installation Process?Yes, there are safety precautions to take before you start. First, always wear safety glasses to protect your eyes. Next, make sure your workspace is clean and free of clutter. If you’re using tools, check that they are in good condition. Finally, keep your hands dry, and don’t work near water.