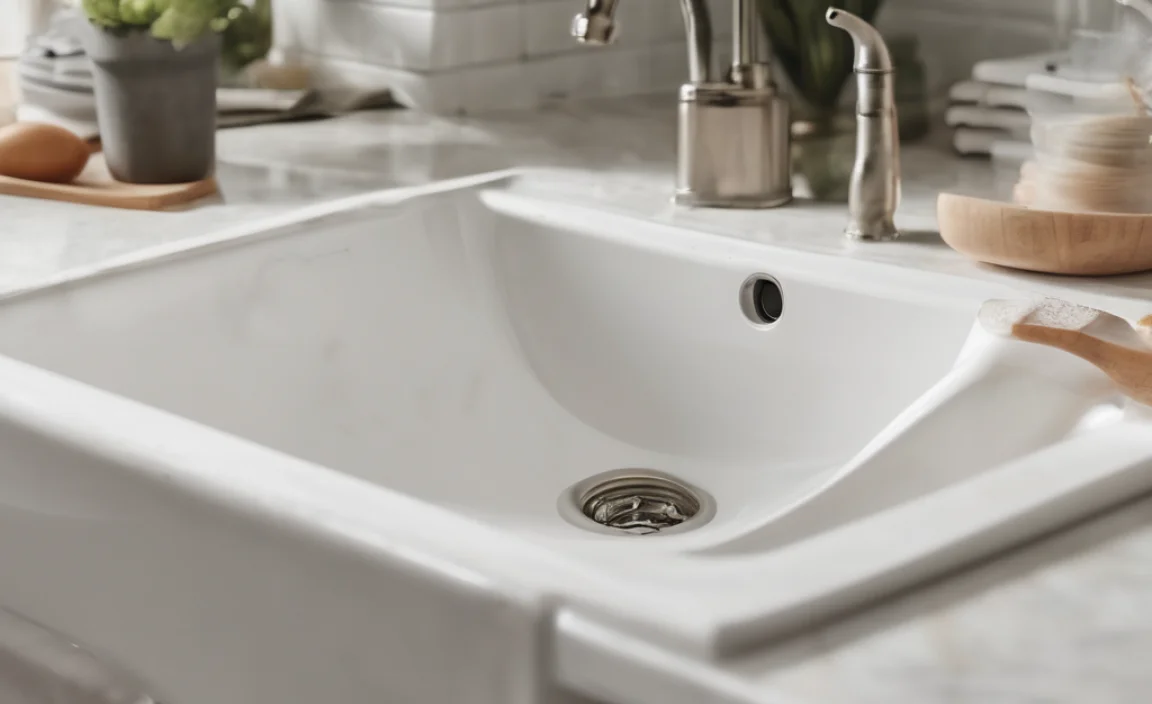
Have you ever seen a sink that looks old and worn? Maybe it’s chipped or stained. Did you know you can make it look new again? You can learn how to reglaze a sink! It’s like giving your sink a fresh start.
Imagine your bathroom looking bright and clean. A shiny sink can make a big difference. It can make your whole bathroom feel new. So, let’s find out how to reglaze a sink and make it sparkle!
Key Takeaways
- Reglazing a sink makes it look new and saves you money over replacement.
- Safety first: Always wear a mask, gloves, and eye protection.
- Proper cleaning and sanding are key to a smooth, lasting finish.
- You can choose from different colors to match your bathroom.
- Be patient and follow instructions carefully for the best results.
How to Prepare to Reglaze a Sink
Before you start how to reglaze a sink, you need to get ready. This means gathering all your supplies. You also need to clean the sink very well. A clean sink helps the new finish stick better. Think of it like painting. You wouldn’t paint over dirt, would you? The same goes for reglazing. You want a smooth, clean surface. This will make your sink look its best. Taking the time to prepare will make the whole process easier. It will also give you a much better result. So, let’s get started with the first steps of preparing your sink.
- Gather your supplies: cleaner, sandpaper, and a reglazing kit.
- Protect yourself with gloves, a mask, and eye protection.
- Clean the sink with a strong cleaner to remove dirt and grease.
- Rinse the sink well and let it dry completely.
- Cover nearby surfaces to protect them from the reglazing spray.
Now that your sink is clean and dry, you are ready for the next step. This involves sanding the sink. Sanding helps the new finish stick even better. It creates a rough surface for the reglazing material to grip. Don’t skip this step! It’s very important for a long-lasting finish. Think of it like preparing a wall for painting. Sanding makes the paint stick better. The same is true for reglazing your sink. With a little effort, your sink will look amazing. You will be so proud of your work. Now let’s move on to sanding!
Fun Fact or Stat: Did you know that reglazing a sink can save you up to 75% of the cost of replacing it?
Why is Cleaning So Important?
Why is cleaning so important before you reglaze a sink? Imagine you’re building with LEGOs. If the baseplate is covered in dust, the LEGOs won’t stick well, right? It’s the same with your sink! If there’s dirt, grease, or soap scum, the new finish won’t stick properly. It might peel or chip off later. Cleaning removes all those things. It gives the reglazing material a clean surface to bond to. Use a strong cleaner that can cut through grease and grime. Rinse the sink really well to get rid of any cleaner residue. A clean sink is the first step to a beautiful, long-lasting finish.
What Kind of Sandpaper Should I Use?
Choosing the right sandpaper is key when you reglaze a sink. Think of sandpaper like different grades of crayons. Some are for thick lines, and some are for fine details. For reglazing, you need sandpaper that’s not too rough and not too smooth. Usually, a medium-grit sandpaper (around 220-grit) is a good choice. It will help create a slightly rough surface. This rough surface helps the new finish stick better. Don’t use sandpaper that’s too rough. It can scratch the sink. Also, don’t use sandpaper that’s too smooth. It won’t create enough grip. Check the instructions on your reglazing kit for the best sandpaper to use.
How Do I Protect My Bathroom?
Protecting your bathroom is very important when you reglaze a sink. Imagine painting a picture. You wouldn’t want to get paint all over your table, would you? It’s the same with reglazing. The reglazing material can spray around. It can get on your walls, floor, and other fixtures. To protect your bathroom, cover everything nearby. Use plastic sheeting or old newspapers. Tape them down to keep them in place. This will save you a lot of cleaning later. Also, make sure you have good ventilation. Open a window or use a fan to get rid of fumes.
How to Sand the Sink Before Reglazing
Sanding is an important step when learning how to reglaze a sink. It helps the new finish stick better. It also smooths out any rough spots. Think of it like preparing a canvas for painting. You want a smooth surface. Sanding does just that for your sink. But you have to do it right. Use the right sandpaper and sand evenly. Don’t press too hard. Just let the sandpaper do its work. After sanding, clean the sink again. This removes any sanding dust. Now your sink will be ready for the next step. It will be smooth and ready for a new finish.
- Use medium-grit sandpaper (around 220-grit).
- Sand the entire surface of the sink evenly.
- Focus on rough spots or chips.
- Don’t press too hard; let the sandpaper do the work.
- Clean the sink again after sanding to remove dust.
- Wipe the sink with a tack cloth to remove any remaining particles.
After sanding and cleaning, your sink should feel smooth. Run your hand over the surface. If you feel any rough spots, sand them again lightly. Make sure you remove all the sanding dust. Use a vacuum cleaner or a damp cloth. A clean, smooth surface is key to a great reglazing job. Remember, taking your time and doing it right is important. It will make the final result look much better. You will be amazed at how to reglaze a sink and make it look brand new. Now, let’s move on to the next important step.
Fun Fact or Stat: Sanding creates a mechanical bond, which helps the new finish adhere up to 50% better than without sanding.
Why Can’t I Skip Sanding?
Why can’t you skip sanding when you reglaze a sink? Imagine trying to put stickers on a bumpy surface. They wouldn’t stick very well, would they? It’s the same with reglazing. If you don’t sand, the new finish won’t have anything to grip. It will peel or chip off easily. Sanding creates tiny scratches on the surface. These scratches give the reglazing material something to hold onto. It’s like Velcro! One side has hooks, and the other side has loops. Sanding creates the “hooks” for the reglazing material to grab. So, don’t skip sanding! It’s a very important step.
How Do I Sand Around the Drain?
Sanding around the drain can be tricky when you reglaze a sink. The drain is a small, tight space. It can be hard to reach with regular sandpaper. One trick is to fold the sandpaper. This makes it easier to get into tight corners. You can also use a small sanding block. A sanding block gives you more control. Be careful not to scratch the drain itself. You can cover it with tape to protect it. Sand gently around the drain. Make sure you remove any rust or buildup. A clean drain area will help the reglazing look smooth and even.
What If I Sand Too Much?
What if you sand too much when you reglaze a sink? Don’t worry, it happens! If you sand too much in one spot, you might create a low spot. The good news is that you can fix it. Use a filler or epoxy to fill in the low spot. Let it dry completely. Then, sand it smooth again. Be careful not to over-sand this time. The goal is to create an even surface. If you’re not sure, it’s always better to sand lightly. You can always sand more if needed. But it’s harder to fix over-sanding. Take your time and be patient.
How to Apply the Reglazing Product
Now comes the exciting part: applying the reglazing product! This is where you’ll see your sink start to transform. But it’s important to do it carefully. Follow the instructions on your reglazing kit. Usually, you’ll need to mix two parts together. Mix them very well. Then, apply the mixture to the sink. Use a brush or a roller. Apply it in thin, even coats. Don’t apply too much at once. It can drip or run. Let each coat dry completely before applying the next one. This will give you a smooth, professional-looking finish. It will be worth the wait.
- Mix the reglazing product according to the instructions.
- Apply thin, even coats with a brush or roller.
- Avoid applying too much at once to prevent drips.
- Let each coat dry completely before applying the next.
- Use a foam brush for smooth application.
- Work in a well-ventilated area.
After applying the first coat, check for any imperfections. Look for drips, runs, or uneven spots. If you see any, sand them lightly with fine-grit sandpaper. Then, wipe the sink clean before applying the next coat. This will help you achieve a flawless finish. Remember, patience is key. Don’t rush the process. Let each coat dry completely. This will ensure that the reglazing material bonds properly to the sink. It will also make the finish more durable. Soon, you’ll have a beautifully reglazed sink that you can be proud of.
Fun Fact or Stat: Applying multiple thin coats, rather than one thick coat, can increase the longevity of the finish by up to 40%.
Should I Use a Brush or a Roller?
Should you use a brush or a roller when you reglaze a sink? It depends on the reglazing product and your preference. A brush can be good for small areas and details. It allows you to control the application. A roller can be good for larger, flat surfaces. It can help you apply the reglazing material more quickly and evenly. If you use a brush, choose a high-quality one. This will help prevent brushstrokes. If you use a roller, choose a foam roller. A foam roller will give you a smooth finish. Try both and see which one you like better!
How Long Should I Let Each Coat Dry?
How long should you let each coat dry when you reglaze a sink? This is very important! If you don’t let each coat dry completely, the next coat won’t stick properly. It can lead to peeling or chipping. Check the instructions on your reglazing kit. They will tell you how long to wait. Usually, it’s at least a few hours. Sometimes, it’s overnight. Be patient! It’s better to wait too long than not long enough. You can test if the coat is dry by touching it gently. If it’s sticky, it’s not ready yet. Wait until it’s completely dry and smooth.
What If I See Bubbles?
What if you see bubbles when you reglaze a sink? Bubbles can be annoying. They can ruin the smooth finish. Usually, bubbles happen when you mix the reglazing product too quickly. This traps air in the mixture. To prevent bubbles, mix slowly and gently. If you see bubbles after applying the reglazing material, don’t panic. You can try to pop them with a clean brush. Or, you can wait until the coat is dry. Then, sand the bubbles lightly with fine-grit sandpaper. Apply another thin coat of reglazing material. This should fix the problem.
How to Choose the Right Reglazing Kit
Choosing the right reglazing kit is important. There are many different kits available. Some are better than others. Look for a kit that is specifically designed for sinks. Read the reviews online. See what other people say about the kit. Choose a kit that is easy to use. It should come with clear instructions. Also, consider the color. Do you want to keep the same color? Or do you want to change it? Make sure the kit comes with everything you need. This includes the reglazing material, sandpaper, and a brush or roller.
- Read online reviews to see what others say about the kit.
- Choose a kit specifically designed for sinks.
- Check if the kit includes all necessary supplies.
- Consider the color options and choose one you like.
- Look for a kit with clear and easy-to-follow instructions.
- Compare prices and choose a kit that fits your budget.
When choosing a reglazing kit, also consider the durability. Some kits are more durable than others. A durable kit will last longer. It will resist chipping and staining. Look for a kit that is resistant to water and chemicals. This is important for a sink. Also, check the drying time. Some kits dry faster than others. A faster-drying kit will save you time. But make sure it still provides a good finish. Choosing the right kit will make how to reglaze a sink easier. It will also give you better results.
Fun Fact or Stat: The lifespan of a properly applied reglazing finish can vary from 5 to 15 years, depending on the quality of the kit and usage.
What About Epoxy vs. Acrylic Kits?
What about epoxy vs. acrylic kits when you reglaze a sink? Both epoxy and acrylic kits are used for reglazing. Epoxy kits are generally more durable. They create a harder, more resistant finish. However, they can be more difficult to work with. They often have a stronger odor. Acrylic kits are easier to use. They dry faster and have less odor. But they may not be as durable as epoxy kits. Consider your needs and experience. If you want the most durable finish and are comfortable working with chemicals, choose an epoxy kit. If you want an easier application and are okay with a slightly less durable finish, choose an acrylic kit.
What Colors Are Available?
What colors are available when you reglaze a sink? Most reglazing kits come in a variety of colors. White is the most common and popular choice. It’s a classic and clean look. However, you can also find kits in other colors, such as almond, biscuit, and gray. Some kits even allow you to mix custom colors. This gives you even more options. When choosing a color, consider your bathroom’s decor. Do you want the sink to match the other fixtures? Or do you want it to stand out? Choose a color that you like and that will complement your bathroom.
How Much Does a Kit Cost?
How much does a reglazing kit cost? The cost of a reglazing kit can vary. It depends on the brand, the type of kit, and the size of the kit. Generally, you can expect to pay between $50 and $150 for a good-quality kit. Epoxy kits tend to be more expensive than acrylic kits. Larger kits, which can cover more area, will also cost more. Consider your budget and your needs. Don’t just choose the cheapest kit. Look for a kit that offers good value for the money. Read reviews and compare prices before making a decision.
Safety Precautions When Reglazing
Safety is very important when you reglaze a sink. The chemicals in reglazing products can be harmful. They can irritate your skin, eyes, and lungs. Always wear gloves, a mask, and eye protection. This will protect you from the chemicals. Work in a well-ventilated area. Open a window or use a fan to get rid of fumes. Don’t eat, drink, or smoke while reglazing. Keep children and pets away from the area. Follow the instructions on the reglazing kit carefully. If you get any chemicals on your skin or in your eyes, rinse them immediately with water.
| Safety Precaution | Why It’s Important |
|---|---|
| Wear gloves | Protects your skin from chemical irritation. |
| Wear a mask | Prevents inhalation of harmful fumes. |
| Wear eye protection | Shields your eyes from splashes and fumes. |
| Ventilate the area | Reduces concentration of harmful vapors. |
| Keep children and pets away | Prevents accidental exposure to chemicals. |
After you finish reglazing, dispose of the leftover chemicals properly. Don’t pour them down the drain. This can harm the environment. Check your local regulations for how to dispose of hazardous waste. Clean your tools with the recommended solvent. Store the leftover reglazing product in a safe place. Keep it away from children and pets. By following these safety precautions, you can reglaze a sink safely and protect yourself and others.
Fun Fact or Stat: Inhaling fumes from reglazing products can cause dizziness, headaches, and respiratory problems. Proper ventilation reduces these risks by up to 80%.
What Kind of Mask Should I Use?
What kind of mask should you use when you reglaze a sink? Not all masks are created equal. A simple dust mask won’t protect you from the harmful fumes of reglazing products. You need a respirator mask. A respirator mask has a filter that can remove the chemicals from the air. Look for a respirator mask that is NIOSH-approved. This means that it has been tested and certified to protect you from certain chemicals. Make sure the mask fits properly. It should seal tightly around your nose and mouth. Replace the filters regularly, according to the manufacturer’s instructions.
How Do I Ventilate the Area?
How do you ventilate the area when you reglaze a sink? Ventilation is key to reducing the risk of inhaling harmful fumes. Open windows and doors to create airflow. Place a fan near the window to blow the fumes outside. If you have a bathroom exhaust fan, turn it on. If possible, use a portable air purifier with a filter that can remove chemicals. Make sure the ventilation is adequate. You should be able to smell the fumes only faintly, or not at all. If you can smell the fumes strongly, you need more ventilation.
What If I Get Chemicals on My Skin?
What if you get chemicals on your skin when you reglaze a sink? Don’t panic! The first thing to do is to remove any contaminated clothing. Then, rinse the affected area with plenty of water. Use soap and water if possible. Rinse for at least 15 minutes. If you experience any irritation, redness, or burning, seek medical attention. Read the safety instructions on the reglazing kit. They will tell you what to do in case of skin contact. By taking quick action, you can minimize the risk of serious injury.
How to Clean Up After Reglazing
Cleaning up is the final step after you reglaze a sink. It’s important to clean up properly. This will protect your bathroom and your health. First, remove all the plastic sheeting and tape. Dispose of them properly. Then, clean your tools with the recommended solvent. This will remove any leftover reglazing material. Wipe down any surfaces that may have gotten splashed. Use a cleaner that is safe for your bathroom surfaces. Finally, wash your hands thoroughly with soap and water. This will remove any chemicals that may have gotten on your skin.
- Remove all plastic sheeting and tape carefully.
- Clean your tools with the recommended solvent.
- Wipe down any surfaces that may have gotten splashed.
- Dispose of used materials according to local regulations.
- Wash your hands thoroughly with soap and water.
- Ventilate the area for several hours after cleaning.
After cleaning, inspect your sink. Look for any imperfections. If you see any, you can touch them up with a small brush. Let the touch-up dry completely. Then, clean the sink again. Avoid using harsh cleaners on your new finish. This can damage it. Use a mild soap and water. Dry the sink with a soft cloth. This will help keep it looking shiny and new. By cleaning up properly and caring for your reglazed sink, you can enjoy it for years to come.
Fun Fact or Stat: Proper cleanup and ventilation can reduce the risk of lingering chemical odors by up to 90%.
What’s the Best Way to Dispose of Leftover Materials?
What’s the best way to dispose of leftover materials after you reglaze a sink? Don’t just throw them in the trash! Reglazing materials are often considered hazardous waste. This means they can be harmful to the environment. Check your local regulations for how to dispose of hazardous waste. Many communities have special collection days or drop-off locations. You may need to take the leftover materials to one of these locations. If you’re not sure, contact your local waste management agency. They can tell you how to dispose of the materials safely and legally.
How Do I Clean My Brushes and Rollers?
How do you clean your brushes and rollers after you reglaze a sink? Cleaning your tools properly will help them last longer. It will also prevent the reglazing material from hardening on them. The best way to clean your brushes and rollers is to use the solvent recommended by the reglazing kit manufacturer. This is usually mineral spirits or lacquer thinner. Pour some solvent into a container. Dip the brush or roller into the solvent. Work the solvent into the bristles or foam. Rinse the brush or roller with clean solvent. Repeat until all the reglazing material is removed. Let the brush or roller dry completely before storing it.
How Soon Can I Use the Sink?
How soon can you use the sink after you reglaze a sink? This is a very important question! You need to give the new finish enough time to cure. Curing is the process of the reglazing material hardening and bonding to the sink. If you use the sink too soon, you can damage the finish. Check the instructions on your reglazing kit. They will tell you how long to wait. Usually, it’s at least 24-48 hours. Some kits may require longer. Be patient! It’s better to wait too long than not long enough. Avoid using harsh cleaners or abrasive materials on the new finish for the first few weeks.
Maintaining Your Reglazed Sink
Now that you know how to reglaze a sink, you should also know how to maintain it! A reglazed sink needs special care. This will help it last longer. Avoid using harsh cleaners. These can damage the finish. Use a mild soap and water. Dry the sink with a soft cloth after each use. This will prevent water spots. Don’t let water sit in the sink for long periods. This can also damage the finish. Avoid dropping heavy objects in the sink. This can chip the finish. By following these simple tips, you can keep your reglazed sink looking beautiful for years to come.
- Avoid using harsh or abrasive cleaners.
- Use a mild soap and water for cleaning.
- Dry the sink with a soft cloth after each use.
- Avoid letting water sit in the sink for long periods.
- Don’t drop heavy objects in the sink.
- Inspect the finish regularly for chips or cracks.
If you notice any chips or cracks in the finish, repair them quickly. You can use a touch-up kit to fix small imperfections. This will prevent them from getting worse. If the damage is more extensive, you may need to reglaze the sink again. Regular maintenance will help you avoid this. It will also keep your sink looking its best. Remember, a little care goes a long way. With proper maintenance, your reglazed sink will be a beautiful addition to your bathroom for many years to come.
Fun Fact or Stat: Regular cleaning and maintenance can extend the life of a reglazed sink by up to 30%.
How Often Should I Clean My Reglazed Sink?
How often should you clean your reglazed sink? The more often you clean it, the better! Regular cleaning will prevent buildup of soap scum, hard water stains, and other grime. Aim to clean your sink at least once a week. If you use it frequently, you may want to clean it more often. Use a mild soap and water. Dry the sink with a soft cloth after each cleaning. This will help prevent water spots. By making cleaning a regular habit, you can keep your reglazed sink looking its best.
What Cleaners Should I Avoid?
What cleaners should you avoid using on your reglazed sink? Harsh cleaners can damage the finish. Avoid using abrasive cleaners, such as scouring powders and steel wool. These can scratch the surface. Also, avoid using cleaners that contain bleach or ammonia. These can dull the finish. Stick to mild soaps and detergents. Look for cleaners that are specifically designed for use on delicate surfaces. Always test the cleaner in an inconspicuous area first. This will make sure it doesn’t damage the finish.
How Can I Prevent Stains?
How can you prevent stains on your reglazed sink? Prevention is key to keeping your sink looking its best. Rinse the sink after each use to remove soap scum and other residue. Dry the sink with a soft cloth to prevent water spots. Avoid letting liquids sit in the sink for long periods. This can cause stains. If you spill something that could stain, clean it up immediately. Protect the sink from sharp objects that could scratch the finish. By taking these precautions, you can keep your reglazed sink looking beautiful and stain-free.
Summary
Reglazing a sink is a great way to make an old sink look new again. It’s cheaper than replacing the whole sink. You need to prepare the sink by cleaning and sanding it. Then, you apply the reglazing product in thin, even coats. Safety is very important. Wear gloves, a mask, and eye protection. Work in a well-ventilated area. Choose the right reglazing kit. Follow the instructions carefully. Clean up properly after you finish.
Maintaining your reglazed sink is also important. Use mild soap and water. Dry the sink with a soft cloth. Avoid harsh cleaners. With proper care, your reglazed sink will look beautiful for years. Reglazing a sink can save you money and make your bathroom look great!
Conclusion
Learning how to reglaze a sink is a great skill. It lets you fix up your bathroom without spending lots of money. It takes some work to prepare the sink and apply the new finish. But the result is worth it. You get a sink that looks new and clean. Remember to be safe and follow the instructions. With a little effort, you can make your sink shine again. Reglazing a sink can make a big difference in your bathroom.
Frequently Asked Questions
Question No 1: Is it hard to learn how to reglaze a sink?
Answer: Reglazing a sink is not super hard. But, it takes some time and effort. You need to clean the sink well. Then, you have to sand it. After that, you put on the new finish. The trickiest part is making sure you don’t have any drips or runs. If you follow the instructions, you can do it! It’s like following a recipe for baking a cake. If you do all the steps, you’ll get a great result. Just be patient and take your time. You will be happy with your new sink!
Question No 2: How long does it take to reglaze a sink?
Answer: The time it takes to reglaze a sink depends. Some steps take longer than others. Cleaning might take 30 minutes. Sanding could take an hour. Applying the finish might take another hour. You also have to wait for each coat to dry. This could take several hours. So, all together, it might take a whole day or even two days. Don’t rush! It’s better to take your time and do it right. This will make your sink look great for longer. Think of it like building a model airplane. You can’t rush it. You have to take each step carefully.
Question No 3: How much does it cost to reglaze a sink?
Answer: It costs less to reglaze a sink than to buy a new one. A reglazing kit might cost between $50 and $150. You might also need some sandpaper, cleaner, and tape. These things don’t cost much. If you hire someone to do it for you, it will cost more. They might charge a few hundred dollars. But, if you do it yourself, you can save a lot of money. Think of it like fixing your own bike. You save money by not taking it to a shop. Reglazing a sink yourself can be a good way to save money.
Question No 4: Can I change the color of my sink when I reglaze it?
Answer: Yes, you can change the color of your sink when you reglaze it! Most reglazing kits come in different colors. White is a popular choice. But you can also find other colors, like almond or gray. Some kits even let you mix your own colors. This lets you create a custom color. When you choose a color, think about your bathroom. Do you want the sink to match the walls? Or do you want it to stand out? Changing the color of your sink can give your bathroom a whole new look. It’s like painting your bedroom a different color.
Question No 5: Is reglazing better than replacing a sink?
Answer: It depends! Reglazing is cheaper than replacing a sink. But, it might not last as long. If your sink has big cracks or damage, replacing it might be better. If your sink just looks old or stained, reglazing is a good option. It can make your sink look new again. It’s also better for the environment. You’re not throwing away an old sink. You’re giving it a new life. Think of it like fixing up an old toy instead of buying a new one. Sometimes, fixing it is the better choice.
Question No 6: What if I mess up when I reglaze my sink?
Answer: Don’t worry if you mess up when you reglaze your sink! Everyone makes mistakes. If you get drips or runs, you can sand them down. Then, you can put on another coat of finish. If you don’t like the color, you can sand it off and try again. The important thing is not to give up. Keep trying until you get it right. Reglazing a sink takes practice. The more you do it, the better you’ll get. Think of it like learning to ride a bike. You might fall down a few times. But, eventually, you’ll get the hang of it!