Vermicomposting in USA: Essential Guide

Hey there, gardening friends! Ever look at your kitchen scraps and think, “There’s gotta be a better way than the trash can”? You’re in luck! Vermicomposting, or worm composting, is a super simple way to turn those scraps into amazing ‘black gold’ for your plants. It sounds a bit fancy, but I promise it’s easy to get started. Let’s dive in and see how you can become a worm-wrangling pro right here in the USA!

Vermicomposting in USA: Your Essential Guide to Wiggly Wonders

So, you’re curious about vermicomposting in the USA, huh? That’s fantastic! It’s a fantastic way to reduce waste and create incredibly rich fertilizer for your garden, balcony plants, or even just that herb you’re growing on your windowsill. My name’s Troy D Harn, and at TopChooser, I love breaking down big projects into bite-sized, doable steps. Vermicomposting might sound a little… earthy, but it’s surprisingly straightforward and incredibly rewarding. Think of it as nature’s ultimate recycling program, powered by a team of hungry worms!

This guide is designed specifically for beginners who want to get started with vermicomposting in the US. We’ll cover everything from choosing your worms and bin to feeding them and harvesting your finished compost. No complex jargon, just practical advice to help you succeed. Ready to get your hands a little dirty (in the best way possible)? Let’s get started!

Why Vermicompost? The Benefits of Wormy Goodness

Before we get our hands dirty, let’s talk about why vermicomposting is such a brilliant idea, especially for us home gardeners in the USA.

  • Waste Reduction: A huge chunk of what we throw away is organic material – fruit peels, veggie scraps, coffee grounds. Worm composting diverts this from landfills, saving space and reducing methane gas production.
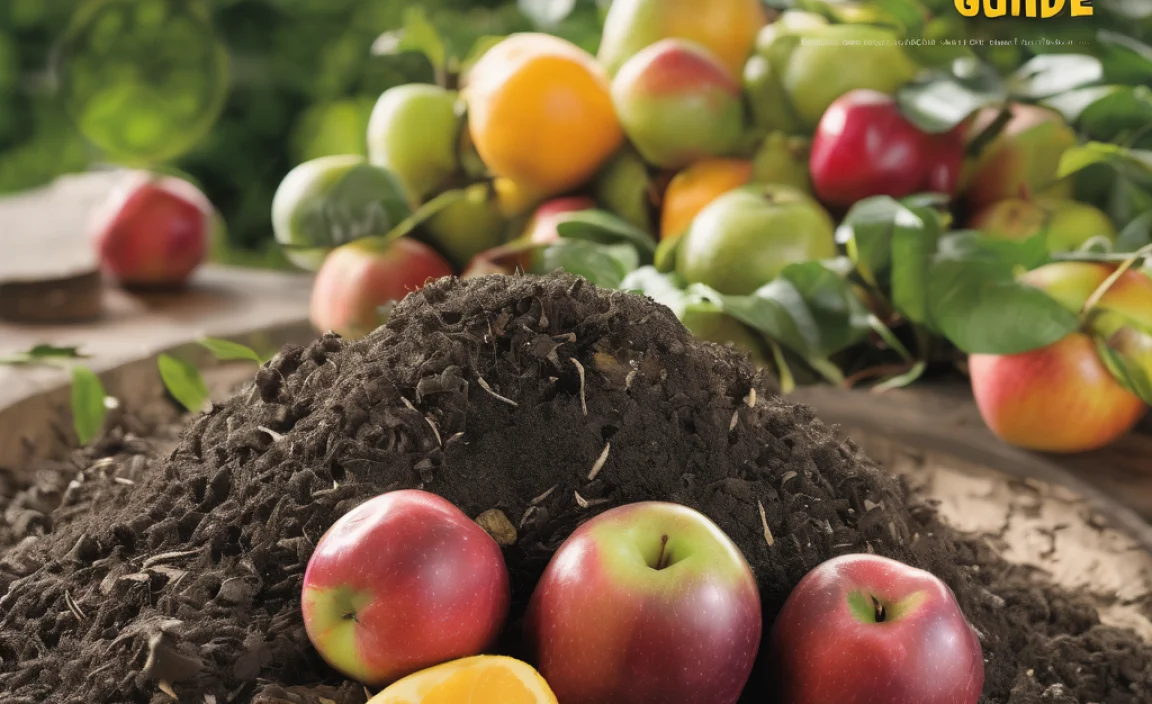
  • Super-Powered Fertilizer: Worm castings (that’s worm poop!) are packed with nutrients that plants absolutely love. They improve soil structure, drainage, and aeration, leading to healthier, happier plants. It’s often called ‘black gold’ by gardeners for a reason!
  • Faster Than Traditional Composting: Worms work much faster than the microbes involved in traditional hot composting, meaning you can get usable compost in as little as a few months.
  • Great for Small Spaces: You don’t need a sprawling backyard! Vermicomposting can be done indoors or outdoors in a relatively small bin, making it perfect for apartment dwellers, condo owners, or anyone with limited space.
  • Educational and Fun: It’s a fantastic learning experience, especially for families. Kids (and adults!) are often fascinated by how the worms transform food scraps into valuable soil amendment.

Choosing Your Worms: Not Just Any Earthworm Will Do!

This is a crucial step! You don’t just go out and dig up regular garden earthworms. They aren’t built for the bin and won’t thrive. For vermicomposting, you need specific types of composting worms, often called red wigglers. These little guys are voracious eaters and reproduce well in captivity.

The most popular worms for vermicomposting in the USA are:

  • Eisenia fetida (Red Wigglers): These are the superstars of the worm bin. They are hardy, reproduce quickly, and are excellent at processing organic waste.
  • Eudrilus eugeniae (African Nightcrawlers): These are larger and can process food waste even faster, but they prefer slightly warmer temperatures than red wigglers.
  • Perionyx excavatus (Indian Blue Worms): Another excellent choice, known for their prolific breeding.

You can purchase these worms online from reputable worm farms or sometimes from local gardening stores or communities. A common starting amount is about 1 pound of worms.

Selecting Your Vermicomposting Bin

The good news is you don’t need a fancy, expensive setup to start vermicomposting. Many options work, from DIY bins to store-bought systems.

DIY Bin Options:

If you’re handy, you can easily build your own bin. Here are a couple of popular DIY methods:

  • Stacking Totes: This is a favorite for simplicity and affordability. You’ll typically need two or three opaque plastic storage totes (around 10-20 gallons each).
    • Bin 1 (Bottom): This bin serves as a leachate collector (the liquid that drains from the compost). No holes needed!
    • Bin 2 (Middle – the Bedding Bin): Drill several small holes (about 1/8 inch) in the bottom of this bin. Later, you’ll drill larger holes (about 1/2 inch) around the sides near the top for ventilation. This is where your worms and bedding will live.
    • Bin 3 (Optional Top): If you’re using a stacking system with multiple working bins, this one would be identical to Bin 2, also with holes in the bottom. This allows you to stack them and have worms migrate upwards as they eat through the lower bin’s contents.
  • Wooden Bins: You can build a simple box out of untreated lumber. Ensure it has good drainage and ventilation. You can line the bottom with mesh to prevent worms from escaping.

Commercial Bin Options:

If DIY isn’t your thing, there are many excellent pre-made worm composting bins available. These are often called “worm farms” or “worm composting systems.”

  • Stacking Systems: Similar to the DIY stacking totes, these systems have multiple trays where bedding and food are placed. As the lower trays are processed, worms migrate upwards to new food in the trays above.
  • Single-Tray Systems: These are simpler, often just one large bin with a lid. They work well for smaller volumes of food scraps.

Important Considerations for Your Bin:

  • Opaque: Worms prefer the dark. Opaque bins protect them from light.
  • Ventilation: Airflow is crucial. Most bins need some holes for air to get in and out.
  • Drainage: Excess moisture needs a way to escape. This collected liquid, called leachate, can be diluted and used as a nutrient-rich fertilizer for plants.
  • Size: A common starting size is 10-20 gallons. This can handle a good amount of kitchen scraps from a typical household.

Setting Up Your Worm Bin: Getting Cozy for Your Worms

Your worms need a cozy place to live, and that means preparing their bedding. This is the material they’ll live in, eat from, and burrow through.

Ideal Bedding Materials:

  • Shredded Newspaper: Black and white ink is fine. Avoid glossy paper. Tear or shred it into strips about 1-2 inches wide.
  • Shredded Cardboard: Similar to newspaper, plain cardboard is best.
  • Coconut Coir: This is a popular choice. You buy it compressed and rehydrate it with water. It’s lightweight and holds moisture well.
  • Peat Moss: Works well but can be less sustainable than other options.
  • Aged Compost or Soil: A small amount can help introduce beneficial microbes.

How to Prepare the Bedding:

  1. Moisten the Bedding: The key is to get it damp, like a wrung-out sponge. It should not be dripping wet. If you’re using coco coir, follow package instructions for rehydration. If using newspaper or cardboard, soak it briefly and then squeeze out excess water.
  2. Fluff it Up: Mix the moistened materials thoroughly. You want it airy for good oxygen flow.
  3. Fill the Bin: Fill your prepared worm bin (the one with holes in the bottom) about halfway to two-thirds full with the moistened bedding.
  4. Settle the Bedding: Let the bedding sit for a day or two before introducing the worms. This allows it to cool down if it warmed up during moistening and lets any initial activity settle.

Introducing Your Worms to Their New Home

Once your bin is set up and the bedding is ready, it’s time to add your wormy friends!

  1. Gently Unpack Worms: Carefully remove your worms from their shipping container.
  2. “Plant” Them: Make a few small furrows or depressions in the surface of the bedding. Gently place the worms into these openings.
  3. Cover Them Up: Gently cover the worms with a thin layer of bedding. They will quickly burrow down to escape the light.
  4. Initial Rest: Leave the worms to settle in for a few days without feeding them. They need time to adjust to their new environment.

What to Feed Your Worms (and What to Avoid!)

Worms are not picky eaters, but there are definitely some foods they love and some they are better off without.

Good Foods (Feed in moderation):

  • Fruit scraps (apples, bananas, berries, melons)
  • Vegetable scraps (carrots, lettuce, broccoli, potato peels)
  • Coffee grounds and paper filters
  • Tea bags (remove staples)
  • Crushed eggshells (great for grit and calcium)
  • Plain cooked pasta or rice (in small amounts)
  • Oatmeal or cornmeal (as a treat, in small amounts)

Foods to Avoid (or feed very sparingly):

  • Citrus fruits: Too acidic and can harm the worms. Small amounts of orange or lemon peel are okay, but not large quantities.
  • Onions, garlic, and spicy peppers: Their strong oils and compounds can be irritating.
  • Meat, dairy, and oily foods: These can attract pests, create foul odors, and go rancid.
  • Processed foods: Too many chemicals and salt.
  • Pet waste: Can contain pathogens.
  • Yard waste: Large amounts of grass clippings or leaves can become too matted and anaerobic.
  • Diseased plants: Avoid introducing any plants that may carry disease.

Feeding Tips:

  • Start Small: When you begin feeding, offer only a small amount. You want to avoid overfeeding, which can lead to anaerobic conditions and smelly issues.
  • Chop it Up: The smaller the food pieces, the faster the worms can process them.
  • Bury the Food: Bury the food scraps under the bedding. This helps prevent odors and keeps pests away. You can rotate where you bury the food so the worms work through the entire bin.
  • Observe: Pay attention to how quickly the food disappears. If food is left behind after a week, you’re feeding too much. If it’s gobbled up quickly, you can increase the amount slightly.

Maintaining Your Worm Bin: Keeping Things Happy and Healthy

A happy worm bin is a productive worm bin! Here’s what you need to keep in mind for ongoing maintenance:

Moisture Levels

As mentioned, the bedding should stay consistently damp, like a wrung-out sponge. If it looks dry, mist it with water. If it’s too wet (and smells), you might need to add more dry bedding or improve ventilation. The bedding and the worms’ environment should be moist but not waterlogged.

Temperature

Red wigglers prefer temperatures between 55°F and 77°F (13°C and 25°C). If your bin is outdoors in a very hot climate, you might need to provide shade or even move it indoors during peak summer. In colder areas, ensure it’s protected from freezing. The ideal temperature range is crucial for worm reproduction and activity.

Aeration

Worms need oxygen! Periodically, you can gently fluff the top layer of the bedding with a garden fork or your hands. Be careful not to disturb the worms too much. The holes in your bin also play a big part in this.

pH Levels

Worms thrive in a neutral pH environment (around 6.0-7.0). Overfeeding acidic foods like citrus can lower the pH. Adding crushed eggshells not only provides grit for the worms but also helps buffer the pH.

Harvesting Your Worm Castings: The Black Gold!

This is the exciting part – collecting the nutrient-rich compost your worms have created! Worm casting harvesting can be done in a few ways, depending on your bin type.

Method 1: The “Migrate Up” Method (for stacking bins)

  1. Stop Feeding: For about a week to 10 days, stop adding food scraps to the bin you want to harvest from.
  2. Add Fresh Bedding and Food Above: In the next level of your stacking system, add fresh bedding topped with a new layer of food scraps.
  3. Wait for Migration: The worms will naturally migrate upwards towards the fresh food and bedding. This can take a few weeks.
  4. Harvest: Once you see most of the worms have moved to the upper bin, you can remove the lower bin for harvesting. You might have a few stragglers, which you can pick out by hand or return to the working bin.

Method 2: The “Light Scare” Method (for single-bin systems)

  1. Empty the Bin: Take all the contents of your worm bin and dump them onto a tarp or plastic sheet in a brightly lit area (preferably outdoors).
  2. Create Piles: Divide the contents into several cone-shaped piles.
  3. Wait: The worms will burrow down to escape the light and heat. Wait about 10-15 minutes.
  4. Harvest Top Layers: Carefully scoop off the top layer of compost. You’ll find fewer worms in this layer. Repeat this process, scooping off layer by layer.
  5. Collect Worms: As you get to the bottom of the piles, you’ll find most of the worms. Collect these and put them back into your prepared worm bin with fresh bedding.

Method 3: The “Screening” Method

This is best for well-established compost. You can use a screen (like a mesh sieve or a custom-built screen box) to sift the compost. The worm castings will fall through, while larger undigested items and cocoons will remain on top to be returned to the bin.

What to do with your castings:

  • Directly in Garden Beds: Mix them into your soil before planting.
  • Top Dressing: Sprinkle a layer around existing plants.
  • Compost Tea: Steep castings in water to create a liquid fertilizer.
  • Potting Mix: Add them to your homemade potting soil mixes.

Troubleshooting Common Vermicomposting Issues

Even with the best intentions, you might encounter a few hiccups. Don’t worry – they’re usually easy to fix!

Issue: Foul Odors

Causes: Overfeeding, too much moisture, lack of aeration, feeding forbidden foods (meat, dairy).
Solutions: Stop feeding for a week or two. Add more dry bedding material. Gently fluff the bedding to aerate. Ensure proper drainage. Only feed approved items.

Issue: Fruit Flies or Gnats

Causes: Exposed food scraps on the surface.
Solutions: Bury food scraps completely under the bedding. Avoid overfeeding. Try adding a layer of dry shredded newspaper on top of the food. You can also try setting simple fruit fly traps near the bin (e.g., a jar with apple cider vinegar and a drop of dish soap).

Issue: Too Wet

Causes: Overwatering, bin not draining properly, too much watery food.
Solutions: Add dry bedding material (shredded newspaper, coco coir) to absorb excess moisture. Ensure drainage holes are clear. If using a stacking system, make sure the leachate collector isn’t full and overflowing.

Issue: Too Dry

Causes: Not enough moisture, poor ventilation causing evaporation.
Solutions: Mist the bedding with water. Gently mix the bedding to distribute moisture. Make sure ventilation holes aren’t blocked.

Issue: Worms Trying to Escape

Causes: Unfavorable conditions (too wet, too dry, too acidic, temperature extremes, lack of air).
Solutions: Check and correct the bin’s conditions (moisture, temperature, pH, aeration). Make sure there are no gaps or holes they can get through other than designed ventilation.

Quick Comparison: DIY vs. Commercial Worm Bins

Choosing between building your own or buying a pre-made bin is a common decision. Here’s a quick look to help you decide:

Leave a Comment

Vermicomposting in USA: Essential Guide

Hey there, fellow home improvers and garden enthusiasts! Are you tired of seeing your kitchen scraps pile up, wondering what to do with them besides tossing them in the trash? It’s a common issue, but I’ve got a super simple, earth-friendly solution that churns out amazing fertilizer for your plants. Get ready to dive into the wonderful world of vermicomposting – that’s just a fancy word for composting with worms! I’ll walk you through everything, step-by-step, so you can start turning your waste into garden gold right in your own home.

Vermicomposting in USA: Your Essential Beginner’s Guide

Welcome to the easiest way to supercharge your garden and reduce household waste! Vermicomposting, or worm composting, is a fantastic method for breaking down organic materials using earthworms. In the USA, this eco-friendly practice is gaining popularity, and for good reason. It’s accessible, efficient, and surprisingly simple, even for absolute beginners. Forget bulky compost bins or complicated systems; vermicomposting can be done right in your home, year-round, producing nutrient-rich compost that plants absolutely adore. Let’s break down exactly how you can get started and reap the benefits.

Why Vermicomposting? The Big Benefits!

So, why should you consider turning your kitchen scraps into worm food? The perks are pretty awesome:

  • Exceptional Fertilizer: Worm castings (that’s worm poop!) are a powerhouse of nutrients, often called “black gold” by gardeners. They improve soil structure, aeration, and water retention.
  • Waste Reduction: You’ll dramatically cut down on what you send to the landfill. Think of all those vegetable peels, coffee grounds, and paper scraps you can divert!
  • Year-Round Composting: Unlike outdoor piles that slow down in cold weather, indoor worm bins work consistently, no matter the season.
  • Space Efficient: A worm bin doesn’t need much space. It can sit on a balcony, in a garage, under a sink, or in a corner of your home.
  • Educational and Fun: It’s a great way to connect with nature and teach kids about the decomposition cycle. Plus, it’s really not gross when you set it up right!

Choosing Your Worms: The “Red Wigglers” Are Your Friends!

Not just any worm can do the job. You’ll want to get your hands on composting-specific worms. The undisputed champions of vermicomposting are Red Wigglers (Eisenia fetida). They’re voracious eaters, reproduce quickly in captivity, and thrive in the conditions you’ll create in your worm bin.

You can usually purchase starter populations of Red Wigglers online from reputable worm farms or sometimes from local gardening centers. A pound of worms is a good starting point for most beginner bins.

Setting Up Your Worm Bin: Your Worms’ New Home

This is where the magic begins! You don’t need anything fancy. A simple, DIY bin is often the best way to start. The key is to provide an environment that’s dark, moist, well-ventilated, and safe for your worms.

Option 1: The DIY Plastic Tote Bin

This is a favorite for many beginners because it’s affordable and easy to assemble. You’ll need:

  • A dark-colored plastic storage tote with a lid (around 10-18 gallons is a good size). Dark colors help keep the bin dark, which worms prefer.
  • A drill with a 1/8-inch drill bit and a larger 1/4-inch or 1/2-inch drill bit.

Step-by-Step DIY Bin Creation:

  1. Drill Drainage and Aeration Holes: Using the 1/8-inch bit, drill several holes in the bottom of the tote for drainage. Worms need moisture, but they don’t like sitting in water. Then, use the larger bit to drill aeration holes around the top sides and in the lid. Aim for holes spaced a few inches apart. Good airflow is crucial to prevent odors and keep the environment healthy.
  2. Add Bedding: Worms don’t eat solid bedding like outdoor compost. They need a cozy, moist environment. Shredded newspaper (avoid glossy pages), cardboard, coconut coir, or peat moss are excellent choices. Moisten the bedding until it’s damp, like a wrung-out sponge. You want it moist, but not dripping. Fill the bin about 1/3 to 1/2 full with this bedding.
  3. Introduce Your Worms: Gently place your Red Wigglers on top of the bedding. They’ll naturally burrow down to escape the light.
  4. Start Feeding: Begin by burying small amounts of food under the bedding. Don’t overfeed them at first!
  5. Close the Lid: Secure the lid. Make sure the aeration holes aren’t blocked.

Option 2: Purchased Worm Bins

If DIY isn’t your style, there are many excellent commercial worm composting bins available. These often come with multiple trays that make harvesting your compost easier. Brands like Urbalive, Worm Factory, or Makana are popular choices. While they might be an initial investment, they are designed for optimal airflow, drainage, and ease of use.

What to Feed Your Worms: The Wormy Diet Menu

Red Wigglers are pretty happy eaters, but there are some rules. Think of it as giving them a balanced, healthy diet. They primarily eat decomposed organic matter.

Good Foods (Feed Freely):

  • Fruit and vegetable scraps (apple cores, banana peels, carrot tops, lettuce, etc.)
  • Coffee grounds and filters
  • Tea bags (remove any staples or plastic tags)
  • Crushed eggshells (rinsed and dried – helps with grit and calcium)
  • Plain, unsweetened baked goods (bread, crackers – in moderation)
  • Oatmeal

Foods to Avoid or Feed Sparingly:

  • Citrus: Too acidic and can harm worms in large quantities. A few small lemon or orange peels are okay, but don’t make it a staple.
  • Onions and Garlic: Worms don’t seem to like them, and they can sometimes deter them.
  • Meats, Dairy, and Oily Foods: These can attract pests, create foul odors, and are difficult for worms to process. Best to avoid completely.
  • Spicy Foods: Worms don’t have a ‘spice’ tolerance.
  • Diseased Plants: You don’t want to spread plant diseases through your compost.
  • Pet Waste: Avoid dog and cat feces as they can contain pathogens harmful to humans.

How to Feed:

Start by burying small amounts of food scraps in different spots under the bedding. As your worm population grows and they become accustomed to the bin, you can increase the amount of food. A good rule of thumb is to feed them what they can eat in about 3-4 days. If you notice uneaten food piling up, you’re feeding them too much. If the bin is empty and they’re still active, they might be ready for more.

Maintaining Your Worm Bin: Keeping Your Worms Happy

Once your bin is set up and your worms are happily munching, maintaining the right conditions is key.

Moisture Levels

Your worm bin should feel like a damp sponge. If it’s too dry, the worms can’t survive. If it’s too wet, it can become anaerobic (lacking oxygen) and smelly. Add more moist bedding if it’s dry, or a bit more dry bedding or shredded cardboard if it’s too wet. You can also gently agitate the bedding to help it dry out a bit. The moisture from the food scraps also contributes, especially if you’re adding a lot of wet fruit and veggie waste.

Temperature

Red Wigglers prefer temperatures between 55°F and 77°F (13°C to 25°C). If your bin gets too hot (above 85°F/29°C), the worms can die or try to escape. If it gets too cold (below 45°F/7°C), they will become sluggish and stop eating. You might need to move your bin to a more temperature-stable location if you live in an extreme climate or provide insulation. For example, during hot summers, keep the bin in a cool basement or garage. During cold winters, you might wrap it in an old blanket or move it inside.

Aeration

Good airflow is essential. Worms breathe through their skin, and a compact, soggy bin quickly becomes toxic. Gently fluffing the bedding with a hand trowel or a small stick every week or two helps. The holes you drilled in the bin are also critical for this.

Harvesting Your Worm Castings

This is the exciting part – collecting your “black gold”! Worm castings are typically ready to harvest every 3-6 months, depending on the bin size, worm population, and amount of food you provide. There are several methods to harvest:

  • The “Migration” Method: This is a popular, low-stress method for DIY bins. Stop adding food to one side of the bin. Instead, add fresh bedding and food scraps to the other side. Over time, the worms will migrate to the fresh material, leaving the finished compost behind. You can then scoop out the side with the finished compost.
  • Light Method: Dump the bin’s contents onto a tarp or plastic sheet in bright light (sunlight is great). Worms dislike light and will burrow down. Scoop off the top layer of compost, and continue until you reach the layer of worms. Then, dump them back into your clean bin with fresh bedding.
  • Sifting: You can use a screen or sieve to separate the castings from any larger, undigested material.

What to Do with Finished Compost:

Your worm castings are ready to use!

  • Soil Amendment: Mix them directly into potting soil or garden beds. A 1:4 ratio of castings to soil is a good starting point.
  • Top Dressing: Sprinkle a layer of castings around the base of plants.
  • Compost Tea: You can steep worm castings in water to create a nutrient-rich liquid fertilizer, often called ‘worm tea’ or compost tea. There are many recipes online for making this, but a simple brew involves soaking castings in aerated water for 12-24 hours. For an educational guide on compost teas, check out resources from: UC Master Gardener Program

Troubleshooting Common Worm Bin Issues

Even with the best intentions, you might encounter a few hiccups. Don’t worry, most are easily fixed!

Problem Possible Cause Solution
Fruit Flies or Gnats Food scraps exposed on the surface; bin too wet. Bury food scraps deeper; add more dry bedding; ensure the bin is not too wet. A small amount of diatomaceous earth around the rim can deter them.
Bad Odors (Ammonia, Rotten Eggs) Overfeeding; lack of aeration; bin too wet; wrong foods added. Stop feeding until food is consumed; add dry bedding (shredded cardboard); gently aerate the bin. Remove any meat, dairy, or oily scraps.
Worms Trying to Escape Conditions are wrong – too wet, too dry, too acidic, too hot, lack of oxygen, pH imbalance, or too much uneaten food. Check moisture, temperature, and food levels. Ensure good aeration. Add crushed eggshells to help balance pH. If the bin is extremely wet, try adding more dry bedding and gently aerating.
Slow Composting Rate Worms are too cold, too hot, or not enough food. Adjust bin temperature. Ensure you are feeding them enough appropriate food and that the bedding is moist and airy.

Essential Tools & Materials Checklist

Here’s a quick rundown of what you’ll need to get started. Remember, simplicity is key!

For the Bin:

  • Dark plastic storage tote with lid (approx. 10-18 gallon) OR a purchased worm bin system
  • Drill with various bit sizes (if making a DIY bin)
  • Shredded newspaper, cardboard, coconut coir, or peat moss (for bedding)

For the Worms:

  • 1 pound of Red Wiggler worms (Eisenia fetida)

For Feeding & Maintenance:

  • Kitchen scraps (fruits, vegetables, coffee grounds, tea bags, eggshells)
  • A small trowel or hand cultivator (for fluffing bedding)
  • Spray bottle (for adding moisture if needed)
  • Optional: Crushed eggshells (for pH balance and grit)

Where to Find Resources and Supplies in the USA

Getting what you need is easier than you might think:

  • Worms: Many online retailers specialize in selling composting worms. Search for “red wigglers for sale” or “worm composting supply.” Reputable sources often include descriptions of their worm health and shipping practices. For a national outlook on composting resources and best practices, the Environmental Protection Agency (EPA) offers valuable information on composting.
  • Bins: While DIY is cost-effective, you can find pre-made worm bins at many garden supply stores or online retailers.
  • Bedding Materials: Shredded newspaper is accessible to everyone. You can also find coco coir bricks at garden centers or pet stores (check they are pesticide-free).
  • Local Gardening Groups: Connect with local gardening clubs, master gardener programs, or even community composting initiatives. They can be fantastic sources of advice and sometimes even supplies. For example, county extension offices often have Master Gardener volunteers who are knowledgeable about composting. You can find your local extension office via local university extension websites (often tied to USDA initiatives).

Frequently Asked Questions about Vermicomposting

Q1: How many worms do I need to start?

A pound of Red Wigglers is a great starting point for most beginner bins (around 10-18 gallons). This provides enough worms to start processing household scraps effectively without being overwhelmed.

Q2: How often should I feed my worms?

Start by feeding them only a couple of times a week, in small amounts. As the worm population grows, you can feed them more frequently, but always monitor to ensure they’re eating the food before adding more. A good sign is that food should be mostly gone within 3-4 days.

Q3: Can I compost with regular garden earthworms?

No, regular garden earthworms (like nightcrawlers) are not suited for worm bins. They prefer to live in soil and won’t thrive in the confined, compost-rich environment of a worm bin. Red Wigglers are specifically adapted for this type of composting.

Q4: How long until I get usable compost?

It typically takes 3 to 6 months to get your

Leave a Comment

Vermicomposting in USA: Effortless & Proven

<h1>Vermicomposting in USA: Effortless & Proven Worm Composting for Your Home</h1>

<p>Got kitchen scraps piling up? Wish you could turn that food waste into something super helpful for your garden? Many of us do! It can feel like a waste to just toss those peels and leftovers. But don’t worry, there’s a super neat way to handle it right at home, and it’s easier than you think. We’re talking about vermicomposting! Grab your gardening gloves (or don’t!), ’cause we’re going to walk through how to get started with worm composting in the USA. You’ll be creating amazing “black gold” for your plants in no time!</p>

<h2>What Exactly is Vermicomposting?</h2>

<p>Vermicomposting is basically composting with worms. The word “vermi” comes from the Latin word for worm! Instead of just letting organic matter break down on its own, we introduce specific types of worms into a bin with food scraps and bedding. These wiggly friends eat the scraps and their castings (that’s worm poop, folks!) become a nutrient-rich fertilizer that’s incredible for your plants.</p>

<p>It’s a fantastic way to reduce landfill waste and create a natural, powerful soil amendment for your garden, houseplants, or balcony pots. Plus, it’s a fun and educational project for the whole family.</p>

<h2>Why Vermicompost in the USA?</h2>

<p>Vermicomposting is a great fit for many homes across the USA, regardless of whether you have a sprawling backyard or a cozy apartment balcony. Here’s why it’s so popular and effective:</p>

<ul>
<li><strong>Waste Reduction:</strong> It diverts a significant amount of kitchen waste from landfills, helping you feel good about your environmental impact.</li>
<li><strong>Nutrient-Rich Compost:</strong> Worm castings are packed with essential nutrients and beneficial microbes that significantly boost soil health and plant growth.</li>
<li><strong>Indoor and Outdoor Friendly:</strong> You can set up a bin indoors, outdoors, on a porch, or in a garage, making it adaptable to different climates and living spaces. This is especially handy for those in colder regions or urban environments.</li>
<li><strong>Relatively Quick Process:</strong> Compared to traditional composting, vermicomposting can yield finished compost in a matter of weeks to months, offering faster results.</li>
<li><strong>Odor-Free (When Done Right):</strong> A well-maintained worm bin doesn’t smell bad! In fact, it should smell earthy and pleasant.</li>
</li></ul>

<h2>Choosing Your Worms: The Right Kind for the Job</h2>

<p>You can’t just use any earthworm from your garden! The key to successful vermicomposting is to use the right species. These are worms that prefer to live in decaying organic matter rather than burrowing deep into the soil. The most common and best-performing composting worms in the USA are:</p>

<h3>Red Wigglers (Eisenia fetida)</h3>
<p>These are the superstars of the worm composting world. Red wigglers are voracious eaters, reproduce quickly, and thrive in worm bins. They are hardy and can tolerate a range of conditions, making them ideal for beginners.</p>

<h3>European Nightcrawlers (Eisenia hortensis)</h3>
<p>Also known as dew worms, these are larger than red wigglers and can also be effective composters. They can be a bit slower to reproduce but are incredibly efficient eaters once established. Some people use them for both composting and fishing!</p>

<p><strong>Where to Buy Worms:</strong> You can typically purchase composting worms from online suppliers specializing in vermicomposting, local garden centers, or even from other vermicomposters. Look for reputable sources that guarantee live arrival.</p>

<h2>Setting Up Your Worm Bin: Simple Steps to Success</h2>

<p>Getting your worm bin ready is straightforward. The goal is to create a cozy, damp, and breathable environment for your composting worms.</p>

<h3>Step 1: Choose Your Bin</h3>
<p>You have a few options for worm bins:</p>
<ul>
<li><strong>DIY Bin:</strong> This is often the most budget-friendly option. You can use a plastic storage tote (around 10-20 gallons is a good start). You’ll need to drill holes for ventilation and drainage. Aim for a few small holes on the sides near the top and a larger one or two near the bottom for drainage. You can also stack two totes, allowing one to drain into the other.</li>
<li><strong>Purchased Bin:</strong> Many companies sell pre-made worm bins. These are convenient and often designed with optimal ventilation and drainage. They can range from simple stacking trays to more elaborate systems.</li>
<li><strong>Composting Tumblers:</strong> While some tumblers can be adapted for vermicomposting, they are generally better suited for traditional composting. Stick to static bins for worm composting.</li>
</li></ul>

<h3>Step 2: Add Bedding</h3>
<p>The bedding is what your worms live in and eat. It needs to hold moisture and allow for airflow. Good bedding materials include:</p>
<ul>
<li>Shredded newspaper (black and white print only, avoid glossy paper)</li>
<li>Shredded cardboard</li>
<li>Coconut coir (often found at garden stores)</li>
<li>Peat moss (use sparingly, can be acidic)</li>
</li></ul>

<p>To prepare the bedding:</p>
<ol>
<li>Shred your chosen material into strips about 1-2 inches wide.</li>
<li>Moisten the bedding thoroughly until it’s about as damp as a wrung-out sponge. It should feel moist but not drip when you squeeze it.</li>
<li>Place the moistened bedding into your bin, filling it about 4-6 inches deep.</li>
</li></ol>

<h3>Step 3: Add the Worms!</h3>
<p>Once your bin and bedding are ready, it’s time to introduce your worms. Gently place the purchased worms on top of the bedding. Leave the lid off for about 30 minutes to an hour. The worms will naturally burrow down into the bedding to escape the light. This also helps them acclimate to their new environment.</p>

<h3>Step 4: Introduce Food Scraps (Sparingly at First!)</h3>
<p>Don’t overload your new worms with food right away. Start with a small amount, about a handful of scraps. You can bury it under the bedding in one corner of the bin. Your worms will gradually find it and start munching.</p>

<h3>Step 5: Cover and Maintain</h3>
<p>After adding the worms and a small amount of food, gently place the lid on your bin. Ensure there is still airflow. Keep the bin in its intended location (more on that below!).</p>

<h2>What Your Worms Can (and Can’t!) Eat</h2>

<p>Worms are pretty amazing eaters, but they have their preferences and limitations. Feeding them the right things is crucial for a healthy, odor-free bin.</p>

<h3>Worm-Friendly Foods (Feed These!):</h3>
<ul>
<li><strong>Fruits and Vegetables:</strong> Peels, cores, rinds, soft fruits like bananas, melon rinds, vegetable scraps (carrots, lettuce, broccoli, etc.). Chop larger items into smaller pieces to speed up consumption.</li>
<li><strong>Coffee Grounds and Tea Bags:</strong> Both are excellent additions. Remove any staples from tea bags.</li>
<li><strong>Crushed Eggshells:</strong> Rinse and crush them well. They help balance the pH and add grit for the worms’ digestion.</li>
<li><strong>Paper Products:</strong> Small amounts of plain, unbleached paper or cardboard (like from paper towel rolls torn up) can be added as a carbon source and for bedding.</li>
</li></ul>

<h3>Foods to Avoid or Limit (Don’t Feed These!):</h3>
<ul>
<li><strong>Meat, Fish, and Dairy:</strong> These can attract pests, create foul odors, and go rancid.</li>
<li><strong>Oily or Greasy Foods:</strong> These can create anaerobic conditions and smell bad.</li>
<li><strong>Spicy Foods:</strong> Peppers, hot sauces, etc., can be too harsh for the worms.</li>
<li><strong>Citrus Peels (in large quantities):</strong> While small amounts are okay, too much acidic citrus can harm the worms.</li>
<li><strong>Onions and Garlic:</strong> Worms tend to dislike these, and they can slow down decomposition.</li>
<li><strong>Diseased Plants:</strong> Avoid adding anything that might harbor plant diseases.</li>
<li><strong>Pet Waste:</strong> Dog and cat feces can contain pathogens that are not suitable for composting for produce.</li>
</li></ul>

<h3>How to Feed Your Worms:</h3>
<p>Start with small amounts and increase as your worm population grows and consumes the food. Bury the food scraps in different spots within the bin each time you feed. This encourages the worms to move around and process the entire bin, preventing food from accumulating in one place and potentially going anaerobic (smelly!). A good rule of thumb is to feed them an amount of food scraps that equals about half their weight per week, but start slower and observe.</p>

<h2>Maintaining Your Wormy Oasis</h2>

<p>Keeping your worms happy and productive is all about maintaining the right environment. It’s a lot less work than you might think!</p>

<h3>Moisture Level</h3>
<p>Your worm bin should be as damp as a wrung-out sponge. If it’s too dry, the worms will struggle. If it’s too wet, it can become anaerobic and smelly. Add more bedding if it’s too wet, or mist with water if it’s too dry. Most bin designs with drainage holes and breathable bedding will maintain good moisture.</p>

<h3>Temperature</h3>
<p>Composting worms prefer moderate temperatures, ideally between 55-77°F (13-25°C).</p>
<ul>
<li><strong>Too Hot:</strong> Worms can try to escape or may die. If your bin is too hot (especially in the summer), move it to a cooler location, try to insulate it, or harvest your compost more frequently.</li>
<li><strong>Too Cold:</strong> Worms become sluggish. If you live in a region with freezing winters, you’ll need to bring your bin indoors or to a protected, unheated space like a garage or basement. For extended periods below freezing, you may lose your worms.</li>
</li></ul>

<h3>Aeration</h3>
<p>Worms need air to breathe! Ensure your bin has plenty of ventilation holes. You can gently stir the top layer of bedding every so often with a trowel or your hand (be gentle!) to help aerate it, but avoid disturbing the worms too much.</p>

<h3>pH Level</h3>
<p>Worms prefer a neutral to slightly acidic environment (pH 6.0-7.0). Most typical food scraps and bedding fall within this range. Adding crushed eggshells regularly helps buffer acidity. If you suspect your bin is too acidic (often from overfeeding or too much citrus), add a bit of crushed eggshell or a small amount of garden lime.</p>

<h2>Understanding Your Worm Bin: Troubleshooting Common Issues</h2>

<p>Even with the best intentions, small issues can pop up. Here’s how to fix some common problems:</p>

<table>
<thead>
<tr>
<th>Problem</th>
<th>Cause</th>
<th>Solution</th>
</tr>
</thead>
<tbody>
<tr>
<td>Bad Odor (Rotten Eggs/Ammonia)</td>
<td>Too wet, not enough air, overfeeding, or wrong food items (meat, dairy, oils).</td>
<td>Stop feeding. Add dry bedding (shredded cardboard, newspaper). Gently aerate the bin. Remove any un-eaten food if possible. Bury food scraps less often and in smaller amounts.</td>
</tr>
<tr>
<td>Worms Trying to Escape</td>
<td>Bin is too wet, too dry, too acidic, lacks air, or new environment shock.</td>
<td>Check moisture. Add dry bedding if too wet, mist if too dry. Ensure good ventilation. Add crushed eggshells if it’s too acidic. Allow them time to adjust.</td>
</tr>
<tr>
<td>Fruit Flies or Gnats</td>
<td>Food is exposed on the surface, bin is too wet.</td>
<td>Bury food scraps deeper under the bedding. Reduce moisture if necessary. A layer of bedding or a piece of cardboard on top can help exclude flies.</td

Leave a Comment