Have you ever seen a camper with patches on its roof? Maybe it had a leaky spot. Lap sealant helps to fix those leaks. It is like a stretchy glue. It keeps water out of your RV or camper.
Why do we need it? Campers move a lot. They face sun, rain, and wind. These can hurt the roof and sides. Lap sealant protects them from damage. It keeps your camper cozy and dry.
Key Takeaways
- Lap sealant is a flexible material to prevent leaks on RVs and campers.
- It protects roofs, windows, and vents from water damage.
- Proper application of sealant can extend the life of your RV.
- Regular checks for cracks help maintain a good seal.
- Knowing what is lap sealant helps you keep your camper safe.
What is Lap Sealant Used For?
Lap sealant is like a superhero for your RV. It stops water from getting inside. Water can cause big problems. It can rot wood and make mold grow. Mold is not good for your health. Lap sealant is used on roofs. It is also used around windows and vents. Vents let air in and out. Windows let you see the world. Sealant keeps these spots safe from rain and snow. It sticks to different materials. These materials include metal, fiberglass, and plastic. It creates a waterproof barrier. This barrier keeps your camper dry and comfy. Using the right sealant makes your camper last longer. It also saves you money on repairs.
- It seals roofs to stop leaks.
- Sealant protects windows from rain.
- It keeps vents airtight.
- Sealant works on metal, plastic, and fiberglass.
- It prevents water damage inside.
Choosing the right lap sealant is important. Some sealants are better for certain jobs. Read the label to see what it works best on. Some sealants are made for roofs. Others are made for windows. Make sure the sealant is flexible. This means it can stretch and move. Campers move and shake when you drive. Flexible sealant will not crack easily. Always clean the surface before you put on the sealant. This helps it stick better. Apply the sealant smoothly and evenly. Check the sealant often. Look for cracks or gaps. Fix them quickly to prevent leaks. Taking care of your sealant keeps your camper dry and safe.
Fun Fact or Stat: The best lap sealants can last up to 10 years if applied correctly and maintained well!
Why is Flexible Sealant Better?
Imagine you have a rubber band. You can stretch it without breaking it. That is what flexible sealant does. Campers move when you drive. They also change shape in hot and cold weather. A flexible sealant can handle this movement. It stretches and bends without cracking. This keeps the seal tight. A sealant that is not flexible will crack. Cracks let water in. Water can damage your camper. Flexible sealant is like a shield. It protects your camper from the weather and movement. It keeps your camper dry and safe for a long time. Choosing flexible sealant is a smart choice for your RV.
How to Clean Before Applying Sealant?
Would you put a sticker on a dirty window? It would not stick very well. The same is true for lap sealant. You need to clean the surface first. Use soap and water to wash away dirt. Then, dry the area completely. You can use a special cleaner for RVs. This cleaner removes grease and oil. Grease and oil can stop the sealant from sticking. Make sure the surface is smooth. Remove any old sealant. Scrape away loose pieces. A clean surface helps the new sealant stick better. This makes the seal stronger and longer-lasting. Cleaning is an important step.
How Often Should You Check the Sealant?
Imagine you have a pet. You need to check on it every day. You need to make sure it has food and water. You also need to check your lap sealant often. Look at it every few months. Check after a big storm. Look for cracks or gaps. Small problems can become big problems. Fixing a small crack is easy. Ignoring it can lead to a big leak. Big leaks can cause a lot of damage. Check your sealant regularly. This helps you keep your camper in good shape. It also saves you money on repairs. Regular checks are part of taking care of your RV.
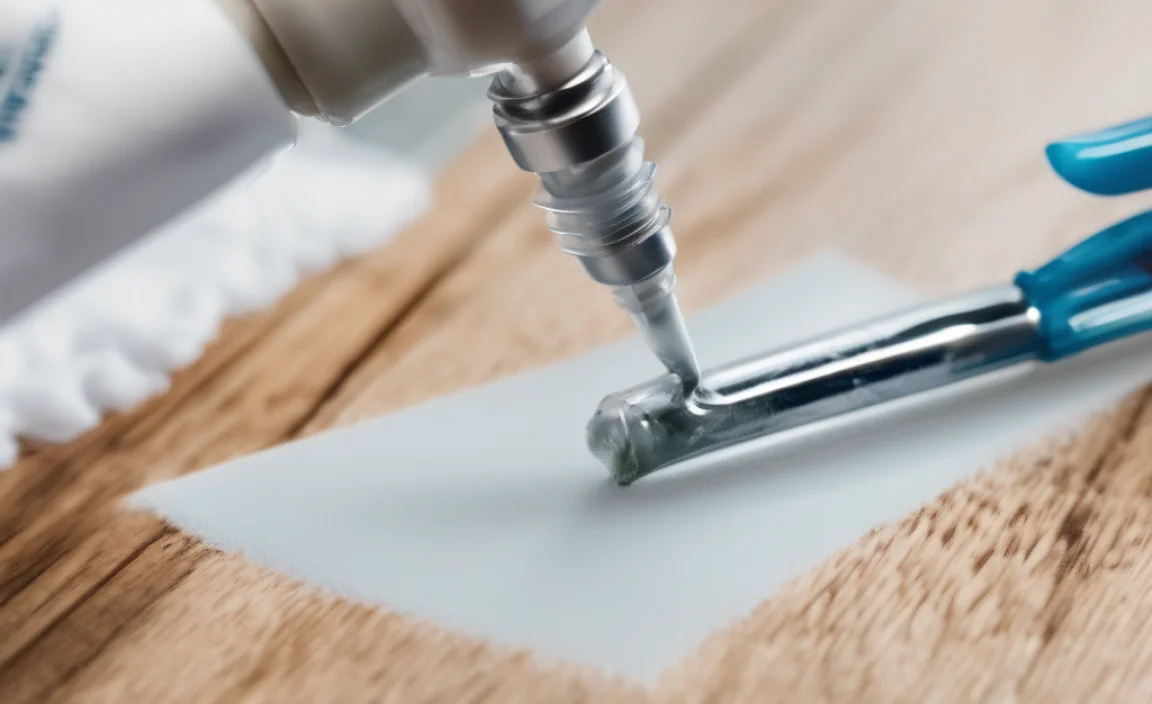
How to Apply Lap Sealant

Applying lap sealant is like frosting a cake. You want to make it smooth and even. First, get the right tools. You will need a caulking gun. This tool helps you squeeze out the sealant. You also need a scraper. This helps you smooth the sealant. Cut the tip of the sealant tube. Make sure the hole is the right size. Put the tube in the caulking gun. Squeeze the trigger to release the sealant. Apply the sealant in a steady line. Do not go too fast or too slow. Overlap the old sealant a little bit. This makes a good seal. Use the scraper to smooth the sealant. Remove any extra sealant. Let the sealant dry completely. This can take a few hours. Read the instructions on the tube. Following the instructions helps the sealant work best.
- Use a caulking gun for smooth application.
- Overlap old sealant for a strong bond.
- Smooth the sealant with a scraper.
- Let the sealant dry completely before use.
- Follow the instructions on the tube.
- Work slowly and carefully for best results.
Think of lap sealant as a protective layer. It is like a raincoat for your RV. You want to make sure it covers everything well. Apply the sealant on a dry day. Rain can wash away the sealant before it dries. Do not apply sealant in direct sunlight. The sun can make it dry too fast. Work in small sections. This helps you keep the sealant smooth. If you make a mistake, do not worry. You can wipe it away with a cloth. Clean your tools after you are done. This keeps them ready for the next time. Applying sealant is a skill. It gets easier with practice. With a little effort, you can protect your camper from leaks.
Fun Fact or Stat: Proper sealant application can prevent up to 80% of common RV leaks!
What Tools Do You Need?
Imagine you are building a sandcastle. You need a bucket and a shovel. Applying lap sealant also needs special tools. A caulking gun is very important. It helps you control the sealant. A scraper helps you smooth the sealant. A knife helps you cut the tip of the sealant tube. A cloth helps you wipe away extra sealant. Safety glasses protect your eyes. Gloves keep your hands clean. These tools make the job easier. They also help you do a better job. Having the right tools is half the battle. Gather your tools before you start. This makes the process smoother and faster.
How to Prepare the Sealant Tube?
Have you ever opened a juice box? You have to poke a hole in it first. A sealant tube is similar. You need to prepare it before you can use it. First, cut the tip of the tube. Use a sharp knife. Cut it at an angle. The size of the hole matters. A small hole is good for small cracks. A bigger hole is good for bigger gaps. Do not cut the hole too big. You can always make it bigger later. Puncture the seal inside the tube. Some tubes have a special tool for this. If not, you can use a nail. Now the sealant is ready to flow. Put the tube in the caulking gun. You are ready to start sealing.
What to Do If You Make a Mistake?
Everyone makes mistakes. Even experts make mistakes. If you mess up the sealant, do not panic. The first thing to do is stop. Do not try to fix it while it is wet. Wipe away the extra sealant with a cloth. Use a special solvent if needed. A solvent is a cleaner that dissolves the sealant. Smooth the area with a scraper. Let it dry completely. Then, apply a new layer of sealant. It is okay to make mistakes. The important thing is to learn from them. Practice makes perfect. Do not be afraid to try again.
Types of Lap Sealant Available
There are many kinds of lap sealant. Each type has its own special uses. Some sealants are made for roofs. These are usually very flexible. They can handle a lot of movement. Some sealants are made for windows. These sealants are often clear. This means you can see through them. This is important for windows. Some sealants are self-leveling. This means they spread out evenly on their own. This is good for flat surfaces. Other sealants are non-sag. This means they do not drip. This is good for vertical surfaces. Read the label carefully. Choose the right sealant for your job. Using the wrong sealant can cause problems later.
| Type of Sealant | Best Use | Pros | Cons |
|---|---|---|---|
| Self-Leveling | Roofs | Easy to apply, fills gaps | Can run on sloped surfaces |
| Non-Sag | Vertical Surfaces | Doesn’t drip, stays in place | Needs careful application |
| Butyl Tape | Windows, Vents | Strong adhesion, waterproof | Can be messy to apply |
| Acrylic Sealant | General Purpose | Affordable, easy to find | Less flexible than others |
- Self-leveling sealant is good for roofs.
- Non-sag sealant works well on walls.
- Butyl tape is strong and waterproof.
- Acrylic sealant is cheap and easy to find.
- Choose the right sealant for the job.
Think about what is lap sealant made of. Some sealants are made of silicone. Silicone is very flexible and waterproof. Other sealants are made of polyurethane. Polyurethane is very strong and durable. Some sealants are made of acrylic. Acrylic is easy to paint. Consider the weather where you live. If you live in a hot place, choose a sealant that can handle heat. If you live in a cold place, choose a sealant that can handle cold. Some sealants are better for certain materials. Read the label to see which materials the sealant works best on. Choosing the right sealant helps your repairs last longer. It also protects your camper from damage.
Fun Fact or Stat: Silicone-based lap sealants are known for their excellent UV resistance, preventing them from cracking under the sun!
Silicone vs. Polyurethane Sealant
Imagine you are choosing between two toys. One is soft and bendy, the other is hard and strong. Silicone sealant is like the soft toy. It is very flexible. It can stretch and bend without breaking. Polyurethane sealant is like the hard toy. It is very strong. It can handle a lot of wear and tear. Silicone is good for sealing things that move a lot. Polyurethane is good for sealing things that need to be very strong. Both are waterproof. Choose the one that is best for your needs. Consider how much movement there will be. Consider how much strength you need.
Self-Leveling vs. Non-Sag Sealant
Have you ever poured honey on a pancake? It spreads out on its own. Self-leveling sealant is like honey. It spreads out evenly on its own. This is good for flat surfaces like roofs. Non-sag sealant is like toothpaste. It stays in place. This is good for vertical surfaces like walls. Self-leveling sealant is easy to apply on roofs. Non-sag sealant is easy to apply on walls. Choose the right one for the surface you are sealing. This makes the job easier and more effective. Think about which one will work best for your project.
How to Choose the Right Type?
Choosing the right lap sealant can feel tricky. Think about the job you are doing. Are you sealing a roof? Use self-leveling sealant. Are you sealing a wall? Use non-sag sealant. Are you sealing a window? Use a clear sealant. Consider the material you are sealing. Some sealants work better on metal. Others work better on plastic. Read the label carefully. The label tells you what the sealant is best for. Consider the weather where you live. Choose a sealant that can handle the weather. Do some research. Ask for advice from experts. Choosing the right sealant is worth the effort.
How to Prepare the Surface for Sealant
Preparing the surface is very important. It is like getting ready to paint a picture. You need a clean canvas. The sealant will stick better to a clean surface. Remove any old sealant. Use a scraper to peel it off. Clean the surface with soap and water. Then, dry it completely. You can use a special cleaner for RVs. This cleaner removes grease and oil. Grease and oil can stop the sealant from sticking. Make sure the surface is smooth. Sand down any rough spots. A smooth surface helps the sealant stick better. This makes the seal stronger and longer-lasting. Preparing the surface is an important step. Do not skip it. It makes a big difference in the long run.
- Remove old sealant completely.
- Clean the surface with soap and water.
- Dry the surface thoroughly.
- Use a special RV cleaner for grease.
- Sand down any rough spots.
Think of the surface as a foundation. A good foundation is strong and stable. Lap sealant needs a good foundation to work well. Check for any damage to the surface. Repair any cracks or holes. Use a patch kit for small holes. Use a fiberglass repair kit for bigger holes. Make sure the surface is dry. Water can stop the sealant from sticking. Use a heat gun to dry the surface quickly. Be careful not to overheat the surface. Test the sealant in a small area. This helps you see if it sticks well. Preparing the surface takes time and effort. But it is worth it. A well-prepared surface makes the sealant last longer. It also protects your camper from leaks.
Fun Fact or Stat: A properly prepared surface can increase the lifespan of your sealant application by up to 50%!
Why is Removing Old Sealant Important?
Imagine you are putting a new sticker on top of an old sticker. The new sticker will not stick very well. The same is true for lap sealant. Old sealant can be loose and cracked. New sealant will not stick well to it. Removing the old sealant creates a clean surface. The new sealant can stick directly to the RV. This makes a stronger and longer-lasting seal. Removing old sealant is a messy job. But it is a very important job. Take your time and do it right. It will save you trouble later.
How to Clean the Surface Properly?
Would you eat food off a dirty plate? Probably not. You want to make sure the plate is clean first. Cleaning the surface before applying sealant is similar. Dirt, grease, and oil can stop the sealant from sticking. Use soap and water to wash away the dirt. Use a special RV cleaner to remove grease and oil. Rinse the surface with clean water. Dry the surface completely. A clean surface helps the sealant stick better. This makes the seal stronger and longer-lasting. Cleaning is an important step. Do not skip it.
What to Do About Cracks and Holes?
Imagine your camper has a small cut. You would want to put a bandage on it. Cracks and holes in your RV are like cuts. You need to fix them before you apply sealant. Use a patch kit for small cracks and holes. Use a fiberglass repair kit for bigger holes. Follow the instructions on the kit. Make sure the patch is smooth and even. Let the patch dry completely. Then, you can apply the sealant. Fixing cracks and holes prevents leaks. It also protects your camper from damage. Taking care of small problems prevents big problems.
Tips for Making Lap Sealant Last Longer
Lap sealant is like a shield for your RV. You want it to last as long as possible. There are things you can do to make it last longer. First, choose the right sealant. Some sealants are more durable than others. Read the label carefully. Apply the sealant correctly. Follow the instructions on the tube. Clean the surface before you apply the sealant. This helps it stick better. Check the sealant regularly. Look for cracks or gaps. Fix them quickly. Keep your RV clean. Wash it regularly to remove dirt and grime. Protect your RV from the sun. The sun can damage the sealant. Use a cover or park in the shade. Taking care of your sealant helps it last longer. It also protects your camper from leaks.
- Choose a durable sealant.
- Apply the sealant correctly.
- Clean the surface before application.
- Check the sealant regularly.
- Keep your RV clean.
- Protect your RV from the sun.
Think of what is lap sealant‘s worst enemy. The sun, water, and dirt can all damage it. Protect your sealant from these things. Use a sealant that is UV resistant. This means it can handle the sun. Reapply sealant every few years. This keeps the seal fresh and strong. Store your RV in a covered area. This protects it from the weather. Inspect your RV after every trip. Look for any signs of damage. Fix problems quickly to prevent bigger issues. Taking care of your sealant is like taking care of your teeth. Regular checkups and maintenance keep it healthy and strong. A little effort goes a long way.
Fun Fact or Stat: RVs that are regularly covered when not in use can see a 30% increase in sealant lifespan!
Choose a UV-Resistant Sealant
Imagine you are wearing sunscreen. Sunscreen protects your skin from the sun. UV-resistant sealant protects your RV from the sun. The sun can damage the sealant. It can make it crack and peel. UV-resistant sealant is made to handle the sun. It lasts longer than regular sealant. When you are buying sealant, look for the words “UV resistant.” This means it will protect your RV from the sun’s harmful rays. Choosing UV-resistant sealant is a smart choice. It helps your sealant last longer. It also protects your camper from leaks.
Reapply Sealant Every Few Years
Have you ever gotten a new coat of paint? It makes your house look fresh and new. Reapplying lap sealant is like getting a new coat of paint for your RV. Over time, sealant can wear down. The sun, water, and dirt can damage it. Reapplying sealant every few years keeps the seal fresh and strong. It prevents leaks and protects your camper. Check your sealant regularly. If you see cracks or gaps, it is time to reapply. Reapplying sealant is a simple way to keep your RV in good shape.
Store Your RV in a Covered Area
Imagine you have a bike. You would not leave it out in the rain. The rain can damage the bike. Storing your RV in a covered area is like keeping your bike in a garage. It protects it from the weather. The sun, rain, and snow can all damage the sealant. A covered area keeps your RV dry and cool. This helps the sealant last longer. If you do not have a covered area, use a cover. A cover protects your RV from the elements. Storing your RV in a covered area is a good way to protect your investment.
Common Problems with Lap Sealant
Even the best lap sealant can have problems. Knowing about these problems helps you fix them. One common problem is cracking. The sun and weather can cause cracks. Cracks let water in. Another problem is peeling. The sealant can peel away from the surface. This happens if the surface is not clean. Another problem is discoloration. The sealant can change color over time. This is usually caused by the sun. Another problem is shrinking. The sealant can shrink and pull away from the edges. This leaves gaps for water to get in. Check your sealant regularly. Look for these problems. Fix them quickly to prevent bigger issues. Taking care of your sealant keeps your camper safe.
- Cracking from sun and weather is common.
- Peeling happens if the surface is dirty.
- Discoloration is caused by the sun.
- Shrinking leaves gaps for water.
- Check sealant regularly for problems.
Think about what is lap sealant‘s weakness. It is not perfect. It needs your help to stay strong. Sometimes sealant fails because it was not applied correctly. Make sure you follow the instructions. Sometimes sealant fails because the wrong type was used. Choose the right sealant for the job. Sometimes sealant fails because the surface was not prepared properly. Clean and prepare the surface before you apply the sealant. Do not ignore small problems. Small cracks can become big leaks. Fix problems quickly to prevent damage. Taking care of your sealant is like taking care of your teeth. Regular checkups and maintenance keep it healthy and strong.
Fun Fact or Stat: Over 60% of RV owners experience sealant issues within the first 5 years due to improper application or maintenance!
Why Does Sealant Crack Over Time?
Imagine you have a balloon. If you leave it in the sun, it will pop. The sun can also damage lap sealant. The sun’s rays can make the sealant dry out. This causes it to crack. Weather changes can also cause cracking. Hot weather makes the sealant expand. Cold weather makes it contract. This can cause stress on the sealant. Over time, this stress can lead to cracks. Choosing a UV-resistant sealant helps. Regular maintenance also helps. Protect your RV from the sun to prevent cracking.
What Causes Sealant to Peel?
Have you ever tried to put a sticker on a dirty surface? It will not stick very well. The same is true for lap sealant. If the surface is dirty, the sealant will not stick properly. Dirt, grease, and oil can prevent the sealant from bonding to the surface. This causes the sealant to peel. Preparing the surface properly is very important. Clean the surface with soap and water. Use a special RV cleaner to remove grease and oil. Make sure the surface is dry before you apply the sealant. This helps the sealant stick properly and prevents peeling.
How to Fix Common Sealant Problems?
Imagine your shoe has a hole in it. You would want to fix it quickly. Fixing sealant problems is similar. Small problems can become big problems. If you see a crack, clean the area around it. Apply a new layer of sealant over the crack. If you see peeling, remove the loose sealant. Clean the surface and apply new sealant. If you see discoloration, it is usually just cosmetic. You can clean the sealant or apply a new layer. Fixing problems quickly prevents leaks and protects your camper. Regular maintenance keeps your sealant in good shape.
Summary
Lap sealant is important for keeping your RV dry. It stops water from leaking into your camper. Sealant protects the roof, windows, and vents. Applying sealant correctly is key. You need to clean the surface first. Then, apply the sealant smoothly. Check the sealant regularly for cracks. Fix any problems quickly. There are different types of sealant. Choose the right one for your job. UV-resistant sealant lasts longer in the sun. Regular maintenance helps sealant last longer. Taking care of your sealant protects your RV from water damage. It also saves you money on repairs.
Conclusion
Lap sealant is a simple way to protect your RV. It keeps water out and prevents damage. Choosing the right sealant is important. Apply it carefully and check it often. A little work can save you from big problems. Keeping your RV dry is important. It makes camping more fun. It also helps your RV last longer. With proper care, your camper will stay cozy and dry. You can enjoy your travels without worrying about leaks. Remember to take care of your RV. It will take care of you.
Frequently Asked Questions
Question No 1: What is lap sealant made of?
Answer: Lap sealant is made from different materials. Some are made from silicone. Silicone is flexible and waterproof. Others are made from polyurethane. Polyurethane is strong and durable. The best choice depends on what you need. Consider the weather and the surface you are sealing. Read the label to see what the sealant is made of. This helps you choose the right one for your RV. It also helps you protect your camper from leaks.
Question No 2: How long does lap sealant last?
Answer: Lap sealant can last for many years. Some sealants last longer than others. It depends on the type of sealant. It also depends on the weather. The sun can damage the sealant. Water can also damage the sealant. Regular maintenance helps. Check the sealant often for cracks. Fix any problems quickly. Reapply sealant every few years. This keeps the seal strong. With proper care, your sealant can last a long time. This protects your RV from water damage.
Question No 3: Can I paint over lap sealant?
Answer: Yes, you can paint over some types of lap sealant. Acrylic sealant is easy to paint. Silicone sealant is harder to paint. The paint may not stick well to silicone. Read the label on the sealant. It will tell you if it is paintable. Use a primer before you paint. A primer helps the paint stick better. Choose a paint that is made for RVs. This paint is flexible and durable. Painting your sealant can make it look better. It can also protect it from the sun. But make sure you use the right type of sealant and paint.
Question No 4: How do I remove old lap sealant?
Answer: Removing old lap sealant can be tricky. Use a scraper to peel off the old sealant. Be careful not to damage the RV surface. You can use a heat gun to soften the sealant. This makes it easier to remove. Use a special solvent to dissolve the sealant. Follow the instructions on the solvent. Wear gloves and safety glasses. Clean the surface after you remove the sealant. Use soap and water. Dry the surface completely. Now you are ready to apply new sealant. Removing old sealant is important for a good seal.
Question No 5: What is the best lap sealant for RV roofs?
Answer: The best lap sealant for RV roofs is self-leveling. Self-leveling sealant spreads out evenly. This fills in cracks and gaps. It is also flexible. This means it can handle the movement of the RV. Choose a sealant that is UV resistant. This protects it from the sun. Read the label carefully. Make sure it is made for RV roofs. Clean the surface before you apply the sealant. Follow the instructions on the tube. This will help you protect your RV roof from leaks.
Question No 6: How do I prevent lap sealant from cracking?
Answer: Preventing lap sealant from cracking takes some effort. Choose a UV-resistant sealant. This protects it from the sun. Apply the sealant correctly. Follow the instructions on the tube. Clean the surface before you apply the sealant. Check the sealant regularly for cracks. Fix any problems quickly. Protect your RV from the sun. Use a cover or park in the shade. Reapply sealant every few years. This keeps the seal strong. Taking care of your sealant helps it last longer. It also protects your RV from leaks.