Hey there, fellow home improvers and garden enthusiasts! Troy D Harn here, your go-to guy for making DIY, gardening, and especially composting easier than ever. Ever look at your yard waste and kitchen scraps and think, “There’s got to be a better way than just tossing it all out?” You’re right! Composting is a fantastic way to turn that “waste” into “black gold” for your garden. Sometimes, though, the world of composting can seem a bit… overwhelming. But don’t you worry! Today, we’re diving into winkrow composting. It sounds fancy, but I promise, it’s a super practical method for anyone looking to tackle larger composting projects without the fuss. We’ll break down exactly why it’s so great and how you can easily get started, transforming your garden’s future, one pile at a time. Ready to discover the magic of windrows?

Windrow Composting Benefits: Your Essential Guide to Easy & Abundant Compost!
Let’s face it, we all want to do our bit for the planet and make our gardens the envy of the neighborhood. Composting is a huge step in the right direction, but sometimes the traditional small bins can feel… well, small. If you’ve got a bit more space and a bit more organic material to handle, windrow composting might just be your new best friend. It’s a method that’s not only incredibly effective but also surprisingly beginner-friendly once you get the hang of it. Think of it as the super-sized, super-efficient way to make the best compost. We’ll walk through why it’s so awesome and how you can easily get started, transforming all that organic stuff into super soil. Get ready to boost your garden’s health and your composting game!
What Exactly is Windrow Composting?
Alright, let’s demystify “windrow composting.” In simple terms, it’s a method where you arrange your compostable materials into long, narrow piles, kind of like long, skinny haystacks in a field – that’s where the “windrow” name comes from. Instead of being confined to a small bin, your compostable goodies are laid out in an elongated shape, usually a few feet wide and several feet high. This shape is key to its success because it allows for excellent aeration (that’s airflow!) and makes it super easy to manage, especially if you have a lot of material to compost. It’s a favorite among larger scale operations like farms or community gardens, but it’s perfectly adaptable for enthusiastic home gardeners too.
Why Choose Windrow Composting? The Amazing Benefits Unpacked
You might be thinking, “Why go through the effort of making a long pile instead of just a regular bin?” Great question! Windrow composting offers some pretty fantastic advantages that make it a standout method, especially for those ready to scale up their composting efforts. It’s all about efficiency, speed, and the quality of your final compost.
1. Faster Composting Cycles
One of the biggest wins with windrow composting is speed. Because the piles are larger and have a greater surface area exposed to air, the microbes that do the composting work can really get going. Plus, the interior of a well-managed windrow reaches higher temperatures. These higher temperatures help break down organic matter much quicker and also kill off weed seeds and pathogens. You can often see finished compost in as little as 4-8 weeks, which is significantly faster than many other methods!
2. Handles Large Volumes with Ease
Do you have a generous backyard, a small hobby farm, or just a lot of leaves and grass clippings from your landscaping? Windrow composting is ideal for processing large quantities of organic materials. You’re not limited by the size of a small bin. You can simply make your windrow longer or wider to accommodate whatever you’ve got. This makes it a very practical solution for dealing with significant amounts of yard waste or food scraps.
3. Excellent Aeration and Moisture Control
The long, rectangular shape of a windrow is perfect for aeration. Air can easily circulate throughout the pile, which is crucial for the aerobic bacteria that create good compost. Poor aeration can lead to smelly, anaerobic conditions. With windrows, you can also manage moisture more effectively. If it gets too wet, the large surface area allows it to dry out a bit. If it’s too dry, it’s easier to turn and add water.
4. Simplicity of Turning and Monitoring
While turning a large compost bin can be a chore, turning a windrow is surprisingly straightforward, especially if you have a tractor or a small tiller. Even by hand with a pitchfork, the long, accessible shape makes it easier to mix from the outer layers to the inside. This consistent turning is what keeps the process aerobic and speeds things up. Monitoring the temperature inside the windrow is also simpler. You just need a long-stemmed compost thermometer
5. High-Quality Compost Production
When managed correctly, windrow composting consistently produces a nutrient-rich, well-decomposed compost. The controlled conditions, consistent turning, and optimal temperatures lead to a finished product that’s fantastic for improving soil structure, increasing water retention, and providing essential nutrients to your plants. Your garden will thank you!
6. Cost-Effective for Larger Projects
While you might need a bit more space, windrow composting itself doesn’t require expensive, specialized equipment when you start. You can use readily available materials and manage it with basic tools like pitchforks, shovels, and perhaps a wheelbarrow. For those looking to produce compost in significant quantities without a huge upfront investment, it’s a very economical choice.
Getting Started with Windrow Composting: A Simple Step-by-Step Guide
Ready to give windrow composting a whirl? It’s easier than you might think! Here’s a breakdown of how to set up and manage your first compost windrow.
Step 1: Choose Your Location
Think about where your windrow will live. You’ll need a spot that’s:
- Accessible: Somewhere you can easily get to with your materials and tools. If you plan to use a wheelbarrow or a small tiller, make sure the path is clear.
- Level: A flat or gently sloping area is best so your windrow doesn’t wash away.
- Sunny or Partially Shaded: Full sun can help heat up the pile, but too much can dry it out too quickly. Partial shade is often ideal.
- Well-Drained: Avoid areas that hold standing water after rain.
- Away from Structures: Give it some breathing room from your house or fences.
Step 2: Gather Your Materials
You need a good mix of “greens” (nitrogen-rich) and “browns” (carbon-rich). Aim for a rough ratio of about 2 parts browns to 1 part greens. Great materials include:
- Greens: Fruit and vegetable scraps, coffee grounds, tea bags, grass clippings, fresh plant trimmings (non-diseased).
- Browns: Dried leaves, straw, shredded newspaper (not glossy), cardboard (shredded), twigs and small branches (chopped), sawdust (from untreated wood).
It’s also a good idea to have your initial “activator” ready. This can be a shovel full of finished compost, some compost starter, or even a bit of garden soil to introduce beneficial microbes.
Step 3: Build Your First Windrow
This is where the “windrow” shape comes in. Aim for dimensions that are manageable for you. A good starting size is often:
- Width: 3 to 5 feet wide.
- Height: 3 to 5 feet high.
- Length: As long as you need it! Start with 6-10 feet if unsure.
Here’s how to stack it:
- Base Layer: Start with a layer of coarse brown materials, like small twigs or straw. This helps with airflow from the bottom.
- Layering: Begin alternating layers of greens and browns. Think of it like making a lasagna. Spread out a layer of browns, then a layer of greens, then browns, and so on.
- Add Activator: Sprinkle a bit of your chosen activator (finished compost, starter) between layers or on top.
- Moisten: As you build, lightly moisten each layer with water. The materials should be damp, like a wrung-out sponge, not soaking wet.
- Finish Top: It’s often recommended to cap your windrow with a layer of brown material. This helps retain moisture and heat, and can also deter pests.
Step 4: Aeration and Turning
This is the most active part of composting. The goal is to turn the compost to mix the outer materials into the hotter center and to introduce fresh oxygen.
- Frequency: Aim to turn your windrow every 1-2 weeks, especially in the beginning when it’s heating up.
- How to Turn: Use a pitchfork or a small tiller. Start by pulling the outer layers of the windrow into the center, and then move the inner material to the outside. The goal is to mix everything well.
- Monitor Moisture: During turning is a good time to check moisture levels. If it feels dry, add water as you turn. If it’s too wet and soggy, add more brown materials and turn it more frequently.
Step 5: Monitor Temperature (Optional but Recommended!)
A long-stemmed compost thermometer is a great tool. Stick it into the center of the windrow.
- Ideal Range: You want to see temperatures between 130°F and 160°F (54°C to 71°C) for active composting and pathogen kill-off.
- What to do: If the temperature drops below 130°F, it might be time to turn it to introduce more oxygen or add a nitrogen-rich “green” material to boost activity. If it’s too hot (over 160°F), it might be too dense or have too much green material; turning will cool it down.
You can find reliable compost thermometers from reputable garden supply stores or online through retailers focused on gardening and sustainable living.
Step 6: Harvesting Your Compost
You’ll know your compost is ready when it’s dark brown, crumbly, smells earthy (no strong ammonia or rotten smells), and you can no longer identify the original materials. This usually takes anywhere from 4 weeks to 3 months, depending on how actively you manage it. To harvest, you can simply shovel off the finished material from one end of the windrow, or if you’ve built multiple windrows, you start a new one and use the finished material from the older one.
Factors Affecting Windrow Composting Success
Even with a great method, a few things can influence how well your compost turns out. Don’t stress if it’s not perfect the first time; you’ll learn as you go!
1. Material Balance (C:N Ratio)
This is the holy grail of composting! Carbon (browns) to Nitrogen (greens) ratio. Too much nitrogen, and it can get smelly and goopy. Too much carbon, and it will break down very slowly. The 2:1 to 3:1 ratio of browns to greens by volume is a good starting point that works well for most home composters.
2. Moisture Content
Think “damp sponge.” Too dry, and the microbes slow down. Too wet, and you get stinky anaerobic conditions. Turning is a great time to check and adjust. As a general rule, if you squeeze a handful of compost and only a drop or two of water comes out, it’s about right.
3. Aeration (Oxygen Supply)
The microbes doing the work are aerobic, meaning they need oxygen. Regularly turning your windrow is the primary way to ensure plenty of air gets into the pile. The structure of the windrow itself helps, but turning is essential.
4. Pile Size and Shape
While we’ve talked about ideal dimensions, understand that the size needs to be large enough to heat up effectively (at least 3 feet high) but small enough that you can manage turning it. The rectangular shape maximizes surface area for air and ease of turning.
5. Temperature Management
The ideal temperature range (130-160°F) is crucial for rapid decomposition and killing pathogens and weed seeds. While not strictly mandatory for basic composting, aiming for these temperatures means faster, more efficient compost.
Windrow Composting vs. Other Methods: A Quick Comparison
It’s helpful to see how windrow composting stacks up against other popular methods. This can help you decide if it’s the right fit for your situation.
| Method | Best For | Pros | Cons | What You Typically Need |
|---|---|---|---|---|
| Bin Composting (Tumblers, enclosed bins) | Small yards, limited space, beginners, smaller batches. | Neat, contained, deters pests, can be fast with tumblers. | Limited volume, can be difficult to turn larger bins, tumblers can be small. | Compost bin (plastic, wood, wire), tumblers. |
| Pile/Heap Composting (Open piles) | Medium to large yards, abundant yard waste, more DIY focus. | Simple, handles larger volumes than most bins, can achieve good heat. | Can look messy, more exposed to weather, may attract pests if not managed. | Pitchfork, shovel, maybe some stakes or wire to shape. |
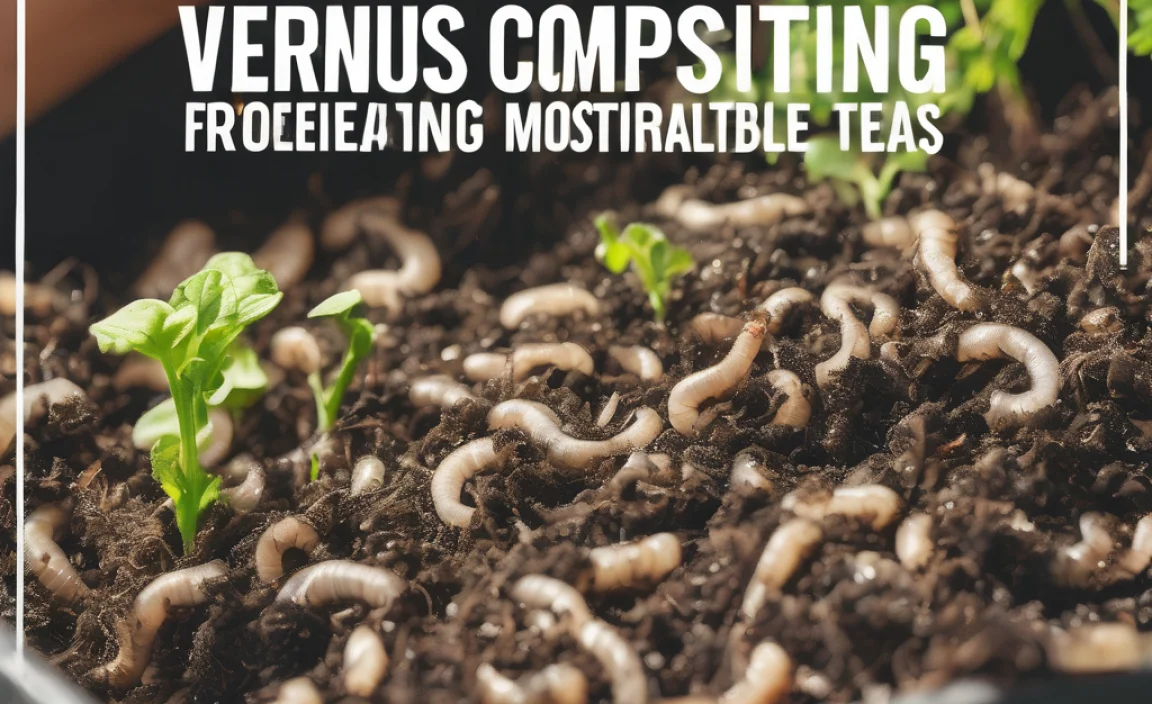
| Vermicomposting (Worm Composting) | Apartments, balconies, very small spaces, indoor composting, kitchen scraps. | Excellent for food scraps, produces high-quality castings, no turning needed. | Cannot handle large volumes or yard waste, temperature sensitive, requires specific worms. | Worm bin, bedding material, red wiggler worms. |
| Windrow Composting | Large yards, farms, community gardens, high volume of yard and kitchen waste. | Fast, handles massive volumes, efficient, easy to turn with machinery, produces high-quality compost. | Requires significant space, may need machinery for large scale, can be exposed to elements. | Pitchforks, shovels, tiller or tractor (optional but helpful), thermometer (optional). |
For those with a decent amount of space and a good flow of organic materials, windrow composting really hits a sweet spot between the simplicity of an open pile and the efficiency required for larger batches.
Troubleshooting Common Windrow Composting Issues
Even with the best intentions, compost piles can sometimes be a bit stubborn. Here are a few common hiccups and how to fix them:
- Smelly Pile (Ammonia or Rotten Egg Smell):
- Why it happens: Too much green material (nitrogen) or not enough air.
- Solution: Add more brown materials (leaves, straw, shredded cardboard). Turn the pile thoroughly to introduce air. If it’s very wet, fork in some dry browns.
- Pile Isn’t Heating Up:
- Why it happens: Not enough nitrogen, pile is too small, too dry, or needs turning.
- Solution: Add more green materials. Make sure the pile is at least 3 feet high. Check moisture – add water if dry. Turn the pile to re-energize the microbes.
- Pile is Too Wet and Slimy:
- Why it happens: Too many greens, too much rain, poor drainage.
- Solution: Add plenty of dry brown materials and turn the pile thoroughly. Cover the pile during heavy rain if possible. Ensure the location has good drainage.
- Pile is Too Dry:
- Why it happens: Not enough moisture added, too much sun or wind.
- Solution: Add water while turning the pile until it’s uniformly damp. Consider adding some moisture-retaining greens like fresh grass clippings.
- Attracting Pests (Rodents, Flies):
- Why it happens: Exposed food scraps, not hot enough to kill them off.
- Solution: Bury food scraps deep within the pile. Always cover your compostable additions with a layer of brown material. Ensure your pile is actively heating up; hot compost deters most pests. Avoid adding meat, dairy, or oily foods, which are more attractive to pests.
Frequently Asked Questions about Windrow Composting
Q1: How big should my windrow be?

I am passionate about home engineering. I specialize in designing, installing, and maintaining heating, ventilation, and air conditioning systems. My goal is to help people stay comfortable in their homes all year long.