Do you have a wobbly toilet? Does your bathroom smell funny, even after cleaning? The toilet flange cover might be the problem. It’s a small part, but it’s very important. It helps keep your toilet sealed tight. But how to remove toilet flange cover if it’s broken or needs replacing? It’s easier than you think!
Imagine a superhero, but for your toilet. That’s the flange! This guide will teach you how to remove toilet flange cover. You will learn to fix things yourself. Let’s get started and make your bathroom better.
Key Takeaways
- Knowing how to remove toilet flange cover helps maintain a healthy bathroom.
- You will need simple tools like a screwdriver and pliers to do the job.
- Always turn off the water supply before you start removing the flange cover.
- A damaged flange can cause leaks and bad smells in your bathroom.
- Replacing the flange cover can prevent costly repairs in the future.
Understanding the Toilet Flange Cover
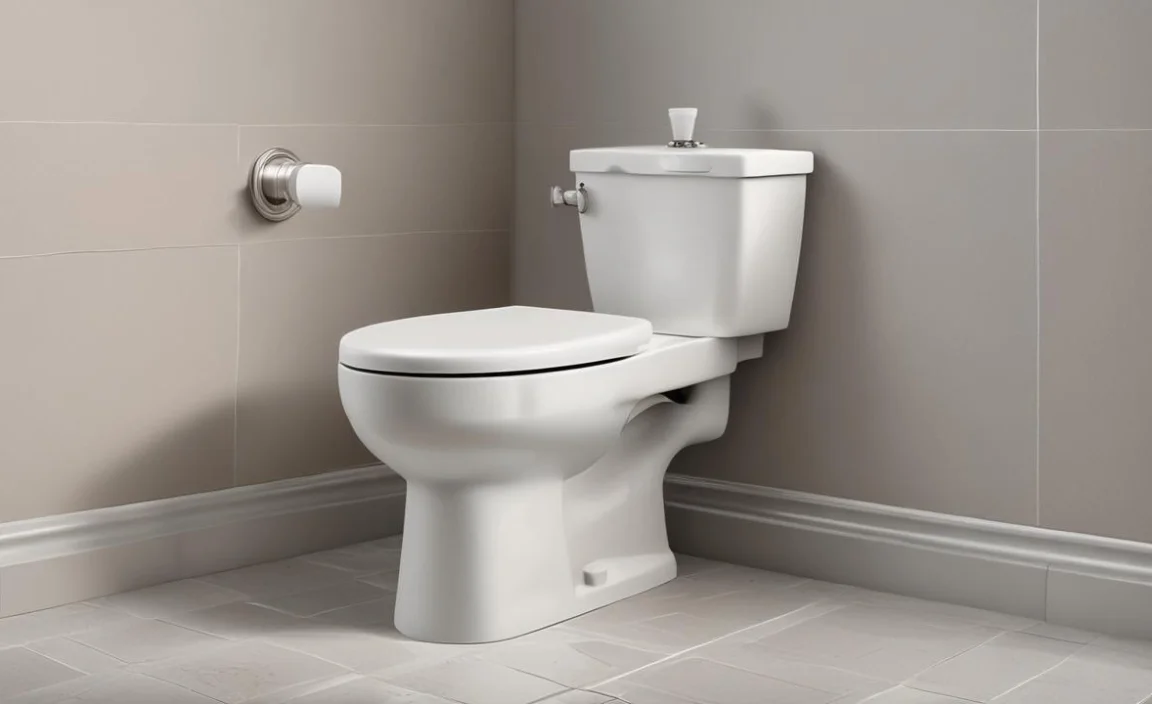
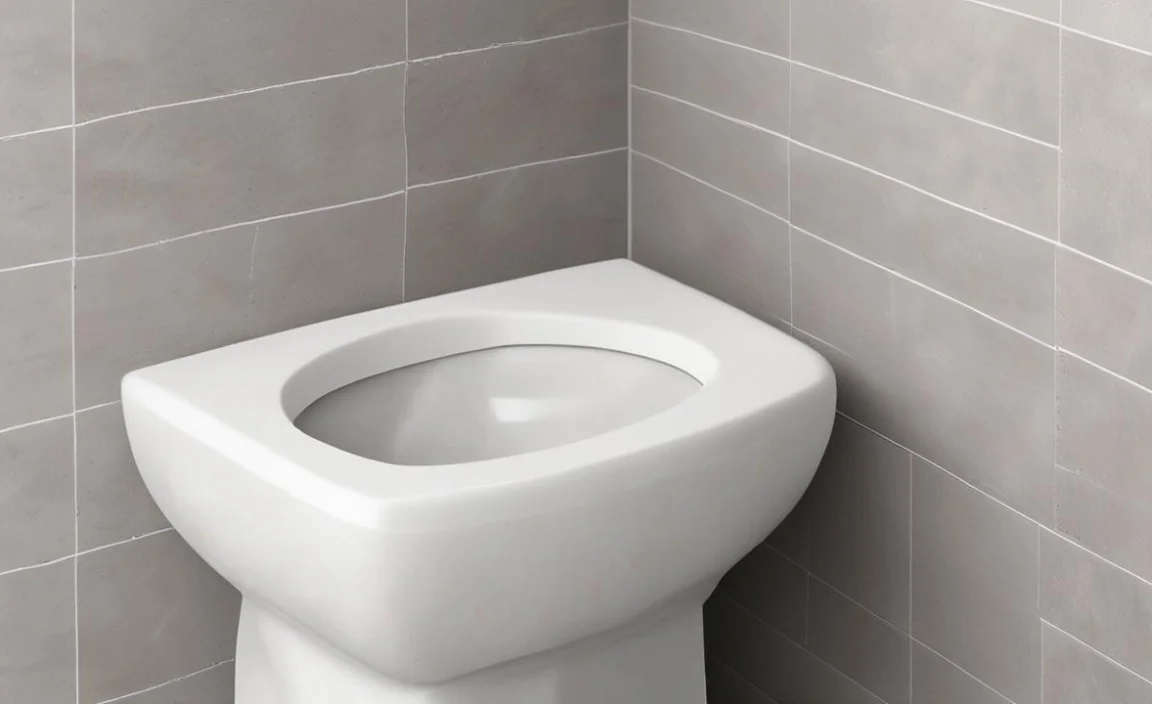
The toilet flange cover is like a superhero’s cape. It might seem small, but it has a big job. It sits on top of the toilet flange. The flange is a ring that connects your toilet to the drainpipe in the floor. The cover helps to seal the connection. This stops water and smells from leaking out. Over time, the flange cover can get old and crack. This can cause problems like a wobbly toilet or bad odors. Knowing how to remove toilet flange cover is the first step to fixing these issues. You can do it yourself with a few simple tools. This saves you money and keeps your bathroom clean and fresh.
- The flange connects the toilet to the drain.
- The cover seals the connection to prevent leaks.
- Old covers can crack and cause problems.
- Replacing the cover is a simple fix.
- This keeps your bathroom clean and fresh.
Think of your toilet as a race car. The flange cover is like a small but important part of the engine. If it’s not working right, the whole car won’t run well. When the toilet flange cover is damaged, it can cause leaks. These leaks can damage your floor. They can also make your bathroom smell bad. Removing the old cover and putting on a new one is like giving your toilet a tune-up. It helps everything work smoothly. You don’t need to be a plumber to do this. With a little patience and the right tools, you can easily learn how to remove toilet flange cover and keep your bathroom in great shape.
Fun Fact or Stat: Did you know that a leaky toilet can waste up to 200 gallons of water per day? That’s like filling up a small swimming pool!
Why is the Flange Cover Important?
Have you ever wondered why your toilet doesn’t leak all over the floor? That’s because of the toilet flange and its cover. The flange is like a base that holds the toilet steady. The cover helps to seal the connection between the toilet and the drainpipe. Without a good seal, water can leak out. This can cause damage to your floor and create a smelly mess. The flange cover also helps to keep sewer gases from coming up into your bathroom. These gases can be harmful to your health. A properly installed and maintained flange cover is essential for a safe and clean bathroom. Learning how to remove toilet flange cover is a valuable skill for any homeowner.
Signs of a Damaged Flange Cover
Imagine you’re a detective. You need to look for clues that your toilet flange cover is damaged. What are some signs to watch out for? First, check if your toilet is wobbly. If it rocks back and forth, the flange cover might be broken or cracked. Second, sniff around for bad smells. If you smell sewer gas in your bathroom, the flange cover might not be sealing properly. Third, look for water around the base of the toilet. This could be a sign of a leak. Finally, check the flange cover itself. If you see cracks or breaks, it’s time to replace it. Knowing these signs will help you catch problems early and learn how to remove toilet flange cover before things get worse.
Tools Needed for Removal
Think of removing a toilet flange cover like going on a treasure hunt. You need the right tools to find the treasure! For this job, you’ll need a few basic tools. First, grab a screwdriver. You’ll use this to loosen any screws holding the cover in place. Next, get a pair of pliers. These will help you grip and pull out the old cover. You might also need a putty knife or scraper to clean away any old sealant. Don’t forget gloves to protect your hands! With these tools in hand, you’ll be ready to tackle how to remove toilet flange cover like a pro. Remember, safety first! Always turn off the water supply before you start.
Preparing to Remove the Old Cover
Before you start learning how to remove toilet flange cover, let’s get ready. First, turn off the water supply to the toilet. You don’t want a surprise flood! The shut-off valve is usually behind the toilet. Turn it clockwise until it’s closed. Next, flush the toilet to empty the bowl. Use a sponge or towel to soak up any remaining water. Now, disconnect the water supply line from the toilet. Have a bucket ready to catch any drips. Remove any decorative caps or covers around the base of the toilet. This will give you a clear view of the toilet flange cover. With these steps done, you’re all set to start the removal process. Remember to take your time and be careful.
- Turn off the water supply to the toilet.
- Flush the toilet to empty the bowl.
- Disconnect the water supply line.
- Remove any decorative caps or covers.
- Make sure you have a clear view.
Imagine you’re a doctor preparing for surgery. You need to make sure everything is clean and ready. The same goes for removing a toilet flange cover. You want to create a clean and safe workspace. This will make the job easier and prevent any accidents. Clear away any clutter around the toilet. Put down some old towels or a drop cloth to protect your floor. Make sure you have good lighting so you can see what you’re doing. Taking the time to prepare properly will make the whole process smoother. You’ll be a pro at how to remove toilet flange cover in no time!
Fun Fact or Stat: The average toilet is flushed about five times per day. That’s a lot of work for the toilet flange!
Shutting Off the Water Supply
Have you ever seen a cartoon where someone forgets to turn off the water and everything gets flooded? We don’t want that to happen! Before you start learning how to remove toilet flange cover, the first thing you need to do is turn off the water. Look for the shut-off valve behind the toilet. It’s usually a small, oval-shaped handle. Turn it to the right (clockwise) until it stops. This will stop the water from flowing into the toilet. Flush the toilet to make sure the water is really off. If the bowl doesn’t refill, you’re good to go! This simple step can save you from a big mess and make the whole process easier.
Emptying the Toilet Bowl
Why do we need to empty the toilet bowl before removing the flange cover? Well, imagine trying to work on something underwater! It would be messy and difficult. Emptying the bowl makes the job cleaner and easier. After you’ve turned off the water, flush the toilet. This will get rid of most of the water. But there’s usually still some water left in the bottom of the bowl. Use a sponge or a small cup to scoop out the remaining water. You can also use a wet/dry vacuum to suck it up. Get the bowl as dry as possible before you start working on the flange cover. This will make the whole process much smoother.
Disconnecting the Water Supply Line
Think of the water supply line as the toilet’s lifeline. It brings the water that it needs to flush. But before you can remove the flange cover, you need to disconnect this lifeline. Find the flexible hose that connects the toilet to the shut-off valve. Use a wrench to loosen the nut that connects the hose to the toilet. Be careful, as there might be some water left in the hose. Have a bucket ready to catch any drips. Once the hose is disconnected, set it aside. Now you have more room to work on the flange cover. Disconnecting the water supply line is an important step in learning how to remove toilet flange cover.
Step-by-Step Guide: Removing the Flange Cover
Now for the exciting part! You’re ready to learn how to remove toilet flange cover. First, check if there are any screws holding the cover in place. If so, use a screwdriver to remove them. Next, gently try to pry the cover off. You can use a putty knife or a flathead screwdriver to help. Be careful not to damage the flange itself. If the cover is stuck, try tapping it lightly with a rubber mallet. This can help loosen it. Once the cover is loose, carefully lift it off. If there’s any old sealant or caulk, scrape it away with a putty knife. Clean the area around the flange to prepare for the new cover. You’re one step closer to a leak-free toilet!
- Remove any screws holding the cover.
- Gently pry the cover off with a tool.
- Tap lightly with a rubber mallet if stuck.
- Scrape away any old sealant or caulk.
- Clean the area around the flange.
Imagine you’re an archaeologist carefully uncovering an ancient artifact. You need to be gentle and patient. Removing a toilet flange cover is similar. You don’t want to break anything or cause any damage. Take your time and use the right tools. If the cover is really stuck, don’t force it. Try using a heat gun to soften the sealant. Or, you can try using a solvent to dissolve the adhesive. With a little patience and the right techniques, you’ll be able to remove the toilet flange cover without any problems. Remember, safety first! Always wear gloves and eye protection.
Fun Fact or Stat: The first flushing toilet was invented in the late 16th century by Sir John Harington for Queen Elizabeth I.
Removing Screws (If Applicable)
Some toilet flange covers are held in place with screws. These screws can be hidden under decorative caps or covers. Look closely at the flange cover to see if you can spot any screws. If you find them, use a screwdriver to remove them. Make sure you use the right size screwdriver to avoid stripping the screw heads. Turn the screwdriver counterclockwise to loosen the screws. Once the screws are removed, set them aside in a safe place. You might need them later to install the new cover. If there are no screws, you can move on to the next step in learning how to remove toilet flange cover.
Prying Off the Old Cover
Now that the screws are out (if there were any), it’s time to pry off the old toilet flange cover. This can be a bit tricky, especially if the cover is stuck or sealed in place. Use a putty knife or a flathead screwdriver to gently pry around the edges of the cover. Be careful not to damage the flange itself. Work your way around the cover, applying gentle pressure. If the cover is really stuck, try tapping it lightly with a rubber mallet. This can help loosen the sealant. Once you’ve pried around the entire cover, it should come loose. Lift it off carefully and discard it.
Cleaning the Flange Area
After you’ve removed the old toilet flange cover, you’ll probably see some old sealant or caulk stuck to the flange. This needs to be cleaned off before you can install the new cover. Use a putty knife or a scraper to carefully remove the old sealant. Be careful not to scratch or damage the flange. You can also use a solvent to help dissolve the old sealant. Follow the instructions on the solvent carefully. Once you’ve removed all the old sealant, wipe down the flange with a clean cloth. Make sure the area is clean and dry before you install the new cover. A clean surface will help the new cover seal properly.
Dealing with Stubborn Flange Covers
Sometimes, removing a toilet flange cover can be like pulling teeth. The cover might be stuck tight, and no amount of prying seems to work. Don’t give up! There are a few tricks you can try. First, use a heat gun to soften the sealant. Apply heat to the edges of the cover for a few minutes. This can help loosen the adhesive. Second, try using a solvent to dissolve the sealant. Apply the solvent to the edges of the cover and let it sit for a few minutes. This can help break down the adhesive. Finally, use a rubber mallet to gently tap around the edges of the cover. This can help loosen it without damaging the flange. With a little persistence, you’ll be able to remove even the most stubborn toilet flange cover.
- Use a heat gun to soften the sealant.
- Apply a solvent to dissolve the sealant.
- Tap gently with a rubber mallet.
- Be patient and persistent.
- Don’t damage the flange.
Think of it like trying to open a jar that’s stuck. You might need to try a few different techniques before it finally pops open. Removing a stubborn toilet flange cover is the same. You might need to combine different methods to get the job done. For example, you could try heating the cover with a heat gun and then applying a solvent. Or, you could try prying the cover with a putty knife while tapping it with a rubber mallet. The key is to be patient and persistent. Don’t get discouraged if it doesn’t come off right away. Keep trying different techniques until you find one that works. You’ll be a pro at how to remove toilet flange cover in no time!
Fun Fact or Stat: The average person spends about three years of their life on the toilet.
Using Heat to Soften Sealant
Why does heat help when you’re trying to remove a stubborn toilet flange cover? Well, heat can soften the sealant that’s holding the cover in place. This makes it easier to pry the cover off without damaging the flange. To use heat, you’ll need a heat gun. Be careful when using a heat gun, as it can get very hot. Apply heat to the edges of the cover for a few minutes. Move the heat gun around to avoid overheating any one spot. The sealant should start to soften and become more pliable. Once the sealant is soft, try prying the cover off again. It should come off much easier this time.
Applying Solvents to Dissolve Adhesive
Sometimes, heat alone isn’t enough to remove a stubborn toilet flange cover. In these cases, you might need to use a solvent to dissolve the adhesive. A solvent is a chemical that can break down the bonds of the adhesive. There are many different types of solvents available at hardware stores. Choose one that’s safe for use on plastic and metal. Apply the solvent to the edges of the cover and let it sit for a few minutes. This will give the solvent time to penetrate the adhesive. After a few minutes, try prying the cover off again. The solvent should have loosened the adhesive, making it easier to remove the cover.
Tapping with a Rubber Mallet
Imagine you’re trying to loosen a stuck bolt. Sometimes, a gentle tap with a hammer can do the trick. The same principle applies to removing a stubborn toilet flange cover. A gentle tap with a rubber mallet can help loosen the sealant without damaging the flange. Use a rubber mallet to tap around the edges of the cover. Be careful not to hit the cover too hard, as this could crack or break it. The tapping motion can help break the seal between the cover and the flange. After tapping for a few minutes, try prying the cover off again. It should come off much easier this time.
| Method | Pros | Cons |
|---|---|---|
| Heat Gun | Softens sealant quickly | Can damage plastic if overheated |
| Solvent | Dissolves adhesive effectively | Can be messy and require ventilation |
| Rubber Mallet | Gentle and won’t damage flange | May not work on very stubborn covers |
| Putty Knife | Good for prying and scraping | Can scratch the flange if not careful |
Installing the New Flange Cover
You’ve successfully learned how to remove toilet flange cover, now it’s time to put on the new one! Before you start, make sure you have the right size and type of flange cover. Clean the area around the flange one more time to remove any remaining debris. Apply a bead of sealant or caulk around the flange. This will help create a watertight seal. Carefully position the new cover over the flange. Press it down firmly to make sure it’s seated properly. If there are screws, insert them and tighten them gently. Don’t overtighten, as this could crack the cover. Wipe away any excess sealant or caulk. Let the sealant dry completely before using the toilet. Congratulations, you’ve successfully installed a new flange cover!
- Make sure you have the right size cover.
- Clean the area around the flange.
- Apply a bead of sealant or caulk.
- Position the cover and press firmly.
- Tighten screws gently (if applicable).
Imagine you’re building a Lego set. You need to make sure all the pieces fit together perfectly. Installing a new toilet flange cover is similar. You need to make sure the cover is the right size and that it’s properly aligned. Taking the time to do it right will ensure a leak-free seal. Don’t rush the process. Double-check your work to make sure everything is secure. With a little care and attention, you’ll have your new flange cover installed in no time. You’ll be a pro at how to remove toilet flange cover and install a new one!
Fun Fact or Stat: Toilets use about 27% of the water in your home. Fixing leaks can save you money on your water bill.
Choosing the Right Replacement Cover
Why is it important to choose the right replacement cover? Well, if the cover is too small, it won’t seal properly. If it’s too big, it won’t fit at all. Before you buy a new cover, measure the diameter of the flange. Also, take a look at the old cover to see what type it is. There are different types of flange covers, so you want to make sure you get the right one. You can take the old cover with you to the hardware store to compare it to the new ones. Ask a sales associate for help if you’re not sure which one to choose. Getting the right replacement cover is essential for a successful installation.
Applying Sealant or Caulk
What’s the purpose of applying sealant or caulk when you install a new toilet flange cover? The sealant or caulk creates a watertight seal between the cover and the flange. This prevents water from leaking out and causing damage. Choose a sealant or caulk that’s designed for use in bathrooms. Make sure it’s waterproof and mildew-resistant. Apply a bead of sealant or caulk around the flange. Be generous, but don’t overdo it. You don’t want the sealant to squeeze out all over the place. Smooth out the sealant with your finger to create a neat and even bead. This will ensure a good seal and prevent leaks.
Securing the New Cover
Once you’ve applied the sealant, it’s time to secure the new toilet flange cover in place. Carefully position the cover over the flange. Press it down firmly to make sure it’s seated properly. If there are screws, insert them and tighten them gently. Don’t overtighten the screws, as this could crack the cover. If there are no screws, the sealant will hold the cover in place. Wipe away any excess sealant or caulk with a damp cloth. Let the sealant dry completely before using the toilet. This will give it time to cure and create a strong, watertight seal. Securing the new cover properly is the final step in learning how to remove toilet flange cover and install a new one.
Summary
The toilet flange cover is a small but important part of your toilet. It helps to seal the connection between the toilet and the drainpipe. Over time, the cover can become damaged or cracked, leading to leaks and odors. Knowing how to remove toilet flange cover is a valuable skill for any homeowner. The process involves turning off the water supply, emptying the toilet bowl, disconnecting the water supply line, and removing the old cover. Sometimes, the cover can be stubborn and require the use of heat, solvents, or a rubber mallet.
Once the old cover is removed, you can install a new one. Make sure you choose the right size and type of cover. Apply sealant or caulk to create a watertight seal. Secure the new cover in place and let the sealant dry completely. With a little patience and the right tools, you can easily remove and replace a toilet flange cover. This will help keep your bathroom clean, fresh, and leak-free. Remember, safety first! Always turn off the water supply before you start and wear gloves to protect your hands.
Conclusion
Learning how to remove toilet flange cover is a simple skill. You can fix leaks and stop bad smells. A new cover makes your bathroom better. Replacing the flange cover yourself saves money. You don’t need to call a plumber. Now you know the steps to fix your toilet. You can keep your bathroom in good shape. So, grab your tools and get started!
Frequently Asked Questions
Question No 1: What is a toilet flange cover and why is it important?
Answer: A toilet flange cover is a part that sits on top of the toilet flange. The flange connects the toilet to the drainpipe in the floor. The cover helps seal this connection. This stops water and bad smells from leaking out. It’s important because it keeps your bathroom clean and prevents damage. Without a good cover, you might have leaks, bad odors, and even damage to your floor. Replacing a damaged flange cover helps keep your toilet working well and your bathroom healthy.
Question No 2: How do I know if my toilet flange cover needs to be replaced?
Answer: There are a few signs that your toilet flange cover might need replacing. First, check if your toilet is wobbly. If it rocks back and forth, the cover might be broken. Second, smell for bad odors in your bathroom. A broken cover can let sewer gases escape. Third, look for water around the base of the toilet. This could mean the cover isn’t sealing properly. Finally, check the cover itself for cracks or damage. If you see any of these signs, it’s time to think about how to remove toilet flange cover and replace it.
Question No 3: What tools do I need to remove and replace a toilet flange cover?
Answer: You don’t need a lot of fancy tools to remove and replace a toilet flange cover. You’ll need a screwdriver to remove any screws. A putty knife or scraper will help you clean away old sealant. Pliers can help you grip and pull out the old cover. A rubber mallet might be useful for loosening a stubborn cover. Don’t forget gloves to protect your hands! These simple tools are usually enough to get the job done. Remember to turn off the water supply before you start!
Question No 4: Is it difficult to remove and replace a toilet flange cover myself?
Answer: No, it’s usually not too difficult to remove and replace a toilet flange cover yourself. Most people can do it with a little patience and the right tools. The steps are pretty straightforward. Just remember to turn off the water supply first! If you’re not comfortable doing it yourself, you can always call a plumber. But if you follow the instructions carefully, you should be able to handle it. Learning how to remove toilet flange cover is a great way to save money and gain some DIY skills.
Question No 5: Can I reuse the old screws when installing the new toilet flange cover?
Answer: It’s generally a good idea to use new screws when installing a new toilet flange cover. Old screws might be rusty or damaged. They might not hold the new cover securely. New screws are usually included with the replacement cover. If not, you can buy them at a hardware store. Make sure you get the right size and type of screws for your flange. Using new screws will help ensure that the new cover is properly installed and sealed.
Question No 6: What kind of sealant or caulk should I use for the new toilet flange cover?
Answer: When you install a new toilet flange cover, you’ll want to use a sealant or caulk that’s designed for bathrooms. Look for products that are waterproof and mildew-resistant. Silicone caulk is a good choice because it creates a strong, flexible seal. You can also use a plumber’s putty, which is a soft, pliable clay-like substance. Apply the sealant or caulk around the flange before you install the new cover. This will help create a watertight seal and prevent leaks. Knowing how to remove toilet flange cover and install a new one properly will keep your bathroom dry and fresh.
