A wood splitter splitter splits logs into smaller pieces for fuel or construction materials. It breaks the log in two along its length, then moves the two halves apart with a series of gears and blades.
This process results in the split logs being chopped into smaller pieces that are easier to handle and less likely to become dangerous projectiles. Have you ever seen a log being split by hand? It takes a lot of strength and skill to split logs manually. And the log splitter pays the price for his job with backache. All is not lost, though. You can buy wood splitter kits that will make manual log splitting easier.
The problem with wood splitter kits is that they require the user to work hard and have the option of failure. We will discuss making a wood splitter or log splitter at home for simple log splitting. You can split logs without needing tools or machinery. We will tell you how it’s done, how many steps it takes, and what its benefits are.

What Is A Wood Splitter?
A wood splitter is a tool used to split logs into smaller pieces. The average cost of a wood splitter varies from $100 to $1,000, depending on the type and features. Different types of wood splitters are available on the market, each with unique features and specifications.
Some common types include log splitter, hydraulic splitter, and manual splitter. It is important to follow the instructions provided by the manufacturer when making a homemade wood splitter to ensure that it functions correctly. The steps necessary to make a homemade wood splitter are: -Make sure to read the manufacturer’s instructions carefully before starting the project.
How Does A Wood Splitter Work?
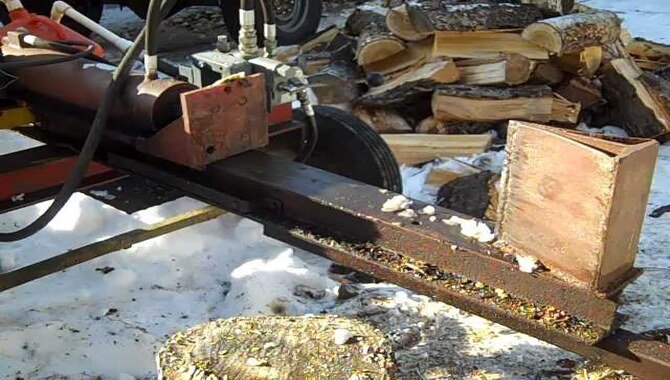
A wood splitter is a simple machine that uses a wedge to split wood into two or more pieces. The motorized splitter rotates the blade, which cuts through the wood and generates sufficient pressure to split the log.
A wood splitter can use in different scenarios; for example, it can use to split logs, lumber, and even firewood. The splitter is easy to assemble and use. However, you need to have a thorough understanding of the working of a splitter before splitting your wood. There are a variety of options available when making a purchase, so choose the one that best suits your needs.
6 Steps To Make A Homemade Wood Splitter

A wood splitter is a machine that splits logs into small pieces by hitting them with a circular blade. This allows the wood to use in various construction projects, like building houses and bridges. If you’re looking for a way to save money on your wood-splitting project, you need to check out this DIY wood splitter. It’s easy to make and works great – perfect for small jobs like splitting logs or kindling. Here are the six steps you need to follow:
- Find an old piece of wood at least 2 inches thick and 8 inches wide. This will be the base of your splitter.
- Cut the old wood into two equal pieces by cutting it lengthwise down the middle.
- Make a U-shape out of one of the pieces by measuring halfway up its length and drawing a line in midair with your pencil. Cut along that line using your circular saw.
- Make the second U-shape out of the other piece of wood using the same method.
- Put both U-shapes together to form an L-shape, and then nail them together using dowels or screws (depending on how strong you want your final product to be).
- Paint or stain your wood splitter as desired, and then enjoy its efficient performance.
How To Make The Frame Of The Homemade Wood Splitter
Since wood is a natural material, it can sometimes be difficult to split it into the correct size pieces without causing any damage. That’s where a wood splitter comes in handy – it helps you break the wood into smaller pieces so it can be easily processed and used. There are many different types of wood splitters on the market, but the one we will discuss here is the homemade version. To make this frame, you’ll need the following:
You’ll need
- A piece of 2×4 lumber
- Two 1×2 boards
- Two screws ( preferably galvanized )
- A drill bit ( either 3/4″ or 1″)
- Sandpaper ( medium or coarse)
- Paint or a sealant (optional)
Process:
- Start by drilling a hole in one end of your 2×4 board at an angle of 45 degrees. Make sure that the hole is big enough so that your screw will fit through it.
- Cut two identical pieces from your 1×2 boards – one for each side of your 2×4 board. These should be about twice as long as your 2×4 board is wide, and they should also be about half an inch wider than your 2×4 board at their widest point.
- Screw each 1×2 piece onto one end of your 2 x4 board, ensuring that the edges of the 1×2 boards are lined up with the edge of your 2×4. Make sure that each side has a hole drilled in it so you can screw on the screws later.
- Finally, drill another hole in one end of your 2×4 board at an angle of 45 degrees (just like you did in step 1). This hole should be big enough to fit your screw through it and into the top piece of your 1×2 boards. Make sure that this hole is placed so it lines up with one of the screw holes you just created.
- All that’s left to do is split your 2×4 board into two pieces using your wood splitter. Slowly move the splitter towards one of the 1×2 boards, making sure not to apply too much pressure – if you do, you’ll end up splitting the wood in an undesirable way. If everything goes according to plan, after a few gentle taps on the splitter with a mallet or hammer, each piece of wood should split cleanly in two without causing any damage.
How To Build The Arm Of The Homemade Wood Splitter
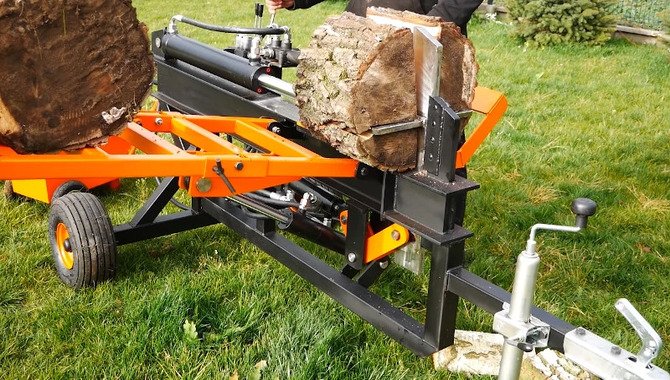
If you’re looking for a way to easily split wood using your own two hands, you’ll need to build an arm for your homemade wood splitter. There are a few different ways that you can do this. The most common approach is to use a basic frame made from several wooden boards that are joined together with angle iron bars. You can then attach the arms of the splitter to this frame using bolts or nails.
Another way is to make the arm out of metal or plastic tubing. This will give you more flexibility in terms of how the arms move and position themselves, as well as make it easier to adjust the angle of the blade. Whichever method you choose, make sure that it’s strong enough to handle the weight of the wood and doesn’t wobble or shake during use. And lastly, ensure it’s easy to clean so that it stays in good condition over time.
How To Attach The Blade Of The Homemade Wood Splitter

If you’re looking to attach the blade of your homemade wood splitter, there are a few different ways to do it. The first option is to use screws and bolts. You’ll need to drill a series of holes near the blade’s center and then screw in each bolt until it’s tight. This method is simple but can be difficult to adjust if the blade moves around a lot.
Another option is to use hand-held clamps. You’ll need to clamp the blade into place on one side and then manually adjust the other clamp so that it’s tight against the edge of the wood. This method is easier to use but may not be as stable as screws and bolts.
The final option is to use an armature system. This involves attaching two metal plates at either end of the blade and then connecting them using wires or rods. This is usually more stable than clamps, but it can be more expensive than other methods.
How To Use The Homemade Wood Splitter

If you have a homemade wood splitter, it’s time to put it to work. With a homemade splitter, you can split wood with the same efficiency as a commercial splitter. The process is simple – follow the steps below to use your homemade splitter. Remove the screws that secure the blade in place -Lift the blade using a lever -Secure the wood against the blade to split it in two -Retrieve the blade and screw it back into place.
If you want to use your homemade splitter more often, consider making adjustments. If the splitter is too heavy to handle, consider making adjustments, such as purchasing a lighter frame or using a thicker log for more splitting power. Also, if your homemade splitter takes too long to split wood, consider making adjustments such as increasing the speed or adding more blades. With these simple adjustments, you can use your homemade splitter effectively and efficiently.
What Are The Benefits Of Making My Wood Splitter?

Save Money:
Making your wood splitter can save you a lot in the long run. You can save money by making your splitter yourself rather than purchasing one. Plus, you can create a splitter that perfectly suits your needs and preferences.
Improve Your Woodworking Skills:
Making your wood splitter is a great way to improve your woodworking skills. By making your splitter, you can learn how to construct quality woodworking equipment. Plus, making the splitter will help you develop manual skills and talent.
Know What You’re Getting:
Another benefit of making your wood splitter is that you are sure of the final product. With a homemade wood splitter, you can be confident that it will be high-quality and durable.
Save Time:
Making your wood splitter can save you a lot of time in the future. You won’t have to search for an affordable, quality splitter again.
Conclusion
A homemade wood splitter is a simple device that uses leverage to break down the wood into smaller pieces. This is useful if you have excess wood you need to get rid of but don’t have the time or resources to take it to the lumberjacks. Although wood splitter machines have a lot of benefits, they can also be quite expensive.
However, with a homemade wood splitter, you can save a lot of money and use readily available materials to make your wood splitter. The process is simple and requires minimal expertise. So, if you want to make your wood splitter, start with the first step. It involves creating an anvil and hammering out the log. After that, follow the remaining steps, and you’ll be able to split wood like a pro in no time.
